We’ve all been there – scrolling endlessly through our iPhone photo library, trying to find that one picture we know we took but can’t seem to locate. Sound familiar? Learning how to organize photos on iPhone is not only crucial for keeping your memories alive, but it saves time and a lot of hassle, too. In this guide, I’ll take you on a step-by-step journey to achieve an organized photo library, covering everything from creating custom albums to exploring alternative photo storage solutions.
Understanding iPhone Photo Organization
Organizing your iPhone photos into albums is a real game-changer. With iPhone albums, you can organize iPhone photos as well as:
- Sort your photos and videos into collections based on your preferences
- Make your collection more meaningful and organized
- Find a specific photo from your cousin’s wedding in seconds rather than minutes
With organized albums, you can easily create albums, making this a reality.
Creating custom albums is one way to organize your photos, but your iPhone also automatically creates albums based on the type of media. That’s right! The Photos app on your iPhone will automatically sort your photos into albums like Live Photos, Selfies, and Portrait. Combining the use of custom and smart albums will make finding and sharing your memories a breeze.
Exploring the Photos App Interface
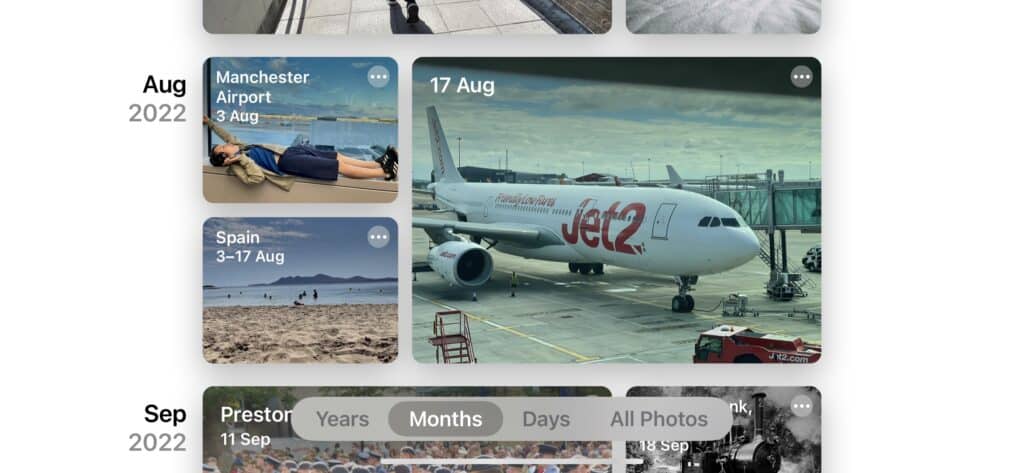
The Photos app on your iPhone is divided into four main sections: Library, For You, Albums, and Search. The Library tab is a collection of all your photos and moments, organized by Years, Months, and Days. You can even filter what’s shown in the Library tab by tapping the Filters button and choosing an option, making it easier to locate specific shots.
The For You tab is a personalized space that showcases your best moments and memories. It searches through your photos and videos, including duplicate photos, to create Memories – collections of photos and videos from specific events or time periods. Here, you can play memory video compilations that highlight your cherished experiences. The Albums tab is where you’ll find your custom photo albums, shared albums, and collections of different types of photos and videos.
iCloud Photos is also a fantastic feature that keeps your albums synced across all your Apple devices. Any changes you make to your albums on one device will also show up on all your other devices, ensuring your memories are always accessible and up-to-date.
Grouping your images by theme, event, or location in custom photo albums is a convenient strategy to organize photos and streamline your iPhone photos. This method makes it easier to locate and share specific photos.
Let’s delve into the process of adding only photos to custom albums, renaming and editing them, as well as looking at how to drop photos.
Adding Photos to Custom Albums
To add photos to your custom albums, follow these simple steps:
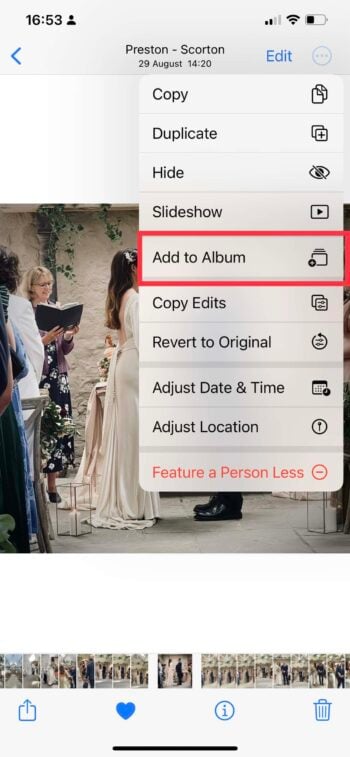
- First, open the Photos app and select the images you want by tapping on them.
- Tap the three-dot icon (top right) to reveal a menu of options.

- Tap on the “Add to Album” option.
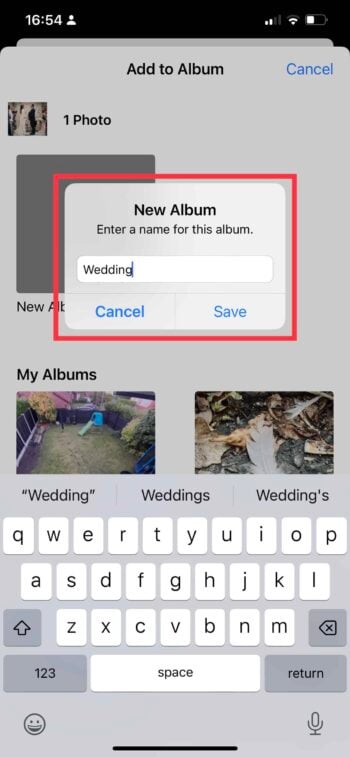
- Choose the album you want to add the photos to or to create a new album by selecting “New Album”. Add an album name and tap “Save”.
- Repeat the process to finish adding photos to your albums.

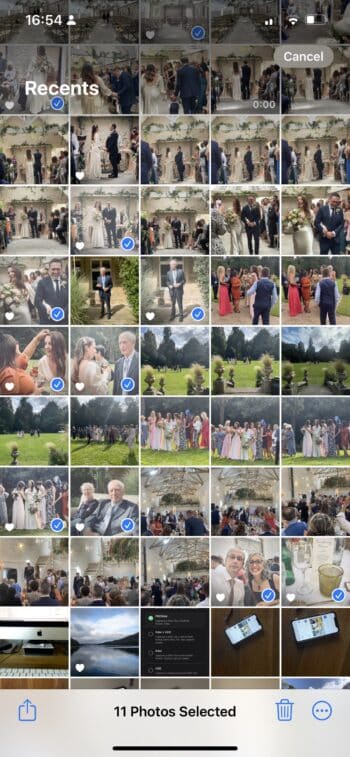
To add photos in bulk, all you need to do is:
- First, open the Photos app and tap Select in the top right corner.
- Next, tap on the photos that you’d like to add to an album. A blue tick will appear in the corner of each photo that has been selected.
- Tap the thee-dot icon in the bottom right corner to reveal a menu of options. Tap on the “Add to Album” option.
- As before, choose the album you want to add the photos to or create a new album.
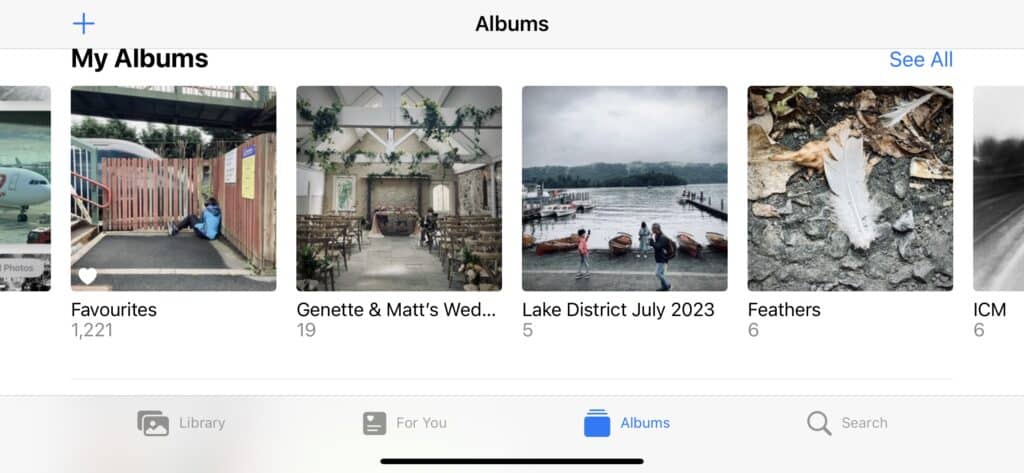
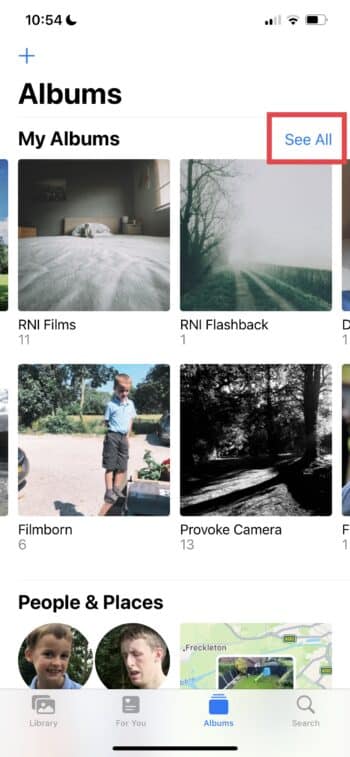
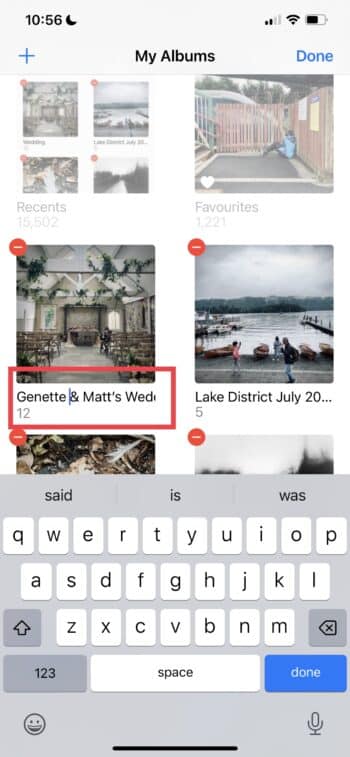
From the camera roll of photos, tap “Albums” at the top left to easily view the album you have just added photos to. This will give you an overview of your current albums. Your album will be easily accessible from there. It will be located in the My Albums section at the top of the screen. Swipe your finger across the screen to find the album you want to open. If it isn’t visible, tap the “See All” option. Tap on the album name. This will open the set of images inside it.
Renaming and Editing Custom Albums
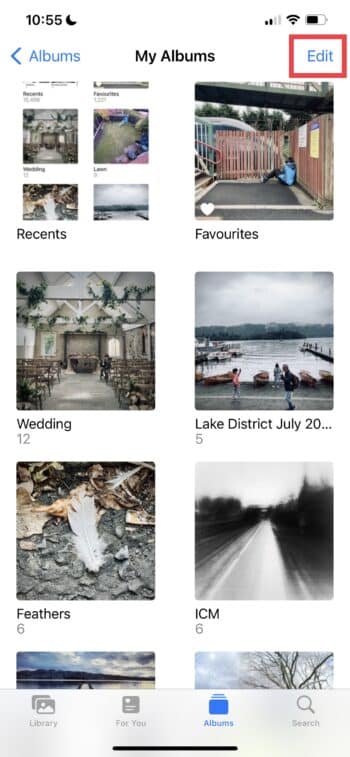
Customizing your albums is simple. To rename an album, follow these steps:
- Head to the Albums screen
- Tap ‘See All’ in the ‘My Albums’ section
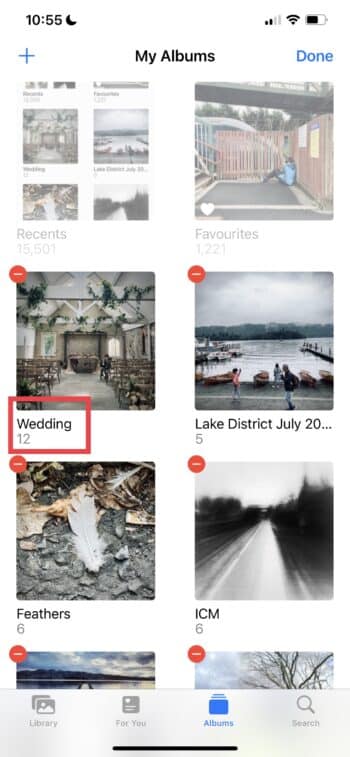
- Hit ‘Edit’ at the top right
- Tap on the album name you want to change
- Type a new name with the keyboard
- Tap ‘Done’ to save the changes
This allows you to keep your photo album organized and up-to-date as your photo library grows.
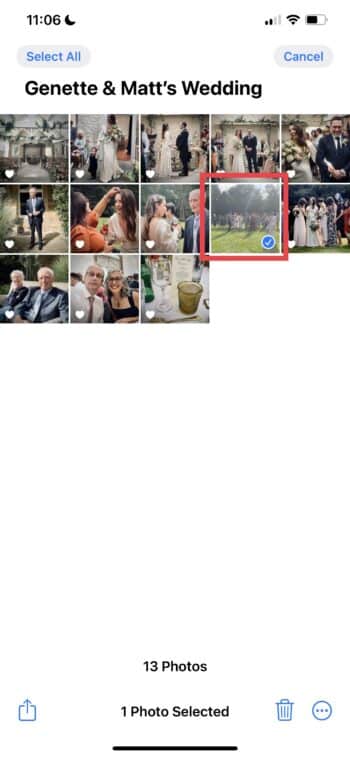
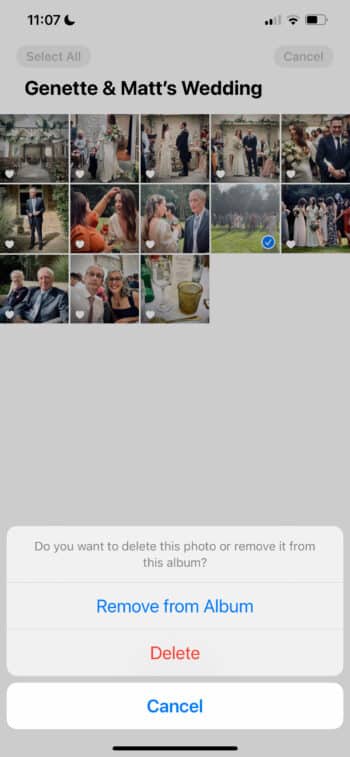
Editing custom albums is also easy. To remove photos from an album without deleting them from your library, follow these steps:
- Open the album.
- Tap “Select” to pick the images you want to remove.
- Tap the trash icon.
- Select “Remove from Album”.
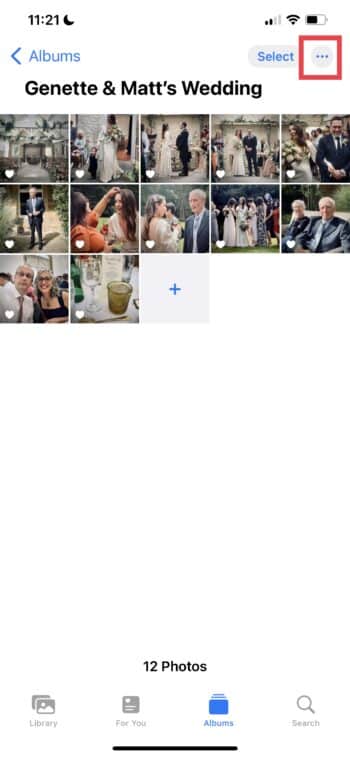
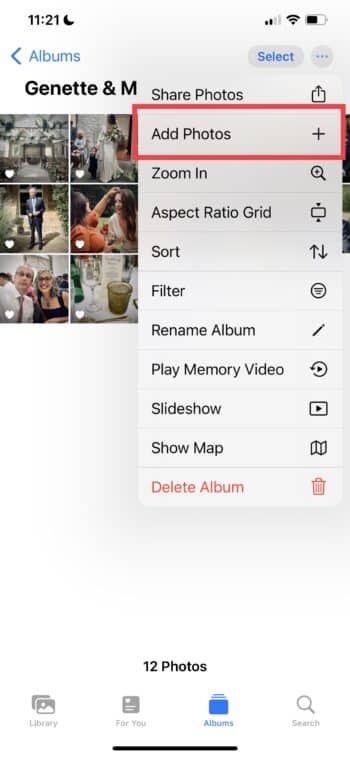
To add more photos to an album, follow these steps:
- Tap the ellipsis icon (three dots).
- Select “Add Photos” to proceed.
- Browse your photo library and choose the photos you wish to add.
- When you have selected your desired photos, tap “Add” in the upper right corner to include them in the album.

Deleting Unwanted Photos and Duplicates
Freeing up storage space and decluttering your photo library involves deleting duplicate photos and unwanted ones. Before you initiate the deletion process, back up your photos to an external or cloud storage device. This will help you avoid accidentally losing any cherished memories.
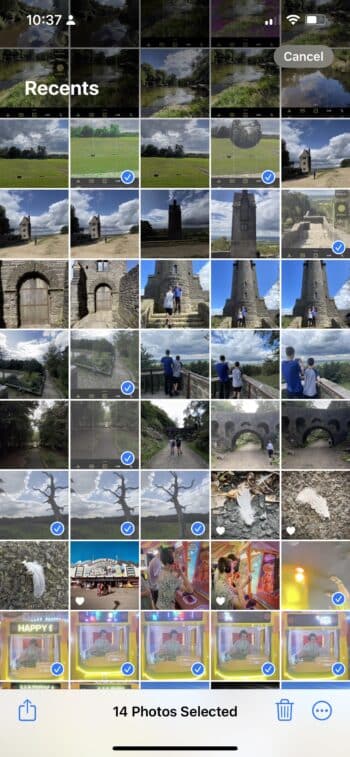
To delete multiple photos, follow these steps:
- Open the Photos app.
- Make sure you’re viewing the pictures in thumbnail view.
- Tap on the Select option at the top right.
- Choose all the photos you want to delete.
- Tap on the Delete (trash) icon.
- Finally, hit Delete Photos to confirm the deletion.

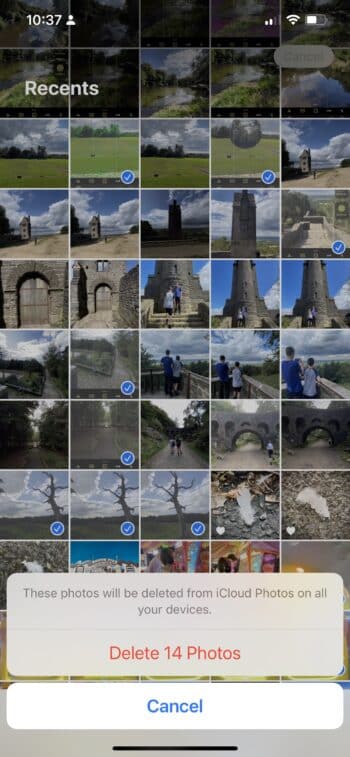
All deleted photos are then moved to the Recently Deleted album.
Managing the Recently Deleted Album
The Recently Deleted album is a safety net for your deleted photos, storing them for 30 days before they’re permanently removed. This feature allows you to recover accidentally deleted photos or permanently delete them to free up space on your iPhone.
To recover a photo from the Recently Deleted album, select the photo you want and tap the “Recover” button. Tap Select to select the photos you want to permanently delete from the Recently Deleted album. Then tap Delete All to delete them. Remember, after 30 days, the photos in the Recently Deleted album will be gone for good.
Tagging and Searching for Photos
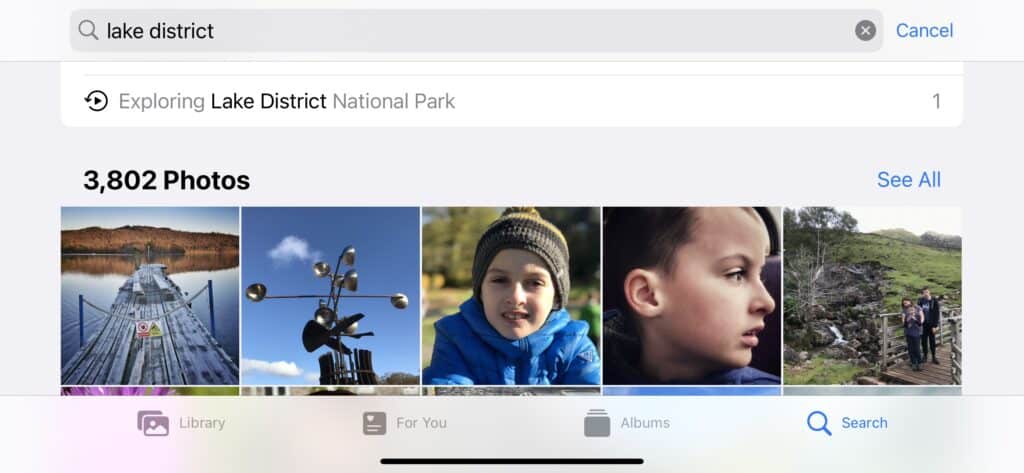
Tagging your photos with keywords is a helpful way to organize and quickly find specific images in your library. By adding names to people in your photos, you can easily search for all the pictures featuring a particular person. Adding locations to your photos can also enhance your organization, allowing you to see what photos you took in various places.
To quickly find specific photos in the Photos app, follow these steps:
- Tap the Search tab.
- Type in your desired keyword or name in the search bar.
- The search function will help you locate the exact photo you’re looking for without scrolling through your entire library.
Syncing and Sharing Photos with iCloud
iCloud is a powerful tool for syncing and sharing your Apple photos across devices. By enabling iCloud Photos, your albums become available on all your Apple devices, keeping your memories both accessible and current.
To check if your iCloud Photos albums are accessible on other Apple devices, follow these steps:
- On an iPhone or iPad, go to Settings > [your name] > iCloud > Photos.
- On a Mac, go to System Settings and select Apple ID > iCloud.
- Make sure Photos is enabled.
- Open the Photos app to see your synced albums under My Albums.
In addition to syncing across devices, iCloud allows you to share photos, videos, and albums with specific people. You can also let them add their own photos, videos, and comments to a shared album. This feature is perfect for sharing memories from events or trips with friends and family.
Alternative Photo Storage Solutions: Google Photos
While the Photos app on your iPhone is a great way to organize and store your photos, it’s always a good idea to also use an alternative storage solution. Google Photos is an excellent option for additional organization, backup options and peace of mind. It offers unlimited photo storage for compressed images, automatic organization features, and a powerful search engine that outperforms the Photos app.
Installing Google Photos on your iPhone is pretty straightforward. All you need to do is download the Google Photos app from the App Store app and install it on your iPhone. To use the Google Photos app, you’ll need a Google account. If you don’t already have one, you can create one for free during the setup process.
Google Photos offers a free version with 15GB of storage, shared across Google Drive, Gmail, and Google Photos. If you need more storage, you can upgrade to Google One, a subscription plan that offers 100GB, 200GB, or 2TB of storage for a monthly fee.
Google Photos comes with an impressive range of features, such as automatic organization of photos by people, places, and things, powerful search capabilities, and the option to create albums, collages, animations, and movies with your photos. It also provides a shared library feature, which enables you to share your photos with family and friends.
When it comes to backing up your photos, having a secondary cloud storage solution is a must. It offers peace of mind should the unthinkable happen.
Summary
In conclusion, organizing your iPhone photos is essential for keeping your memories alive and easily accessible. By creating custom albums, tagging and searching for photos, syncing and sharing with iCloud, and exploring alternative storage solutions like Google Photos, you can transform your cluttered photo library into a well-organized collection that will enable you to quickly find an all-important photo quickly and easily. Go ahead and start organizing your photos today – your future self will thank you!
Frequently Asked Questions
How do I declutter photos on my iPhone?
Delete duplicate photos and unnecessary screenshots, and utilize the search option. Consider using photo organizing apps and creating a “print-worthy” album to declutter your iPhone photos.
Can I organize my iPhone photos into folders?
Yes, you can organize your iPhone photos into folders using the Photos app. Open it and select Albums > Recents, then create a New Folder, type in the name and press Save. Then, go to Edit to rename, rearrange, and delete albums. You can even create folders to contain multiple albums for better organization.
Is there an app to organize photos on iPhone?
Yes, there is an app to help you organize photos on iPhone – it allows you to get out of your camera roll and sort them by category in separate folders.
How do I rearrange photos in all photos on iPhone?
To rearrange photos in all photos on iPhone, go to the photo album, click edit, touch and hold on an image and drag to re-arrange, then click done when finished.
What’s the difference between custom albums and smart albums?
Custom albums are created by you, while smart albums use criteria to gather and display photos automatically. Smart albums are available on Mac but as yet not on iPhone.


Hi, after moving photos to the album, how can I ‘delete or not see the same photo’ in the Library section of the app?
As far as I know you can’t move photos from the main Recents library into an Album, then delete/hide the photo from Recents.
If you delete from Recents then it will delete the photo from all albums that the photos is in.
However, if you delete the photo from an Album, then it will still remain in the Recents folder. The Recents photo will be like the source image, whereas those in Albums are like attached copies of the source file.
How do you rearrange pictures in an album?
If you open the album, then tap Select in the top right corner, you can then tap and hold an image, you can then drag the thumbnail image to a new location in the album.
Once a picture has been moved to an album I believe we should be able to delete it from the photo library! This would make life more manageable!
Being able to do that would help to clean up and manage the camera roll a lot better but unfortunately that’s not possible. Moving a photo to an album, then deleting the original photo from Recent’s will delete the photo from the album.