One of the most welcome and important developments in iPhone photography has been the introduction of the iCloud Photo Library and its ability to backup files, photos and videos to the cloud. This feature resolves a lot of headaches that used to come from losing track of an image’s exact location or losing images altogether due to accidental deletion or a broken, lost or stolen device. Benefits include easier and quicker organization and editing, no matter what combination of Apple devices you own. It’s possible that you already have some familiarity with iCloud if you use it to backup data from your iPhone.
What is iCloud Backup for Photos?
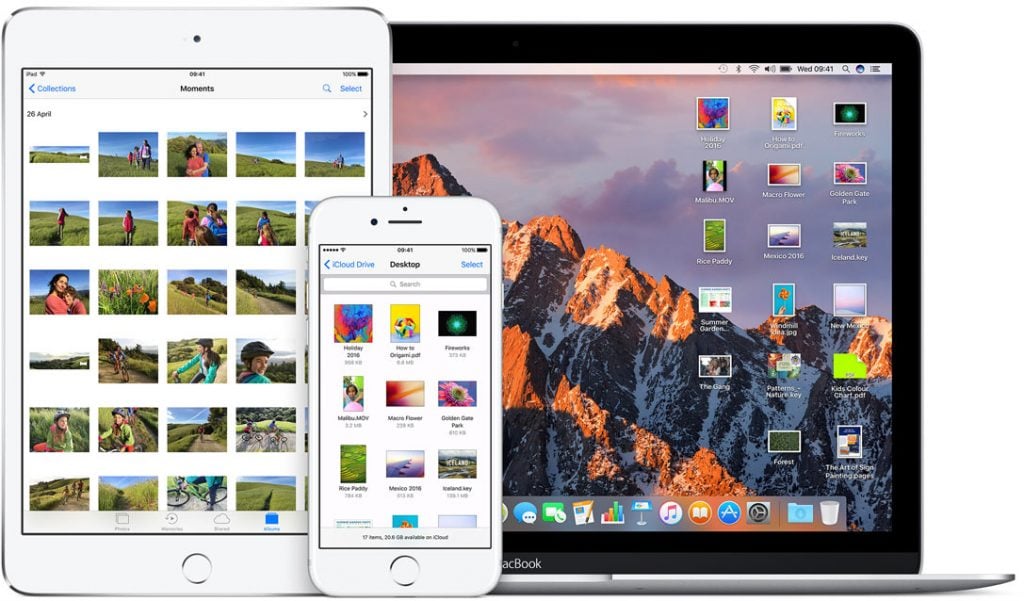
iCloud is Apple’s cloud-based storage facility, giving you the ability to remotely store files via WiFi from any Apple device. Every time you take a photo or video, it’s auto-uploaded to the iCloud Photo Library and then transferred to any of your Apple devices that are iCloud-enabled. Each one of your devices will display the same exact photos in the Photos app no matter which device you used to take the original photo.
The iCloud Photo Library makes your photos accessible from any Apple device, plus a Windows PC if needed. For instance, if you take a photo with your iPhone’s camera, you’ll immediately be able to access that image on your Mac or iPad, too. If you then want to show your friends pictures from your recent vacation, you can do so from whatever device you have on hand, even if you accidentally left your phone or laptop at home.

How Does the iCloud Photo Library Work?
The iCloud Photo Library was introduced with iOS 8.3 and OS X Yosemite 10.10.3, which are the minimum Apple operating systems required to use the feature. Since images are stored on Apple servers instead of a specific device, they’re immediately synced and accessible across all your devices. This also means that you’ll save a lot of space on your devices because the images technically live in the cloud. A wide range of photo and video formats can be stored in the iCloud Photo Library, including JPEG (images have to be under 16GB in size), RAW, PNG, GIF, TIFF and MP4.
How Do I Setup the iCloud Photo Library?
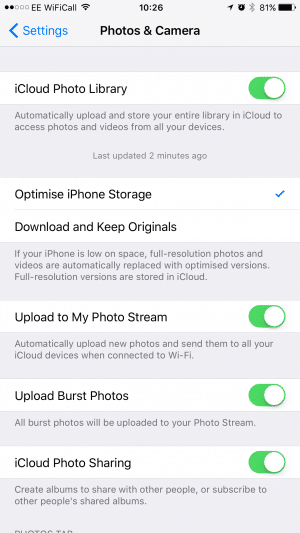
Setting up the iCloud Photo Library couldn’t be easier – all you need is an Apple ID, which you probably already have as the owner of an Apple device. Make sure your iOS and OS X systems are up-to-date, too. Lastly, you’ll need to have enough storage in iCloud to keep all of your images. Below, we’ll discuss storage a bit more. Make sure iCloud Photo Library is turned on for each device you use. On an iPhone, go to Settings > Photos & Camera and then turn the iCloud Photo Library option to “on.” On a Mac, go to System Preferences > iCloud > Options next to Photos, then select iCloud Photo Library. 4
If you already have images on your device when you enable the iCloud Photo Library for the first time, a progress bar will appear that shows the number of photos that have been uploaded and are currently uploading to iCloud. If you have a lot of images, this process may take a while; your Internet speed will also affect how quickly this is finished. Make sure you’re connected to WiFi and that you have plenty of battery life.
What Resolution Will My Photos Be?
On an iPhone, you’ll see two options: “Optimize iPhone Storage” and “Download and Keep Originals.” The “Optimize iPhone Storage” option frees up space by decreasing the resolution of the images on your device while keeping full resolution versions in iCloud. When you’re ready to edit, share or view an image, the full resolution version will be automatically downloaded to your device. However, in order for the full resolution image to be downloaded when you’re ready to work with it, you have to be connected to your cellular provider or to WiFi.
The “Download and Keep Originals” option keeps the full resolution images on your device, allowing you to access them without an Internet connection. Note that this option will reduce the available storage on your device. On a Mac, you’ll see similar options – “Optimize Mac Storage” and “Download Originals to This Mac” – when you open the Photos app, choose Preferences from the Photos menu on the top left, and then choose the iCloud tab.
Can I Use the iCloud Photo Library on a Windows Computer?
If you use a Windows computer instead of a Mac, you can still access your iCloud Photo Library by installing the iCloud for Windows app from the Apple website. You’ll sign-in with your Apple ID, then check the Photos option > Options > iCloud Photo Library > Done > Apply. Note that you’ll need Windows 7 or later to use this feature.
Can I Use the iCloud Photo Library from a Web Browser?
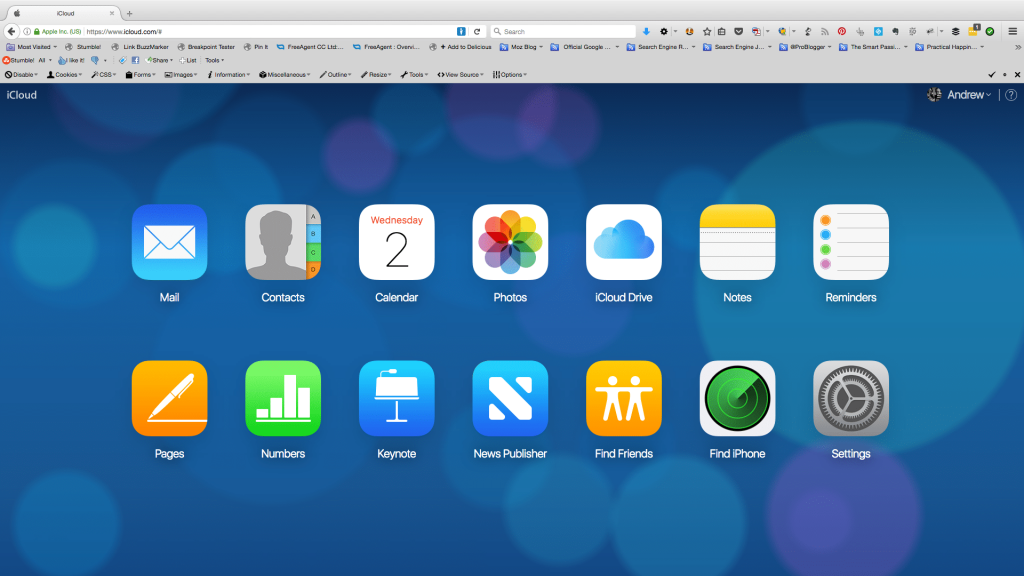
If you have a different kind of device, you can access your photo library by logging in at iCloud.com from a web browser. Sign-in with your Apple ID and choose Photos from the control panel.
Can I Organise, Edit or Share My iCloud Photo Library Images

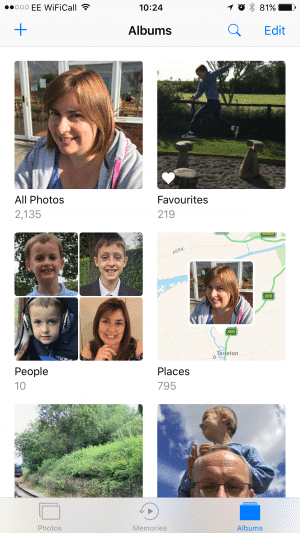
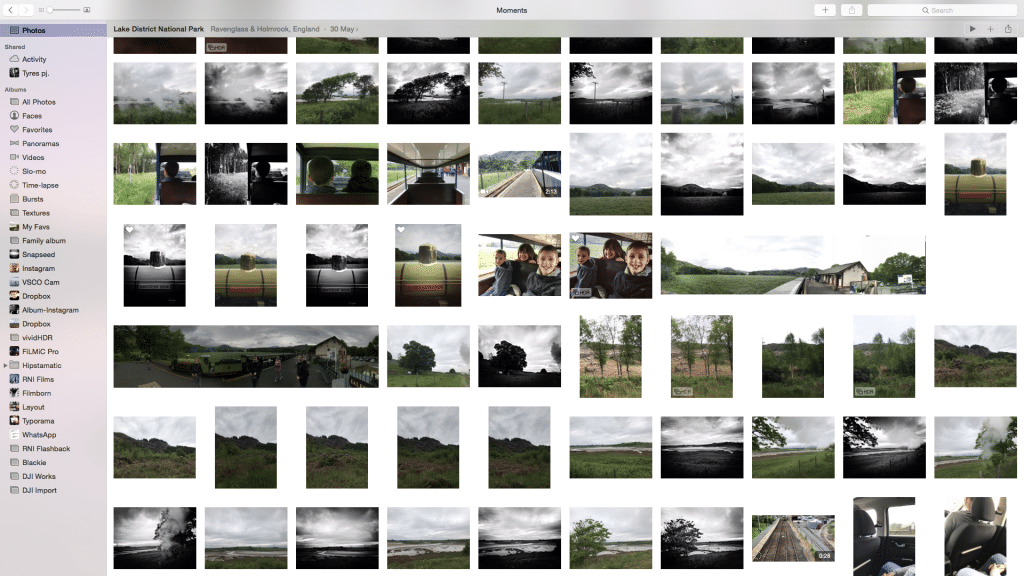
When it comes to organizing your images, each one of your devices will be setup in the same way. Your iCloud-enabled devices will replace the Camera Roll album with an All Photos album because the images are no longer just from one device’s camera roll but from all of your devices libraries. Images will automatically be organised by Years, Collections or Moments. Sorting through your images will be familiar regardless of the device you’re on.
By creating a new photo album in the Photos app of any device, the album will automatically appear on your other Apple devices. Additionally, if you delete a photo from the Photos app of any Apple device, it will be removed from your iCloud Photo Library, which means it will be removed from all of your iCloud-enabled Apple devices. You can also designate images as Favorites or reorganise them. Again, it’s important to remember that whatever changes you make to one device, those changes will be reflected on all of your other Apple devices that are iCloud-enabled.
On your Mac, you’ll be able to see the photo albums as a list on the left side of the screen. You can reorganise images on your Mac, just as you can on other Apple devices. Being able to edit your photos is a huge advantage of accessing the iCloud Photo Library via a Mac. The screen is larger than on your handheld devices, making it easier to adjust colour, cropping and lighting. At the same time, the editing features will be familiar, because they’re the same that you’re used to from your iPhone. To start editing, double-click the image and choose Edit on the top right.
It’s important to remember that changes you make to an image on one device will automatically sync to your other devices. For instance, if you open a photo on your iPhone and adjust the color saturation, the color saturation will also change for that image on your other Apple devices. However, it’s easy to revert to the original version of the image.
You can also share your Apple photos with others. The Photos app will have a Shared tab where you can create an album, fill it with photos and then invite people to join the album. You can also set it so that other people can add their photos to the shared album; “like” images; and comment on images. By viewing Activity in the Photos app’s Sharing tab, you can see any updates and comments that have been added to a shared album. You can access the shared albums from any iCloud-enabled device.
Can I Move Photos To and From iCloud?
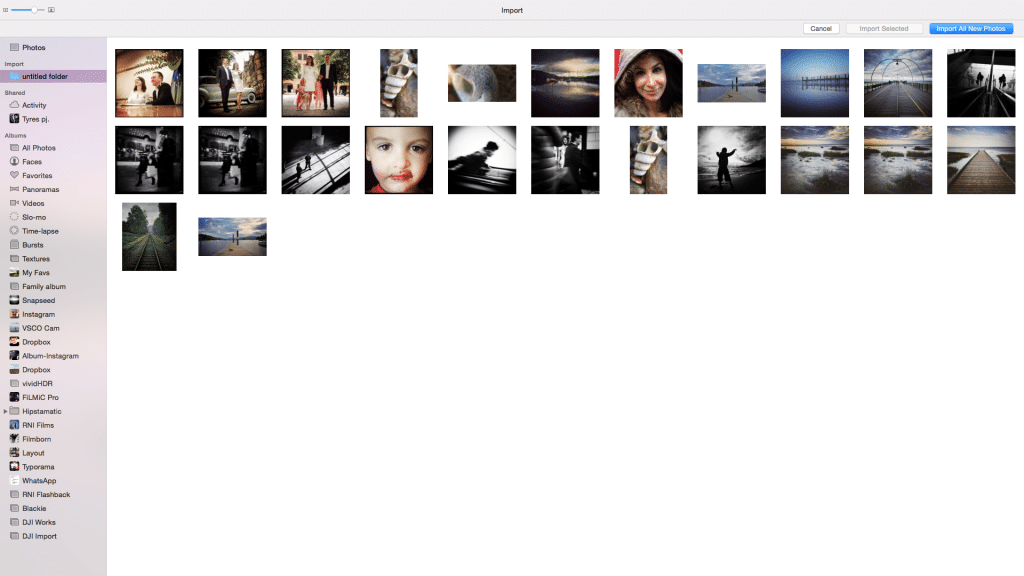
Let’s say you have images that are stored in folders on your Mac. It’s possible to move these images into the iCloud Photo Library so that you can see them on all your devices. Import them into the Photos app on your Mac by going to File > Import, choosing the images you want to add to the library, then choosing Review for Import > Import All New Photos. They’ll automatically be added to your other iCloud devices.
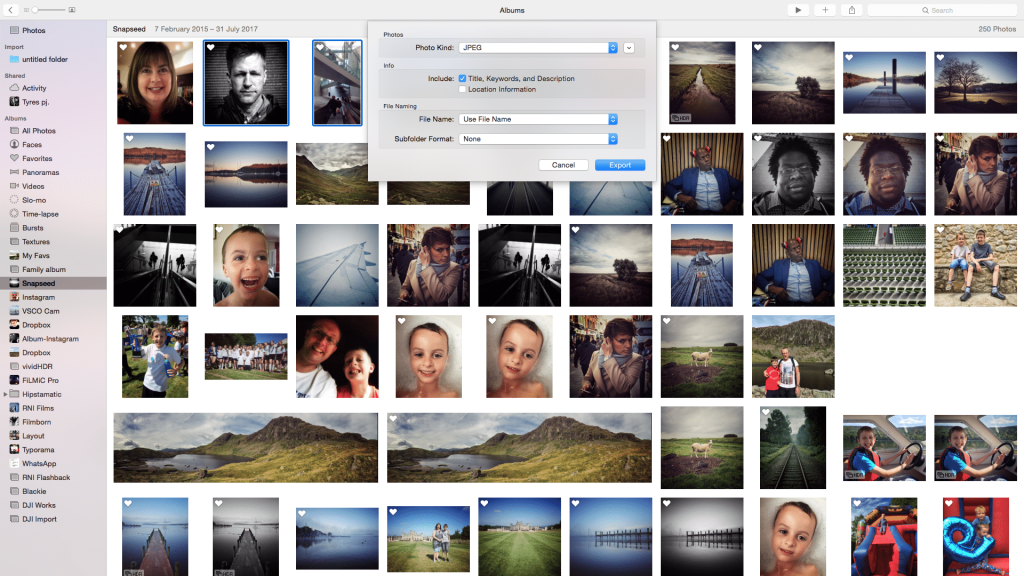
If you’d like to move photos the other way – from iCloud to your device – you can copy the full resolution images by opening the Photos app on your computer, choosing File > Export, choosing the original photo or the modified version, filling out the options in the dialog box that will show up, clicking Export, choosing where you want the images to go, and clicking Export again.
If you’re using a Windows computer, you can upload your images to iCloud by moving them into the Upload folders. They’ll auto-upload to iCloud, allowing you to access them on your Apple devices. Additionally, when you open the Windows File Explorer, you’ll notice a new photo called iCloud Photos. The Downloads folders is where images from your Apple devices will show up.
What Are My Storage Plan Options?
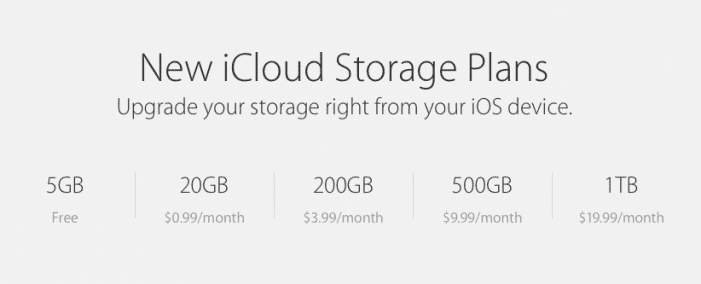
iCloud is free for up to 5GB of storage; expanded storage plans of up to 1TB per year can be purchased. Check how much storage space you’re using in iCloud on your iPhone by going to Settings > General > Storage & iCloud Usage. You’ll see what you’re currently using and what’s still available. To upgrade storage space when you’re running low, choose Change Storage Plan. iCloud storage plans are billed monthly and you’ll pay using the same payment method that you have setup for purchasing items from the App Store. Pricing starts at 99 cents per month for 50 GB and increases from there.
One final note…
If you haven’t yet enabled iCloud across your Apple devices, you’re missing out on major storage and ease-of-use advantages. iCloud is convenient and intelligent, giving you the power to optimize your photos and access them faster. You’ll never again have to worry about moving your photos or videos from one device to another, or losing them in the process. We know you’ll love it.


