One of the unique and defining things about iphone photography is the vast array of creative photo apps available in the app stores. For those with the talent, creativity and vision, there’s the potential to create some truly amazing mobile art.
If you’re looking for an iPhone app to help inject a distressed and textured look to your photos, then Distressed FX is one such app worth checking out. The app is a photo editing app for iPhone and iPad users, which, as this Distressed FX tutorial will demonstrate, is simple to use. It layers color filters and textures over an image, enabling you too quickly and easily create beautiful imagery that have a lovely distressed, painterly effect.
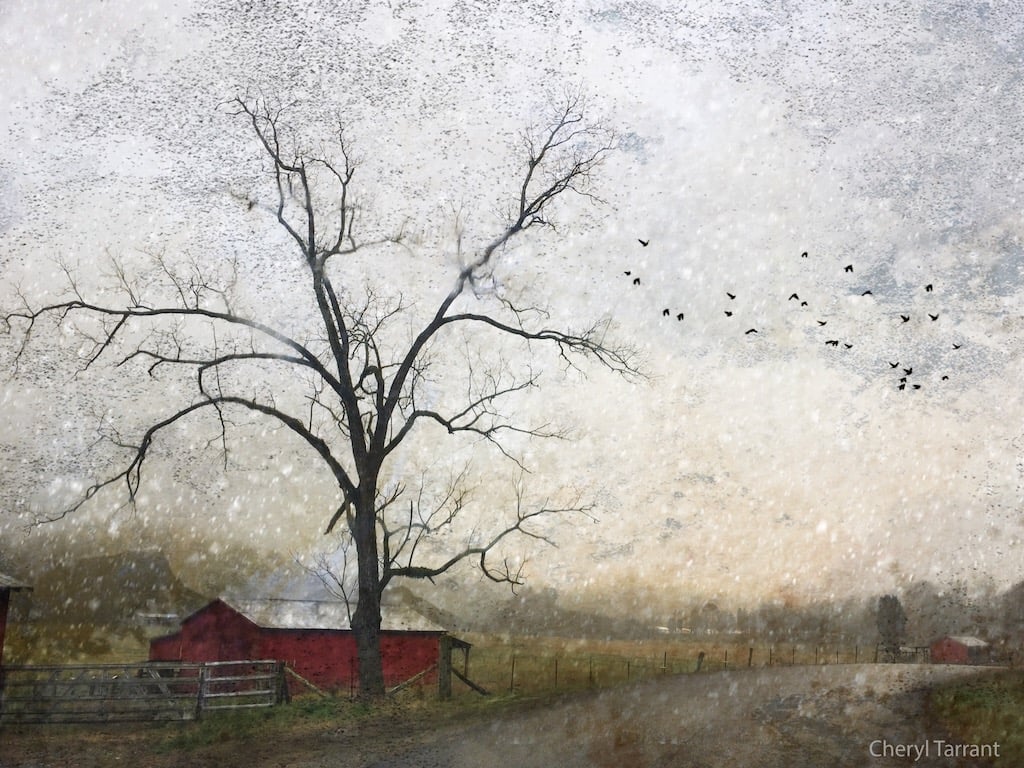
Distressed FX was the brainchild of Cheryl Tarrant, a digital texture artist from Tennessee, USA. Users of Distressed FX will find it super easy to import their photos. A color layer can then be applied, along with a textured layer, as well as objects such as birds in flight or trees. These elements can then be adjusted so their strength and opacity transform the image into something that resembles a painting.
It’s this ability to transform photos into something else that gives mobile photography and art its uniqueness and versatility.
Distressed FX has grown in popularity since its launch back in 2012 and since then has undergone some significant updates. I personally like the updates and think Cheryl Tarrant and her team have done an excellent job of incorporating user feedback and taking the app to another level. I find it so much more user-friendly than other apps which produce similar effects.
If you’re not familiar with Distressed FX then let’s take a dive into the app, its layout, and how you can use it to create your own unique piece of art.
The Layout & Interface
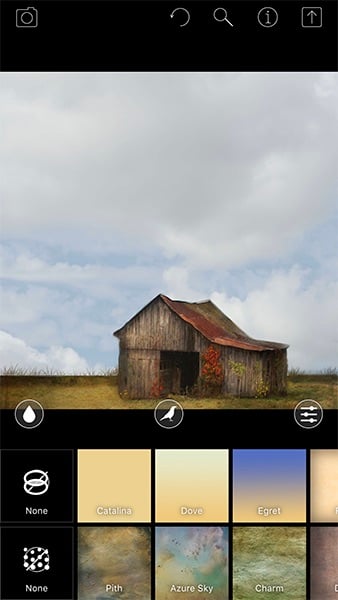
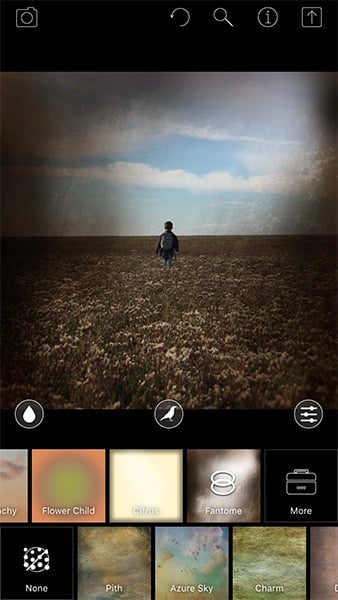
The first thing you’ll notice about the Distressed FX interface is that it has a simple layout. At the top of the screen you’ll find a number of icons that enable you to access your camera roll, undo editing steps, zoom into the image to examine it in more detail, as well as share your images to different social platforms.
The main portion of the screen is devoted to the image itself. At the bottom of this section you’ll find three icons that allow you to do things such as add and adjust the amount of blur applied to a photo, select an object overlay of birds in flight, and adjust the brightness, contrast and saturation levels of the image.
At the very bottom of the screen are two rows of small color/pattern swatches. The top layer of swatches applies a color overlay to the image, while the lower layer applies a textured overlay. By swiping all the way to the right of each of these layers you then have the option of buying extra color/texture packs to further broaden the app’s creative potential.
So, let’s take a walk through the process of using Distressed FX to create a painterly inspired image from an ordinary looking photograph.
How To Use Distressed FX To Create Mobile Art
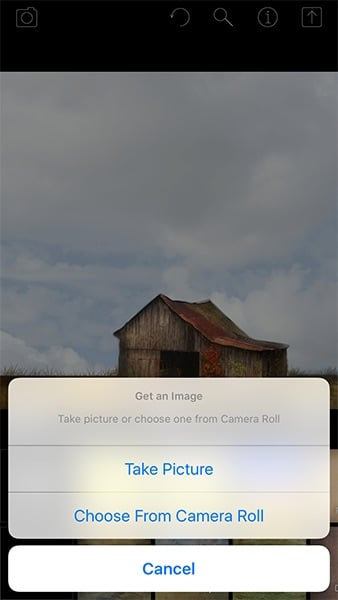
To begin with we need to select the photo that we want to start working with. To do this tap the camera icon in the top left and select an image from your camera roll.
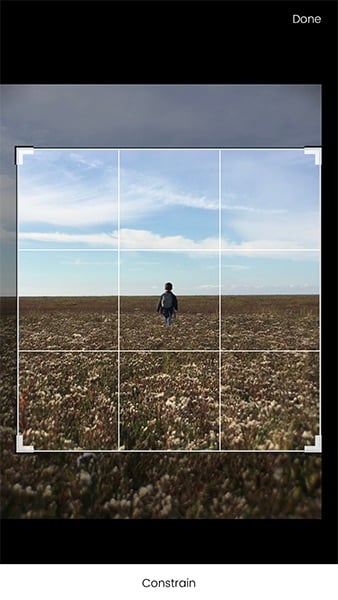
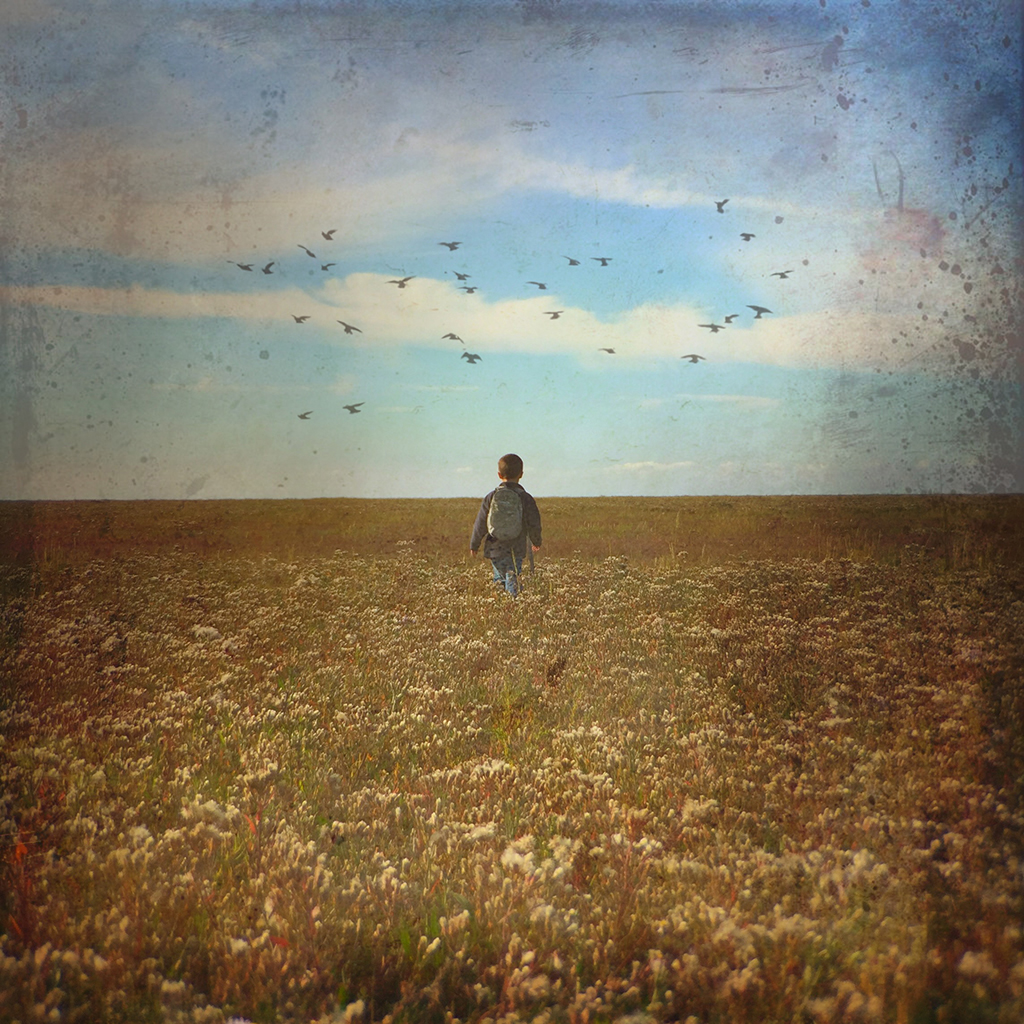
I select a photo of my son running across a heather covered field. I can see from the rule of thirds guidelines that he’s not centrally placed within the frame and that the image isn’t square. To correct this I tap “Constrain” at the bottom of the screen and select the “Square” option. I then move the photo so it’s more central, and adjust one of the corners so my son is in the middle of the image and tap “Done.”
Next, I apply a color overlay to the photo of which there are several to choose from. Some use bright colors, some more muted tones, some with vignettes, and others with vibrant colored patterns. Swipe right to view the choice of swatches and tap each one to see how it would affect the image. The last swatch gives you the option to buy additional overlay texture packs.
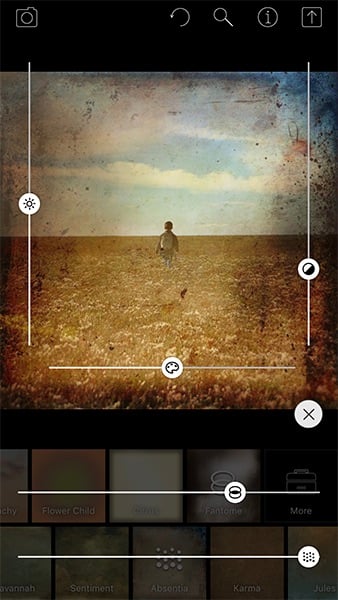
For my image, I select the “FanTome” filter which applies a distressed vignette to the edges of the photo. It’s a bit dark and heavy, so I tone this down by tapping the adjustment tool (the icon on the right of the group of three at the base of the image). I then reduce the opacity of this layer by moving that layer’s opacity slider down about three quarters of the way until I feel it has the right balance.
Next, I try out a few textured overlays by swiping the bottom layer of swatches towards the right and selecting each one until I find a texture that compliments the image. Again, at the end of this row you have the option to purchase new texture packs. For my image I decide on using “Absentia” as I like the old emulsion and distressed splatter effect. I then open the adjustments tool and reduce the opacity levels for this layer.
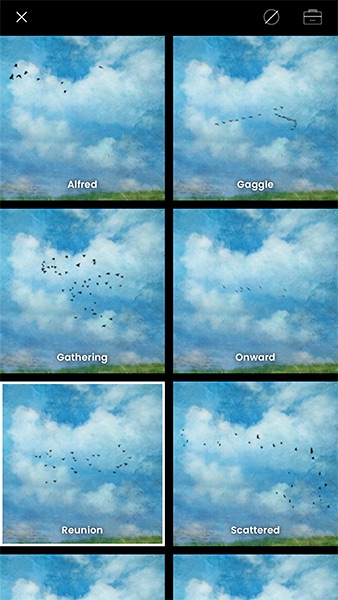
Next I decide to add some birds into the sky. For this I tap the middle icon (at the bottom of the image) and scroll through the different object options. Once selected, the bird layer can be moved around with your finger and enlarged or reduced with a two-finger pinch action. I also reduce the opacity of the layer so it blends into the rest of the image.
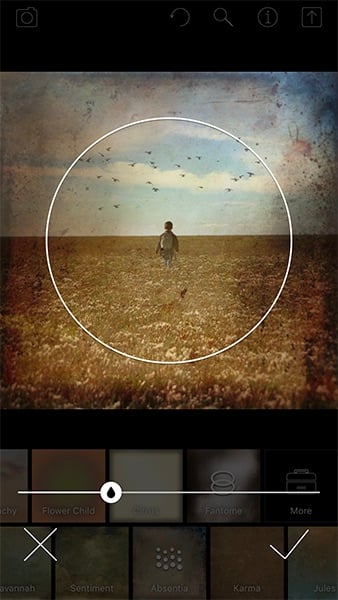
To further distress the image, you can apply some radial blur by tapping the blur icon (the left icon at the base of the image). The level of blur can be adjusted using the slider at the bottom, and the blur area can be widened or reduced with a two-finger pinch action. To apply the changes, I tap the big white tick.
I review the image and make some final tweaks to the brightness, saturation and overlay opacity levels before saving the final image to my camera roll.
As you can see, the Distressed FX app has allowed me to take a simple photo and take the look and feel of the image in a totally different direction.
Final Thoughts…
Distressed FX is a simple, easy to use app which offers the ability to create painterly inspired images from your photo collection.
Playing about with the app is fun and it’s interesting to see how different types of photographs react to the distressed treatment. For me, landscape photography seems to benefit more from this approach.
Download Distressed FX for your iPhone or iPad today and see what it can do to your photos. Don’t forget to share your Distressed creations on Instagram using the hashtag #mobiography.



This is looking good. I must go & get it now.
How do I save the photo to my photos after I have used the distress app?
Tap the arrow icon in the top right corner, then tap the downward arrow icon in the pop up window. This will save the photo to your camera roll
I do not see rule of thirds guideline and constrain option that you mention in tutorial
The rule of thirds relates to when you import the photo in from your camera roll.
Tap the camera icon in the top left, tap ‘choose from camera roll’, select a photo then in the next screen at the bottom of the screen if you tap the crop icon, select a ratio, then reduce the crop that is when the rule of thirds gridlines appear.
I hope this makes sense.