There are so many benefits associated with getting outside and exploring the great outdoors. It’s a place where you can take a step back, de-compress and forget about the stresses of everyday life. For those who love photography, the outdoors has so much to offer. After all, nature makes for a beautiful subject. From wildflower meadows to green, tree-covered mountains, from fast-flowing rivers to meandering streams, all set against a backdrop of dramatic cloud formations or lit up by vibrant sunset skies.
The art of landscape photography is all about framing these sights. It sounds easy, but the best landscape photos are carefully crafted. Gone are the days when you needed expensive gear to take stunning landscape images. Nowadays, with some basic knowledge and a willingness to explore, learning how to take landscape photos with an iPhone can produce remarkable results.
So, to help you find your inner Ansel Adams, we’ve put together this guide to landscape photography – smartphone style. Join us on this journey to discover the secrets of iPhone landscape photography.
Short Summary
- Master the basics of iPhone landscape photography to create beautiful photos
- Utilize essential accessories and tools like tripods, lenses & editing apps for stunning results
- Practice makes perfect, and with dedication, you can capture breathtaking images!
Mastering the Basics of Landscape Photography with an iPhone
Firstly, before you venture outside to start capturing those stunning landscape photos, it’s essential to get an understanding of the basics of landscape photography with your iPhone. The fundamentals encompass such things as having straight horizons, adjusting exposure, and highlighting a point of interest and using composition to create stunning shots.
Let’s take a closer look at some of the fundamentals of landscape photography.
Straight Horizons
A straight horizon is crucial for professional-looking landscape photos. I’ve seen many photos, ruined by a wonky horizon. This need not be the case though, as the iPhone makes it easy to ensure a straight horizon every time. There are two ways you can ensure your horizons are level; by using the iPhone camera grid and aligning the horizon using the gridlines or by using the Rotate tool in the Photos app (or another photo editing app like Snapseed) to adjust the angle of the photo.
Adjusting Exposure
Capturing the perfect lighting is key to creating stunning landscape images. With your iPhone, you can adjust exposure settings in the native camera app to avoid overexposure and create a balanced scene. To make these adjustments, simply tap on the camera screen and slide your finger up or down. Other camera apps may use a slider dial to adjust exposure levels.
Experiment with High Dynamic Range (HDR) photography, which merges multiple exposures of the same photo into one optimally-exposed image. This is especially useful when the sky is included in your landscape shot.
Find a Focal Point
In most genres of photography, the subject of an image will most likely be clear and obvious, but in landscape photography, this may not be the case. Many photographers will mistake a beautiful view for a great image, and as a result, their landscape photos will lack a focal point for the viewer to be directed too.
Focal points are essential for creating a captivating and well-composed landscape image. When you’re presented with a beautiful view, try breaking down the scene into small sections. You can do this by either looking through your camera app’s viewfinder and using the grid lines to create a frame or using your hands to create a frame.
When shooting any landscape photo, it is important to define what the subject of the image is and then decide how best to lead the eye into the scene and towards your intended subject. This will help to create a more dynamic and interesting composition and ensure that your photos will be interesting and dynamic.
Maximizing Composition Techniques
Composition is another critical component that will help elevate the standard of your landscape photos. Using techniques such as the rule of thirds, leading lines, and including foreground elements will enhance your images and make them truly stand out.
Let’s take a look at a few of the most common compositional techniques.
Rule of Thirds
The rule of thirds is an incredibly useful technique that is most commonly used in landscape photography. The “rule” works on the premise that your frame should be divided into nine equal parts and your subject placed off-centre at the intersection of those grid lines, about one-third of the way into the frame.
Similarly, horizons should be placed either one-third from the bottom of the frame or one-third from the top. This technique will help add a pleasing asymmetry to your photos. In other scenarios, when there are multiple elements in your composition, the Rule of Thirds helps to “balance” things.
To help you compose your images using the rule of thirds, be sure to enable grid lines on your viewfinder. On an iPhone, this can be found in Settings > Camera > Composition > Grid. Other third-party camera apps will offer the ability to turn this feature on/off from within their own settings.
It is always advisable to experiment with the placement and positioning of your subjects in order to find the most captivating composition for your landscape photos. Even the slightest movement in your camera’s position can change the placement of your subject, which can then have a big impact on a photo’s dynamic. The key is to play about with different angles and perspectives and work the scene.

Leading Lines
Incorporating leading lines into a photo is another great way to guide the viewer’s eye into a scene. Leading lines are visual paths that extend into a scene and help direct your viewer towards the image’s main subject. It is also a great way to add depth to your landscape images.
For this reason, leading lines are one of the most valuable tools in your compositional toolbox – so keep looking for anything that could work in this way. Look out for rivers, streams, footpaths, or roads that wind their way towards a distant mountain landscape.
However, leading lines aren’t always so clear and obvious. Often, leading lines can be more subtle such as the lines created in a field of crops or the patterns formed on wind swept sand dunes.

You can also combine the rule of thirds with leading lines to help direct the eye within the frame. This will further help to create a more captivating and stronger composition.
Foreground Elements
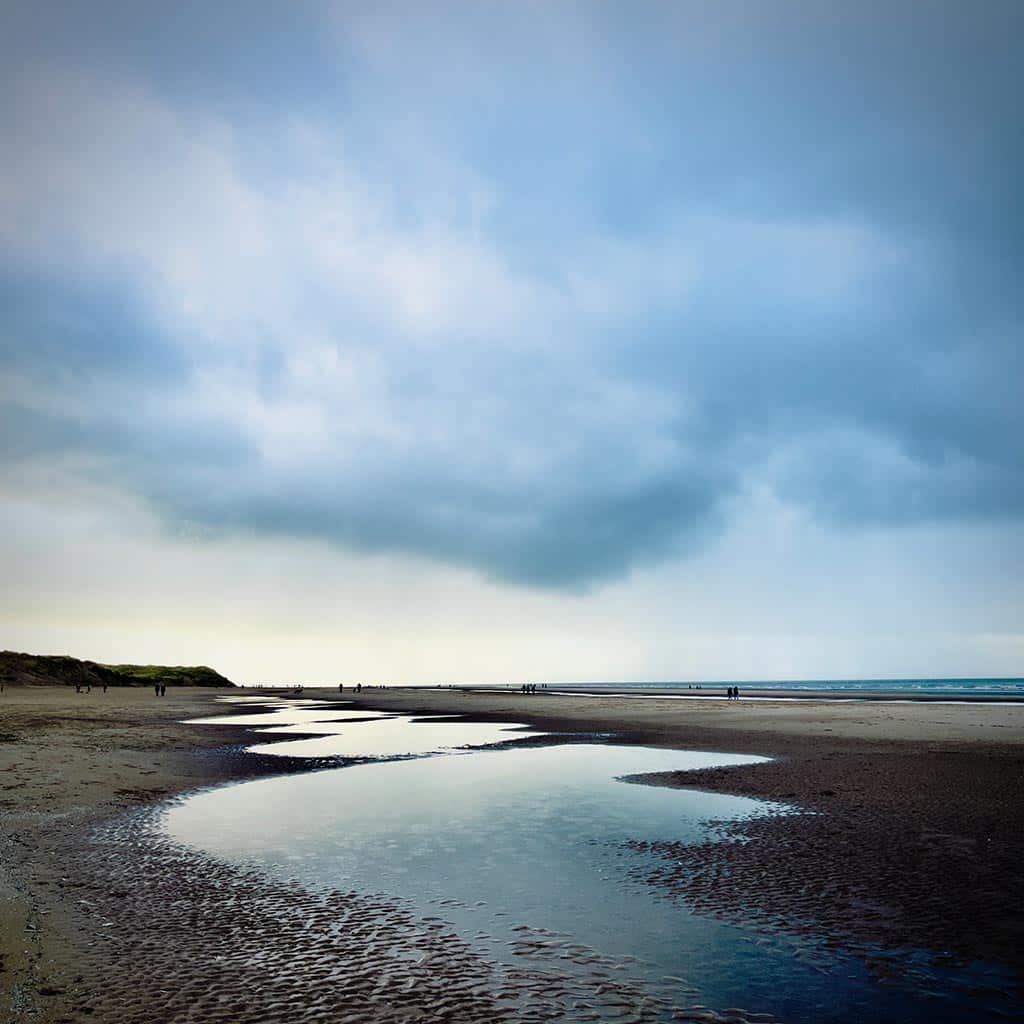
While the sky plays an important part in the composition of a landscape photo, so does the lower part of the frame. Just as the first chapter of a novel helps to set up the story, the foreground of your frame provides an essential introduction to the scene. You want to entice the viewer into your photo while leaving the main plot twist somewhere nearer the middle of the frame. Including foreground elements will help you add depth and interest to your images.
Foreground interest can come in many forms. You could choose to include ripples left by the retreating tide on a sandy beach or a weather-beaten gate on farmland. You could just as easily frame an icy waterfall beneath a towering mountain or pair a wildflower meadow with a magnificent oak. In fact, there are countless options available to you.
As a rule of thumb, the best foreground elements are complementary to the main subject. In other words, try to ensure your foreground does not outshine your focal point. While bright colors and large objects may cause a distraction, elemental textures and small details will help to set the scene.
Again, enabling the grid lines on your iPhone camera will help you effortlessly align the foreground elements and create a stunning composition.

Photo by Mariko Klug
Look for symmetry
Symmetry is a good reason to ignore the Rule of Thirds. Nature is inherently chaotic, so any opportunity to frame perfect order within a landscape should be grasped with both hands.
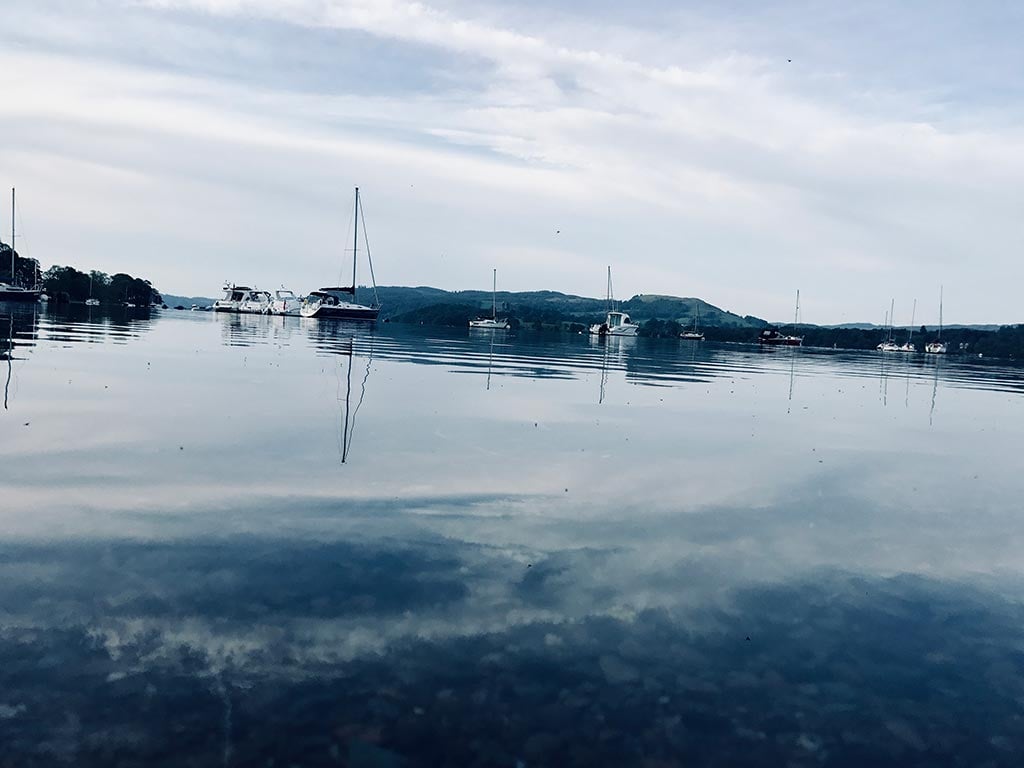
Probably the most common form of natural symmetry is between calm water and the sky. On calm days, you may also be able to capture the mirror image of mountain peaks on the surface of an alpine lake. It can be fun to turn such compositions sideways or upside down, to keep the viewer guessing.
Man-made parts of the landscape are often vertically symmetrical. Bridges, piers and roads offer the perfect opportunity to split your image down the middle. However, these scenes are more technically challenging to capture because vertical misalignment is easier to spot. When framing your shot, be very careful to stand dead centre and enable grid lines in your camera app as a visual guide.

Photo by Alice1280
Negative Space
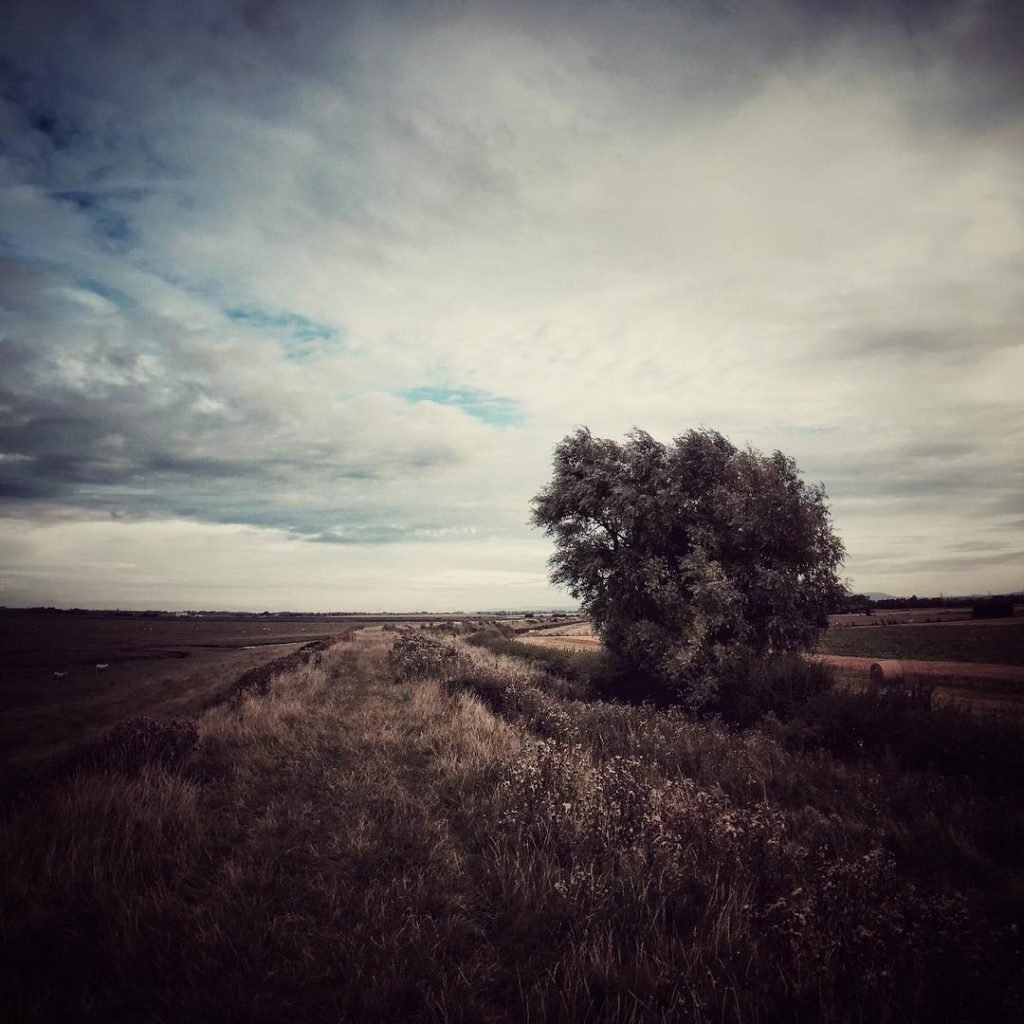
Some of the most arresting landscape images are filled with very little. Instead of being bombarded with visual information, the viewer can focus their attention on one, solitary subject. The unfilled area is known as negative space.
The use of negative space goes against the grain in landscape photography. We are usually told to add more interest to our images, rather than subtract. But negative space offers an important contrast with your primary subject. For instance – while a single tree may get lost in a forest photo, a lone tree on a blue-sky horizon will stand out.
The easiest way to employ negative space in your photography is to look upwards. Keep your main subject in the frame, but fill the rest of your composition with the sky. Alternatively, look for plain backdrops within the landscape – still lakes and areas of shadow within a forest can work.

Capturing the Perfect Light
Lighting is a crucial element in landscape photography, and capturing the perfect light can make all the difference to your images. Shoot during the golden hour and capture dramatic skies to enhance the beauty of your landscape photos.
Also, pay attention to weather patterns and embrace the unique lighting conditions they bring to create moody, breathtaking images.
Shoot in the Golden Hour
The golden hour, the time just after sunrise and just before sunset, is one of the most optimal times to capture stunning landscape photos. During these times, the light is especially beautiful and golden, providing soft, warm lighting that helps create depth and highlight the colors of the landscape.
Apps like Lumy can help you determine the exact time of sunrise and sunset, so you can plan your photo shoot accordingly.

Dramatic Skies
Dramatic skies can greatly enrich your landscape photos. Pay attention to weather patterns and shoot during stormy days or colorful sunsets to capture the beauty of the sky. Use the rule of thirds to create a balanced and visually appealing landscape picture that helps to give more prominence to the sky in your composition.
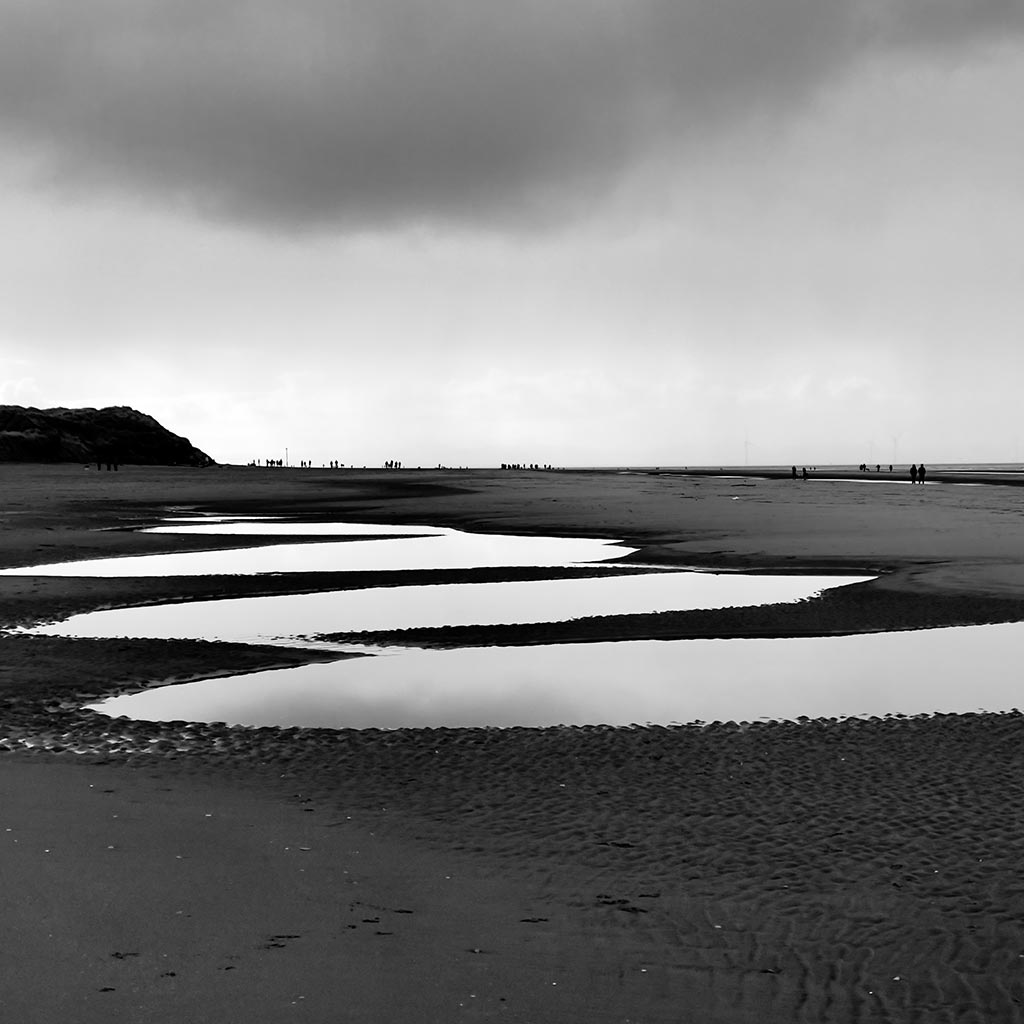
Be sure to look out for and embrace interesting light and cloud formations that will help you capture stunning landscape shots that showcase the great outdoors in all its glory, resulting in some great landscape photos. You could also try shooting in black and white using apps like Blackie to inject some rich, dark contrasts into the clouds in the sky.
Embrace the Weather
Weather and light are inextricably linked. But more than this, meteorological conditions can add real interest to your landscape photography.
Embracing all types of weather is important. While blue skies are certainly attractive, storm clouds can be just as pleasing – albeit in a more dramatic fashion. Similarly, foggy conditions can add an air of mystery or perhaps some artistic style.
Rain is probably the most difficult type of weather to work with. It tends to arrive in an unappealing blanket of cloud, and the falling droplets can easily soak your phone. That said, you only need a break in the clouds for a rainbow to form.

Experimenting with Different Perspectives
Don’t be afraid to experiment with different perspectives in your landscape iPhone photos. Adjust the height that you shoot from, try different angles, include a human element to add a sense of scale to your images.
By stepping out of your comfort zone and trying new things, you’ll discover fresh ways to capture the beauty of the landscape.
Shoot From Different Angles
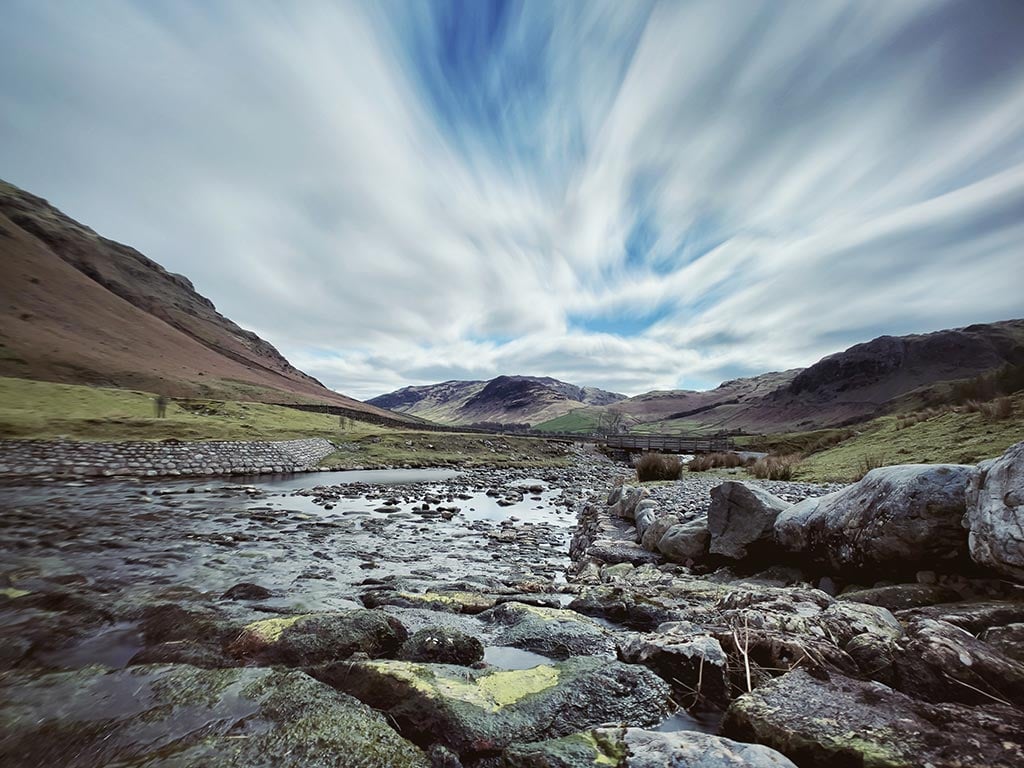
Transform your landscape photos by trying different angles. Get down low to the ground to create a deeper perspective and make foreground elements appear much larger, or find an elevated position and shoot from above for a different viewpoint.
Experiment with various vantage points to find the perfect angle that captures the entire landscape in a unique and captivating way.
Create a Sense of Scale
Often the vastness of a landscape scene gets lost when converted to the small screen on an iPhone.
To avoid this, try to include something that will give a sense of scale to your image. One trick is to include a human element in the composition. Including someone in the scene will help attract the viewer’s attention and give the image a sense of isolation.

Photo by Andy Bakk
Use of Essential Accessories and Tools
You can enhance your iPhone landscape photography further with the help of some additional accessories. Tripods, add-on lenses, and editing apps can all help you capture sharp, well-composed iPhone landscape photos.
Tripods
Using a tripod can stabilize your iPhone and enable you to avoid any unwanted camera shake. Tripods give you the freedom to be creative with your iPhone’s positioning and ensure that your device stays still especially when taking long exposure images. Tripods range from budget-friendly GorillaPods to top-of-the-range Peak Design Travel Tripods. There are plenty of options available to suit your needs and budget, giving you a lot more creative control.
Add-On Lenses
Even though modern iPhones come with a choice of different lens options built-in, to achieve the best results possible, it is advisable that you consider using a specialist add-on lens to help enhance the photography further. This is because the glass used will be bigger and of better quality than the built-in lens. This will help to reduce any distortion and vignetting on the outer edges of your images.
For landscape photography, consider using a wide-angle lens, as this will help you capture more of the expansive landscapes that cannot be fully framed with the regular iPhone lens. Wide-angle lenses like those from Moment or Reeflex allow you to capture more of the landscapes enabling you to better showcase the vastness of the scene in front of you.

Photo Editing Apps
Edit your images using apps like VSCO, Snapseed, and Lightroom is an important part of the image creation process. These powerful photo editing apps allow you to adjust different aspects of the image, such as its brightness, contrast, saturation, sharpness, warmth etc. Images can be cropped and preset filters applied, which will help enhance the image further.
Remember, a little goes a long way when editing, so avoid over-editing and focus on making small tweaks to achieve the most impactful results. It is always better to enhance a good photo rather than mask the flaws in what is a poorly taken one.
It is important that you are able to master the art of taking great landscape photos in-camera rather than trying to rely on post-production photo editing in order to pull something out of the bag.

Finding the Best Locations
Finding the best locations for taking landscape photos can be a fun and rewarding process. Scout quiet areas, incorporate points of interest, and use vanishing points to create captivating compositions in your landscape photography. Remember, the best locations also depend on your personal preferences and the type of landscape you want to capture, so experiment and explore to find unique and captivating results.
Panoramic Mode for Breathtaking Landscapes
Capture breathtaking, wide landscape photos using the photo app’s panoramic mode on your iPhone. Panoramic mode allows you to capture stunningly wide, expansive images simply by panning your phone from left to right. Including just the right amount of foreground in your panorama can help create a stunning effect.
Embrace this feature to create impressive beautiful landscape images that showcase the vastness of the scene.
Black and White Landscape Photography
Shooting your landscapes in black and white is a perfect combination. Black-and-white landscape photography is timeless, and allows you to create classic images that emphasize the tones, lighting, and dramatic skies of the scene in front of you.
You can choose to either use a dedicated black and white camera app like Blackie or make use of the built-in camera app and then apply a black-and-white filter from the Edit settings of the Photos app. Alternatively, you can use third-party photo editing apps such as Lightroom CC Mobile or Snapseed to convert your color photos to black and white. Doing so can result in stunning results that evoke a sense of nostalgia and emotion.
Practice Makes Perfect
As with any skill, practice is key when it comes to mastering iPhone landscape photography. By making an effort to get outside and visit different locations in different weather conditions, you will be able to practice and experiment with different techniques and, over time, discover what works best.
It is also worth joining a local photography group, an Instagram community group or enrole on a photography workshop. These will enable you to learn from other, like-minded people and become more inspired.
Remember to take your time and explore different settings and techniques to achieve the most stunning results. With dedication and practice, you’ll soon be capturing breathtaking photos with your iPhone.
Summary
In conclusion, iPhone landscape photography offers endless possibilities for capturing stunning images of the world around us. By mastering the basics, maximizing composition techniques, capturing the perfect light, experimenting with different perspectives, utilizing essential accessories and tools, and practising regularly, you’ll be well on your way to becoming a skilled iPhone landscape photographer.
Embrace the journey and discover the beauty of the great outdoors through the lens of your iPhone.
Frequently Asked Questions
Is the iPhone good for landscape photography?
Yes, the iPhone is an excellent choice for landscape photography, given its powerful lens and high megapixel resolution. By mastering some simple techniques, you can take stunning images of mountain scenes, valleys, and rolling hills.
How can I ensure a straight horizon in my iPhone landscape photos?
To ensure your horizon is straight when taking landscape shots, enable the iPhone’s camera grid by going to Settings > Camera > Composition > Grid. Next, align the horizon with the grid lines or make adjustments by using the Rotate tool in the Photos app or in Snapseed.
What is the best time to capture stunning landscape photos?
Capture stunning landscape photos during the golden hours, just after sunrise or before sunset, for the best results.
The golden hours are the best time to take landscape photos because the light is softer and more even. The colors are more vibrant, and the shadows are less harsh. The sky is often more dramatic.
What are some essential accessories and tools for iPhone landscape photography?
To get the most out of your iPhone landscape photography, use a tripod, wide-angle lens, and an editing app for great results.


