When it comes to wildlife photography, you don’t have to look far even in a busy town or city. Those of us with gardens have a ready-made wildlife photography “studio” on our doorstep! However, what if you haven’t got a garden? No problem – your nearest park, a lone tree, a hedgerow or even a window ledge will suffice.
Garden wildlife photography is simple and rewarding. All you need is a little preparation, a few cheap accessories, some willing subjects and time and you’re good to go! Here are some tips to help you achieve great results that you’ll be proud to show off to family and friends.
Invest in a remote shutter release or a motion-sensitive camera app
The primary challenge when photographing wildlife is getting your subject large enough in the frame. Smartphones don’t generally have optical zoom lenses with sufficient magnification. So, positioning yourself and the smartphone close enough to the subject to fill the frame isn’t practical as your presence will most likely scare the subject away. The solution to this problem is for you to be separated from your smartphone camera. This will allow you to position it close to where the intended subject is expected to be. You will then need to trigger the shutter by alternative means.
There are three main ways to trigger the shutter when the photographer isn’t close enough to the camera to press the shutter button:
The first uses the timer/delay feature. In this case, it isn’t practical because there’s no way of knowing when your subject will arrive and to coincide it with the precise moment that the shutter will fire.

Next, there are several camera apps that include motion detection. These trigger the shutter automatically when enough motion is detected in the scene. The motion threshold (the amount of motion required to trigger the camera) is usually adjustable. This will prevent small movements from things like dust, insects flowers or tree branches from triggering the shutter. Flow Shot is just one example that works on an iPhone, but many more exist for both iOS and Android devices.
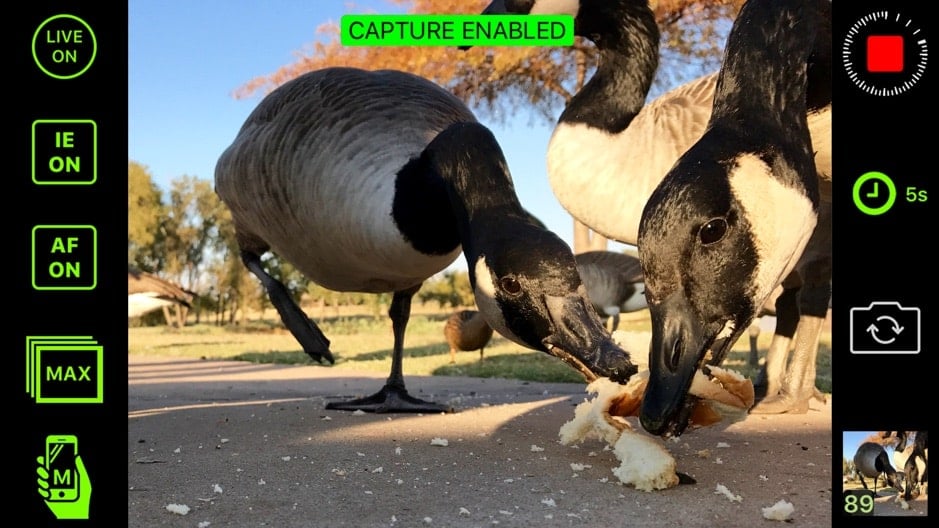
Lastly, a remote shutter can be used. These are usually wireless and use Bluetooth technology. The photographer holds the remote shutter and watches the scene from a distance (Bluetooth normally has a maximum range of about 10 meters, less if there are obstacles in the way). Pressing the remote shutter button will trigger the camera’s shutter. For iPhone users, an Apple Watch can be used as both a remote shutter and a viewfinder! The CamKix pictured here is a good example, though there are dozens of similar products.
Use a tripod to hold the camera steady
Since you won’t be close enough to your camera to hold and frame your shot, you’ll need to find a way to support the phone. A simple solution is to prop it up against a sturdy object, but for best results, I advise using a tripod.
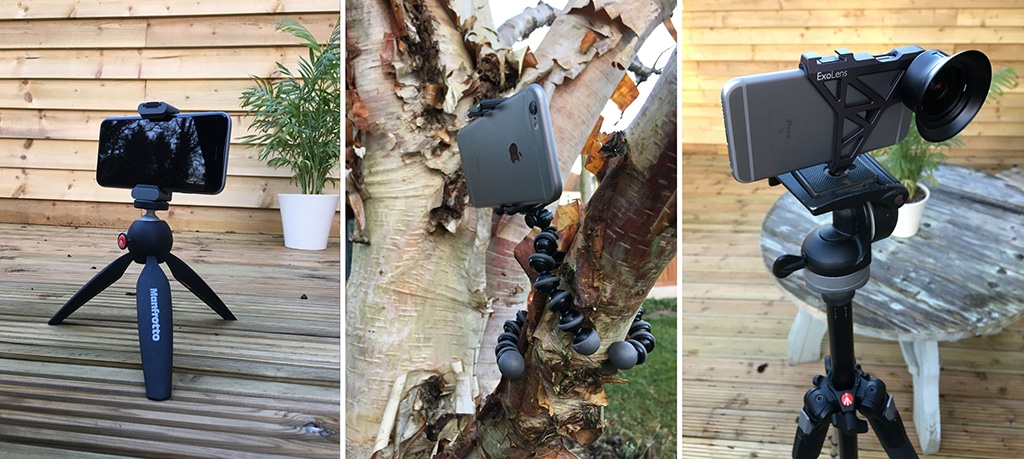
Different tripod designs lend themselves to different scenarios. A tall tripod might be useful for a tall birdfeeder. A tripod with flexible legs is perfect for wrapping around the branches of a tree or any other irregular surface or object. Meanwhile, a short pocket tripod is best for shooting at low levels.
Regardless of which tripod you use, you’ll need a way of attaching it to your smartphone. A wide range of clamps, clips and adaptors exist for this purpose.
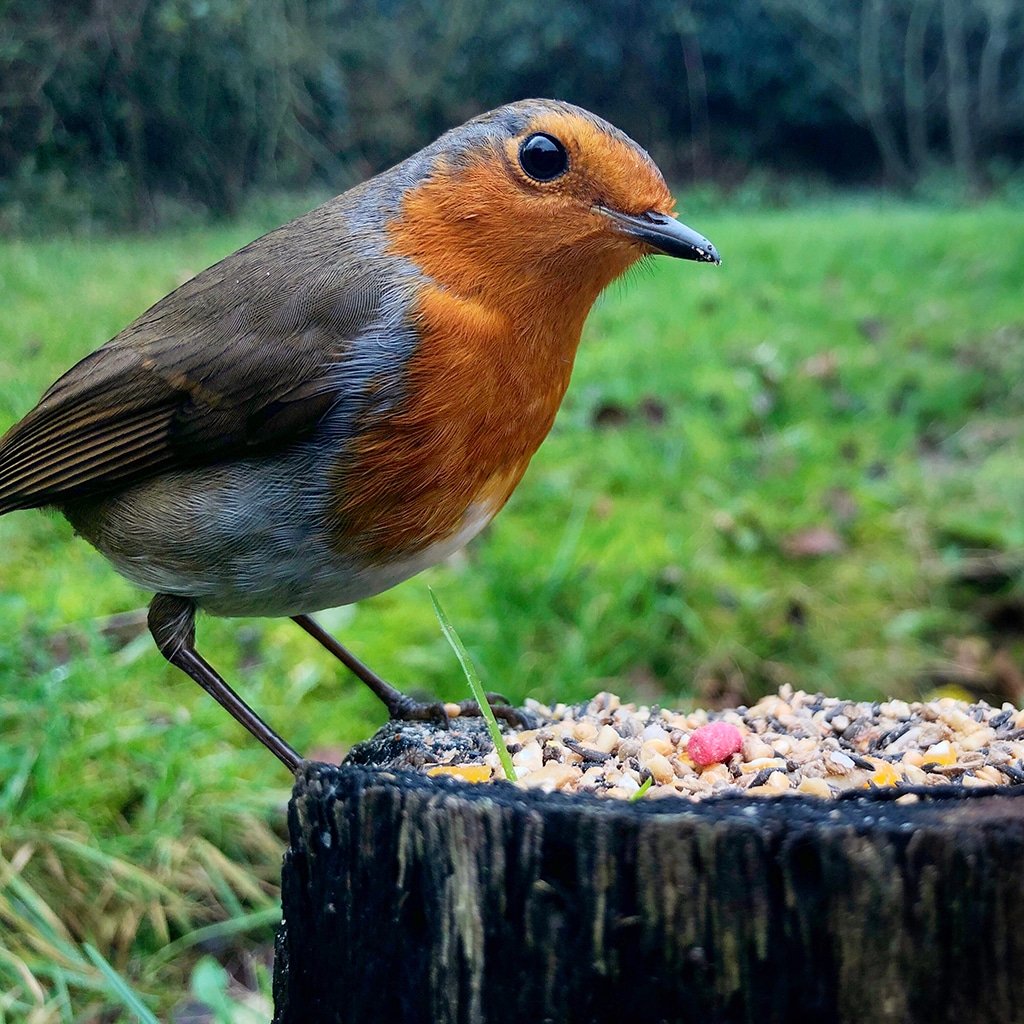
Choose an attractive spot where wildlife will feed, and shoot from a position that gives the best background
Regardless of how beautiful your wildlife subject is, a messy, cluttered or distracting foreground or background will detract from the result. Spend a little time looking for the best possible place to lay the bait you’ll use to lure the wildlife, and decide on the shooting direction.
All of your photographic composition techniques apply here, so look for ways to compose the shot to include what you want to include and exclude what you don’t.
Check your exposure
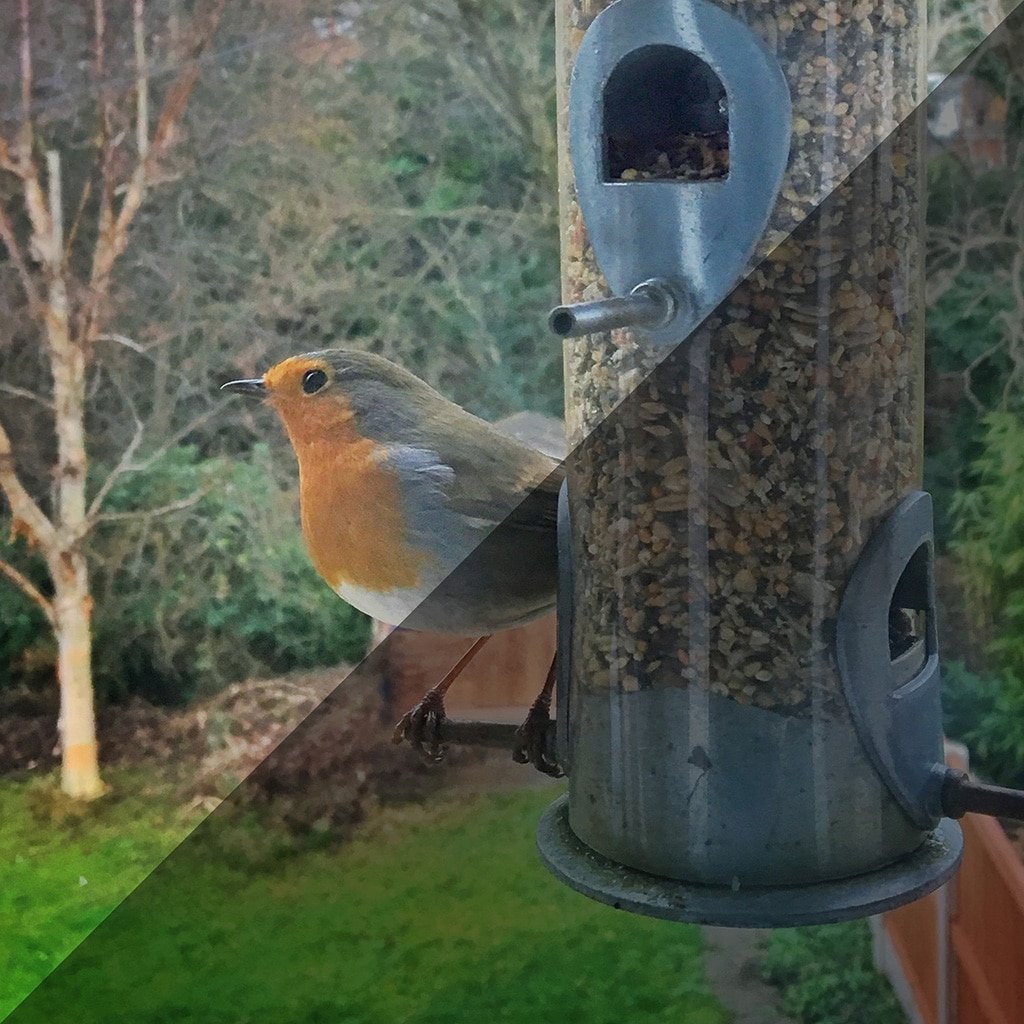
Now is a good time to check your exposure. If the scene contains both dark and light areas, consider recomposing so that the brightest regions are excluded or minimized.
If your scene is predominantly dark, your camera will attempt to brighten the entire scene to compensate. It does this by using a slower shutter speed to let more light in through its fixed aperture. However, a fast-moving subject is more likely to appear somewhat blurry in the resulting photo. To remedy this, you will need to reduce the exposure slightly, either by using the exposure slider or dial or by locking the exposure on a brighter area of the scene. It’s preferable to have a slightly under-exposed image than an over-exposed image. It’s much easier to brighten a photo in post-production using your favorite photo editing app. The composite photo below shows before-and-after brightening.
A predominantly light scene will cause the camera to underexpose the image. This will result in faster shutter speeds and less blurry subjects, but you may not get much detail or color saturation. In this sort of situation, try increasing the exposure a little.
Lure the wildlife to your chosen spot
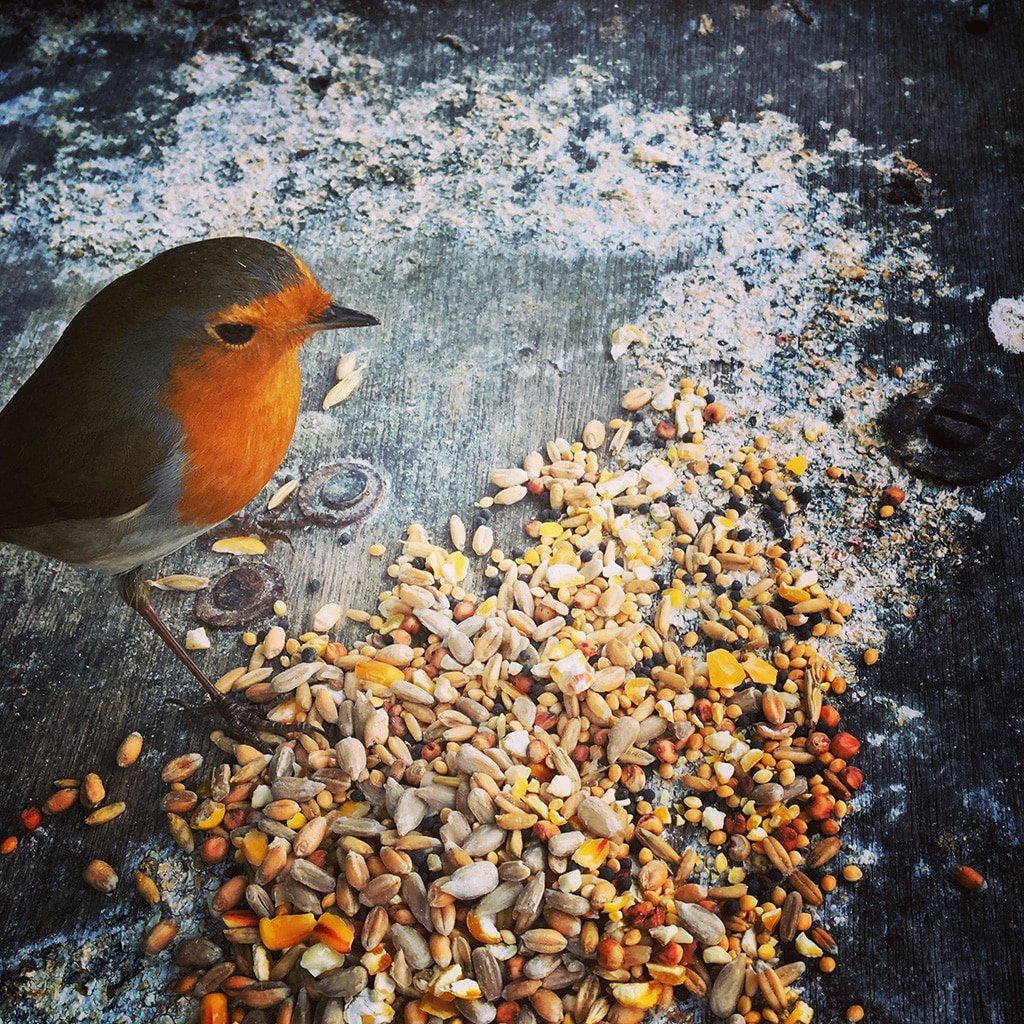
It may seem rather obvious, but to attract wildlife to your garden, you’ll need to lay out some bait. Ideally, you’ll have done this regularly for several days or weeks beforehand, but it’s amazing how quickly garden birds will appear the first time you put out some bird feed.
Do some research to find out what’s the best bait for your part of the world, and for the likely visitors to your garden. Your choice of feed will influence the kind of wildlife you attract.
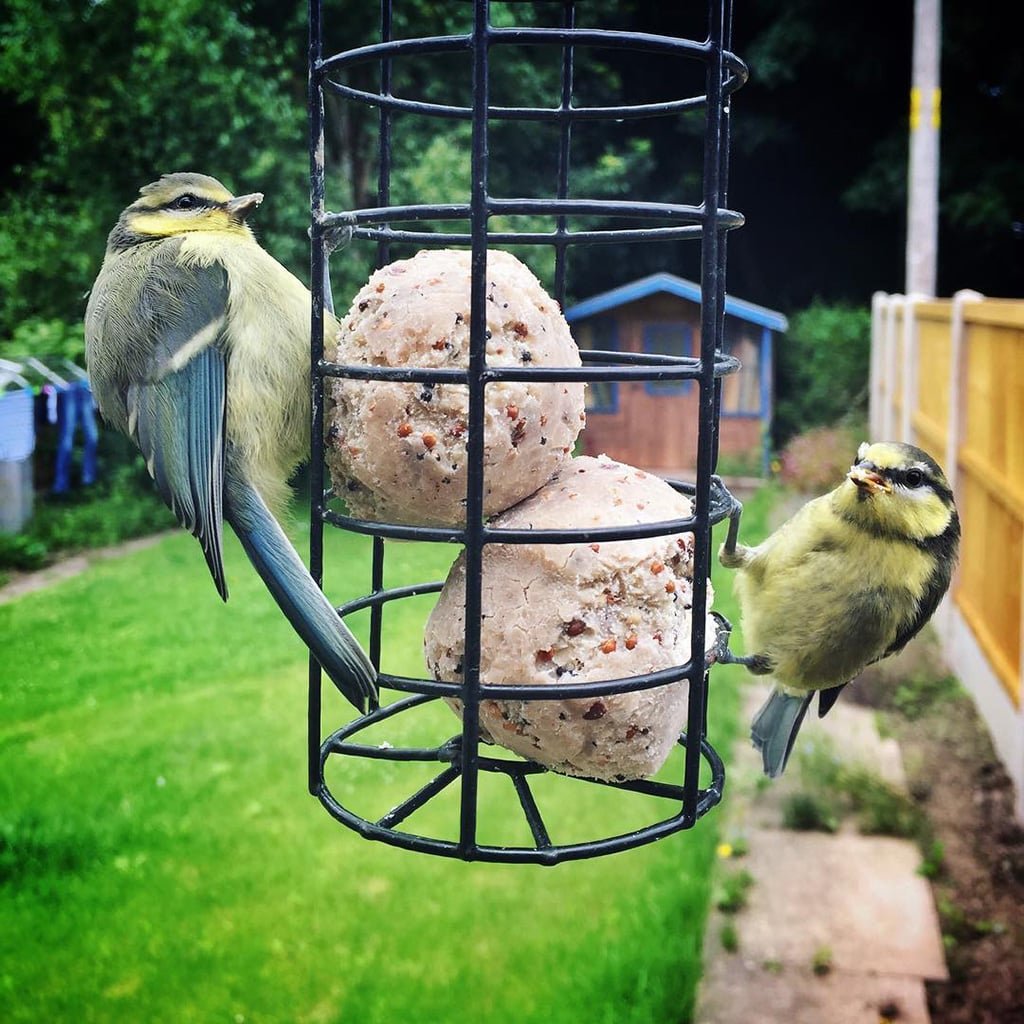
Peanuts (plain, free from aflatoxin, not salted or dry roasted) are popular, and you can crush or grate these to make them go a little further. A seed mix containing wheat will bring pigeons, pheasants and carrion, whereas other birds might discard the wheat, due to its lack of nutritional value, to get to the good stuff. Seed mixes containing pink or green lumps are usually crushed dog biscuits, which should only be eaten when soaked.
Fat-balls are popular and readily available, although you can even make your own. Pure fats such as lard and suet are best for making fat-balls, as the fat re-solidifies after warming and is less hospitable to undesirable bacteria. Other cooking oils won’t solidify so well and can smear on the birds’ feathers, making flight difficult and encouraging the breeding of bacteria.
Lay your bait in moderation. A massive pile of birdseed might not be very photogenic!
Shoot early to mid-morning or late afternoon, when the sun is lower in the sky
When the sun is high or overhead, it’s difficult to avoid hard shadows, and the most important details of your wildlife subject may be underexposed. As with many other types of photography, it’s usually best to shoot when the sun is lower in the sky, especially during the Golden Hour when the sunlight has an extra-special quality to it.
Alternatively, an overcast day will give more diffused light that will result in softer shadows.
Use burst mode
Since your visiting wildlife is likely to be intermittent, you’ll want to take as many photos as possible when they do actually arrive. Rather than repeatedly pressing your remote shutter button, simply use burst mode by pressing and holding the remote shutter button. This will give you a good burst of multiple images so you are more likely to capture the perfect pose.
Be aware that your smartphone may take as many as ten photos per second. If you hold down the shutter button for ten seconds, you’ll end up with around 100 photos to sift through! Use your best judgment about when and how long to hold the shutter button down.
Try different props for the wildlife to feed from or next to
The world isn’t short of great wildlife photography, so how do you make your wildlife photos stand out from the crowd? Well, you could introduce some props to add interest, tell a story or convey a sense of scale – real or otherwise.
Wildlife photographed next to something complementary, or even unusual or unexpected, is likely to be more memorable.
Your subject sitting on the handle of a garden tool, such as a spade or fork, suggests a relationship between it and the gardener. Including a broken bottle or crushed aluminum can will make the viewer think more about the environment.
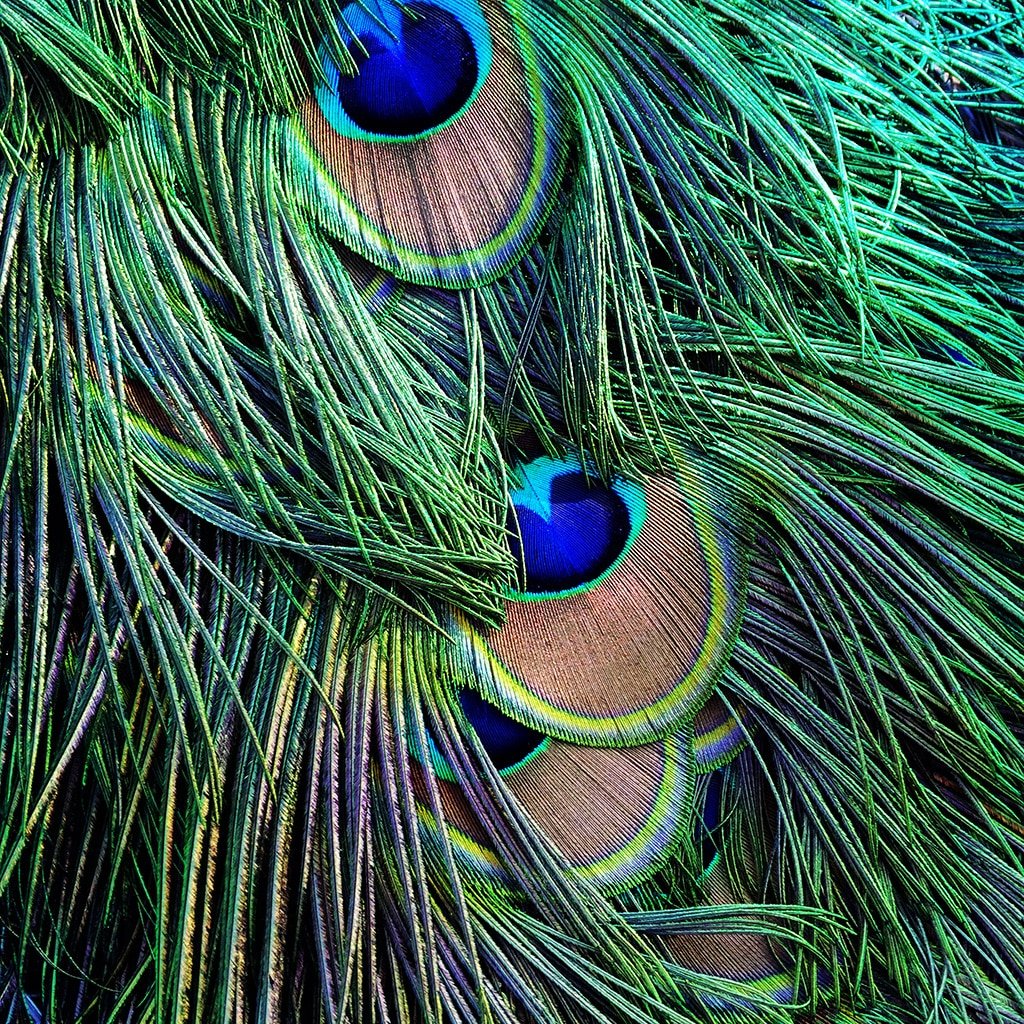
Look for abstract patterns
When photographing larger wildlife, such as ducks, pheasants or even peacocks, look for abstract or repeating patterns.
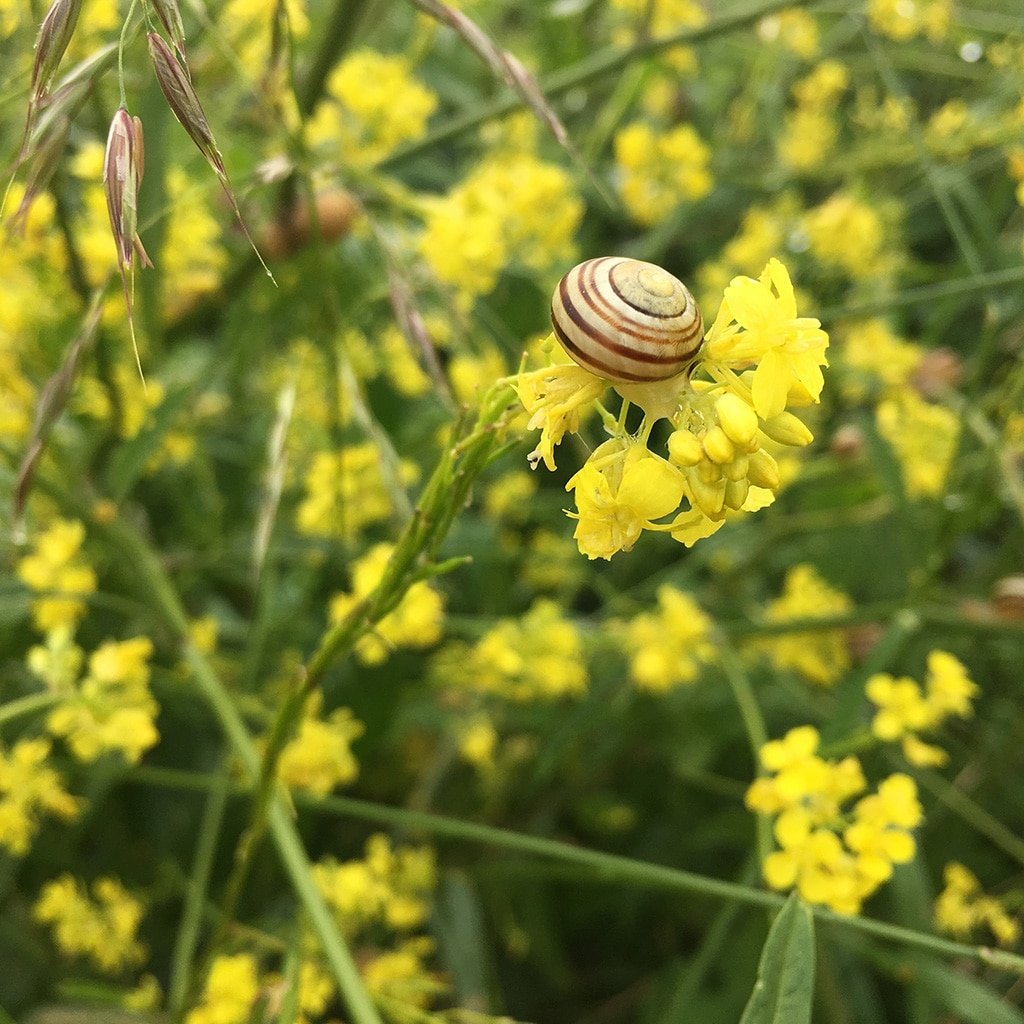
Use a macro lens to capture smaller creatures
For every visiting bird or squirrel visiting your garden, there will be a thousand bugs. Getting up close and personal with these tiny creatures is best achieved with a macro lens.
Several reputable manufacturers of macro lenses exist, the most notable being Moment and Reeflex.
Macro lenses are like telephoto lenses that only work at very close distances (a few centimeters). This close proximity to the subject presents two main problems. Firstly, it’s hard to prevent the smartphone from blocking some of the light from reaching the subject. Secondly, the presence of your smartphone (and you, if you decide to hand-hold it) may scare away the intended subject.
While you can shoot macro shots remotely, it’s a little harder to predict when and where your tiny subject is going appear. Being farther away means you’ll struggle even to see when the subject is in the shot, let alone posing nicely for you! Therefore, casual macro photographers tend to hand-hold their cameras.
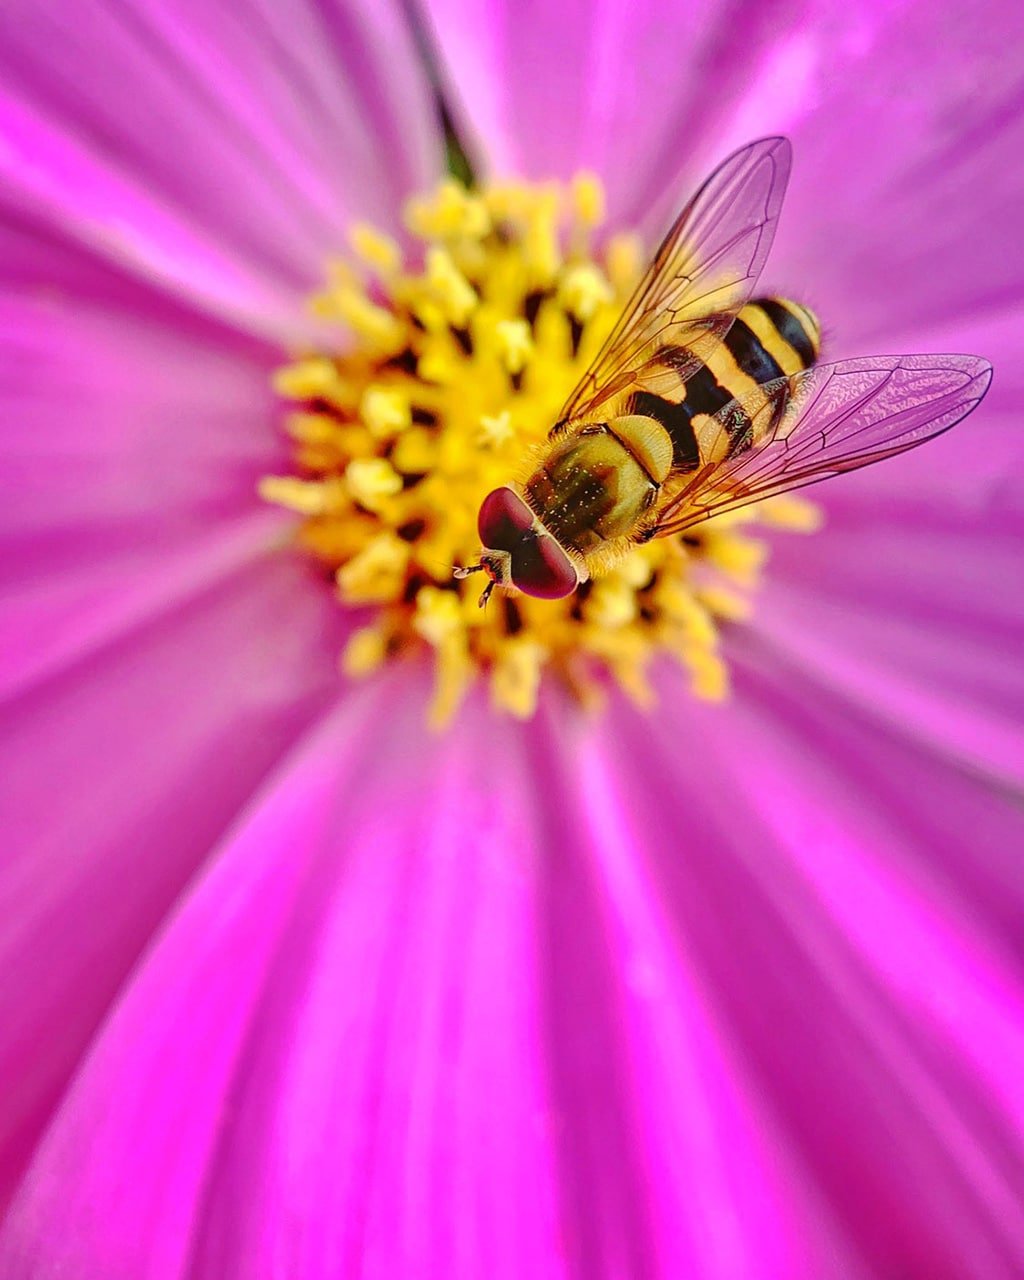
Another challenge you will face is the incredibly shallow depth of field that macro photography gives you. This makes it very difficult to get much of the subject in focus. It therefore involves a lot of trial and error. The best advice I can give is to handhold the camera, lock the focus so the camera isn’t constantly searching for something to focus on, then use burst mode and gently move the camera around the subject. Varying the distance between the subject, even by tiny amounts, can dramatically alter the focus area of an image. You’ll end up with a lot of photos to review, but you’re far more likely to get the perfect shot you’re after.
Summary
To summarize, use a tripod to support your camera and find a way to trigger the camera shutter remotely. You should take care to ensure the scene you’re capturing looks aesthetically pleasing. Pay attention to your exposure and try to shoot when the sun is a little lower in the sky. Use the most appropriate bait to lure your subjects to your chosen spot and use burst mode to capture them at their best. For smaller wildlife, such as insects, use a macro lens.
Hopefully, these garden wildlife photography tips will inspire you to try this rewarding activity and help you get results you can be really proud of.


