This is the first in what I hope will be a regular feature on Mobiography. The aim will be to ask a talented mobile photographer or artist to take us step by step through their workflow process that they follow in order to create an image, from initial capture to finished article.
Today, Geri Centonze of Art of Mob kicks off this series by showing us how she uses the Sketch Club app in her photographic workflow. You will discover how she starts with an ordinary image many people might dismiss and using the apps Easy Calc, Sketch Club, Brushstroke, Mextures and Snapseed creates a beautiful masterpiece that wouldn’t look out of place on the walls of an art gallery.
My Workflow by Geri Centonze
Please note all screenshots were taken from an iPad. If you’re using an iPhone, the apps may look different, but all functions are available.
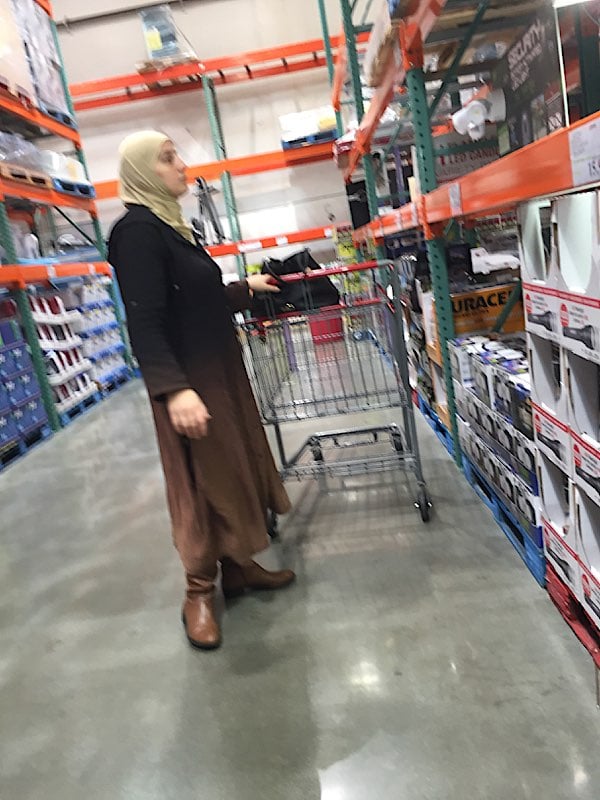
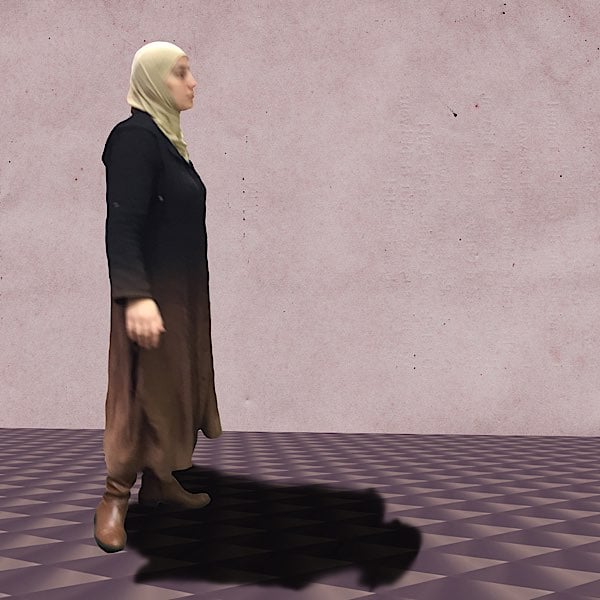
Below is my original photograph. I took this image of a woman while shopping. I liked her dress and demeanor and thought she made an interesting subject. I used an app called Easy Calc to shoot the image. This app takes photos at set intervals and I was not able to see what I was photographing (I was in stealth mode!), so it’s not very well composed and it is blurred. I was still happy with the woman’s pose, so I decided to see what would happen when I extracted the image from the background to create something new.
Step 1: Sketch Club app
I use Sketch Club as my go-to painting and layering app. Many other apps would also work, but because I’m most familiar with Sketch Club, I use it for work like this.
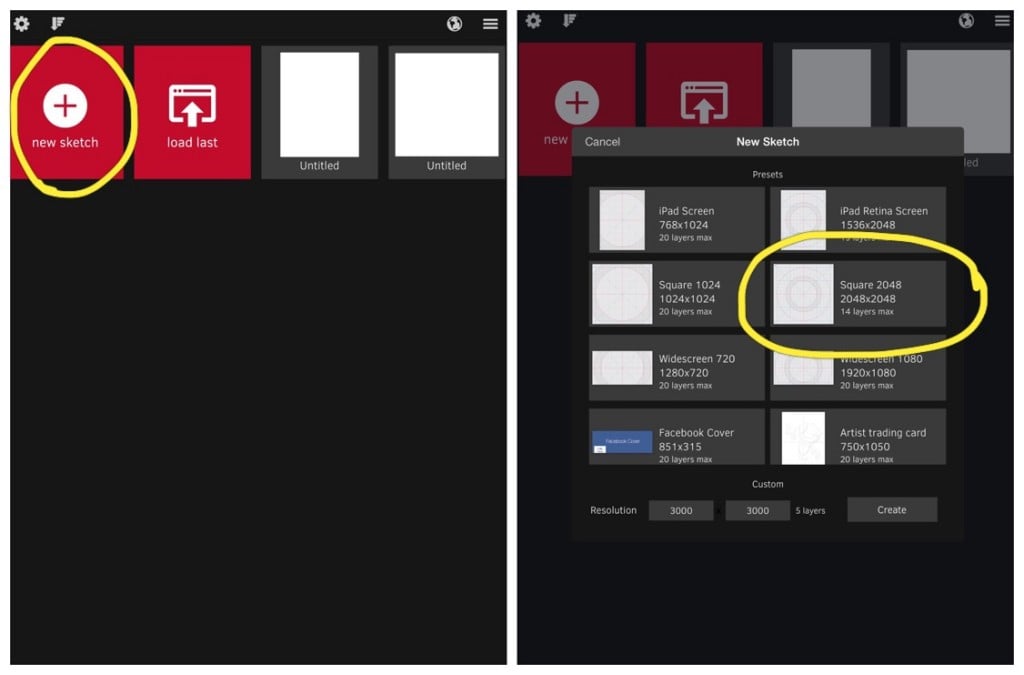
Create a new document in Sketch Club by clicking on the red and white + New Sketch Button. A new menu will open where you can choose the dimensions of your new sketch or create a custom size. For this image I selected Square 2048 x 2048.
Step 2
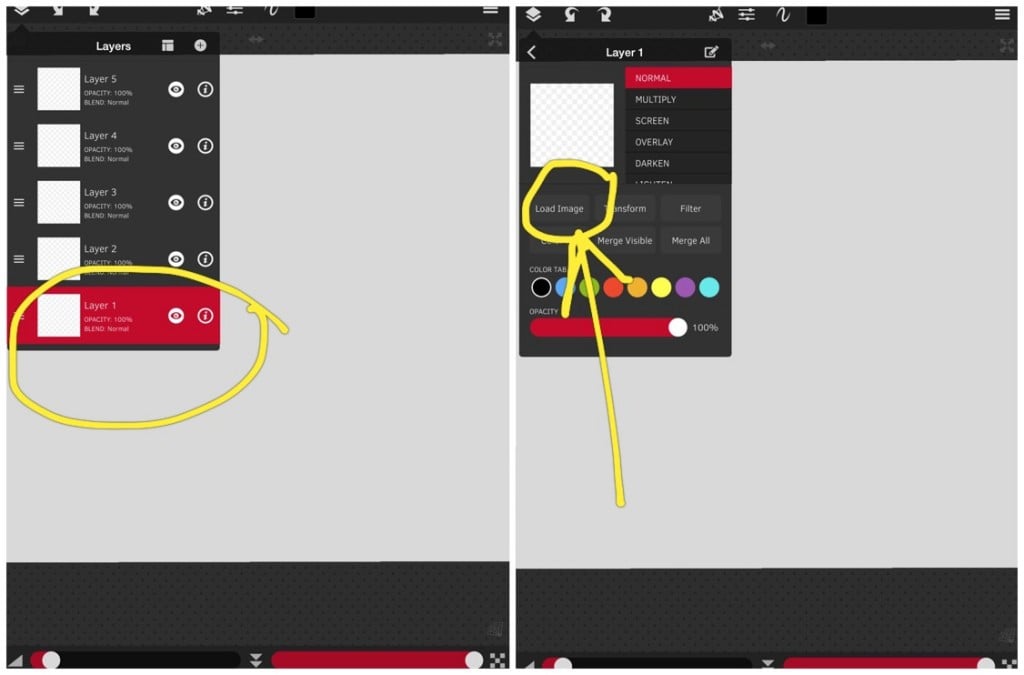
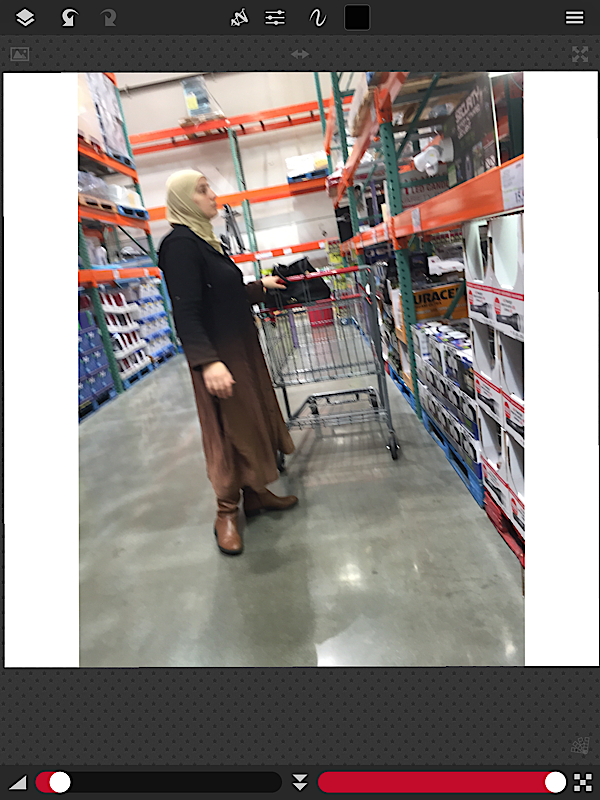
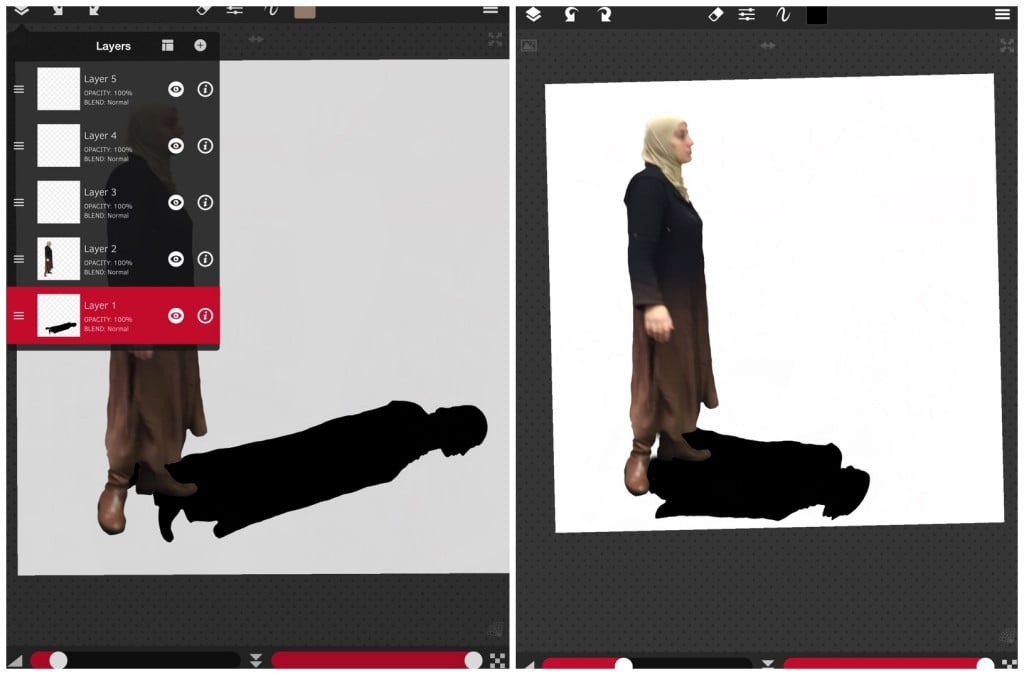
To open an image in Sketch Club, click on the layers icon in the upper left hand corner. Click on Layer 1 and then click the “i” icon to the right of the layer. This will open up a new menu where you can select “Load Image”. You will be able to choose from your Photo Library (where you can find the Camera Roll on your device)
Step 3
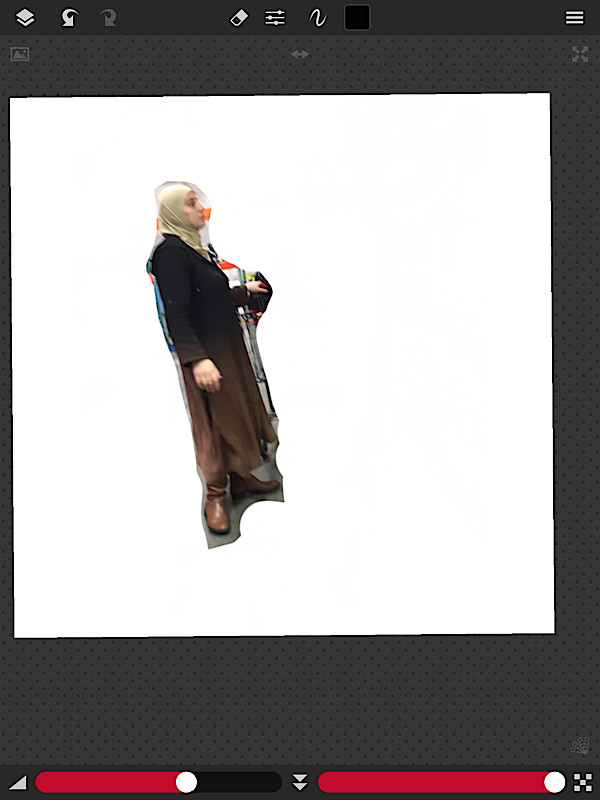
From the Tools menu at the top of the screen select Eraser. If you click the sliders right next to the Eraser icon you will be given a selection of various Eraser tools. I selected the hard eraser on the top left and set it to 100% opacity. Erase as closely as you can get with a larger brush to get rid of most of the background.
Step 4
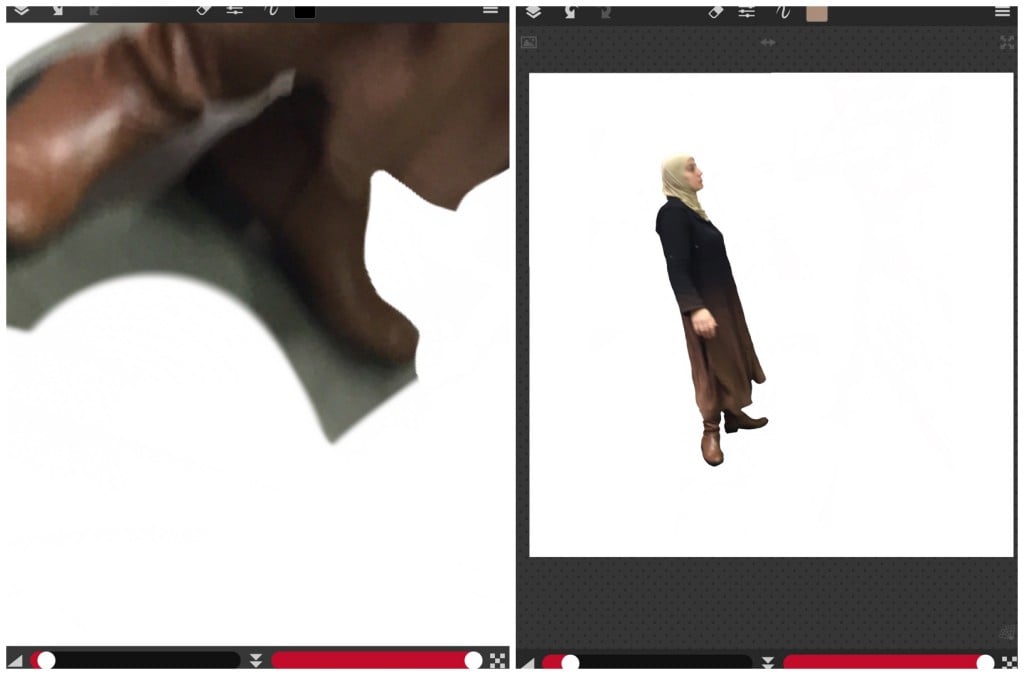
To completely erase the background, zoom in and make your brush size small (Sketch Club also allows you to rotate the image by applying two fingers to rotate). You can use a stylus for this but I used my finger. I decided rather than to try and improve the look of her left hand, I erased it completely.
Step 5
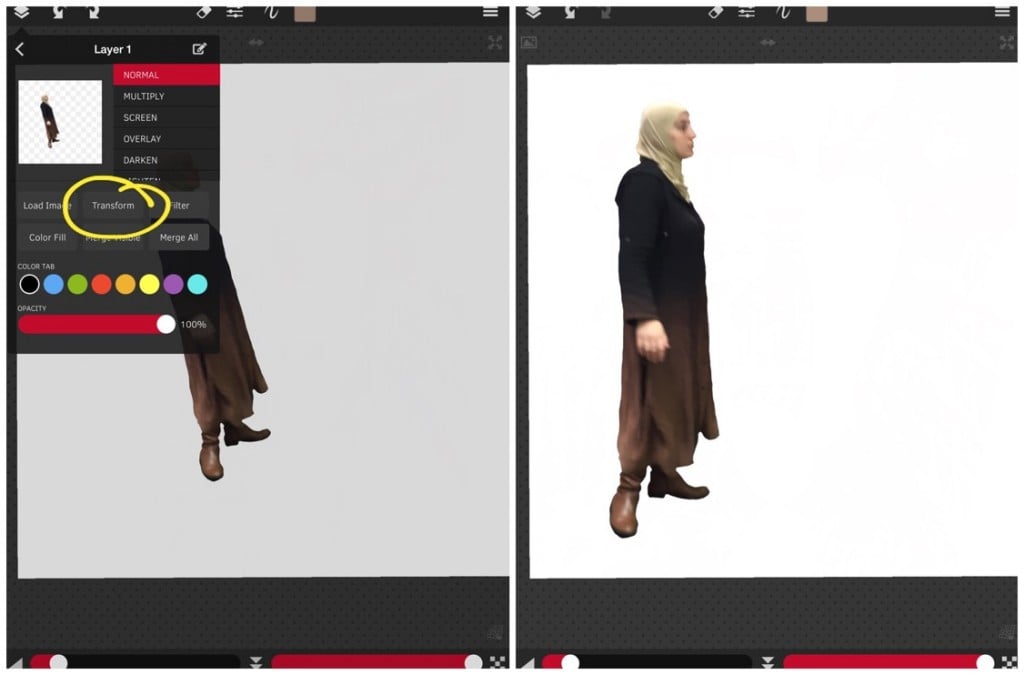
Now I want to place my image and rotate her so she appears on the “canvas” where I want her to be. By clicking on my active layer containing the woman, I can see a menu that includes “Transform” as a selection. This allows me to enlarge and rotate the image on the canvas. Be sure to click “Done” to accept the changes.
Step 6
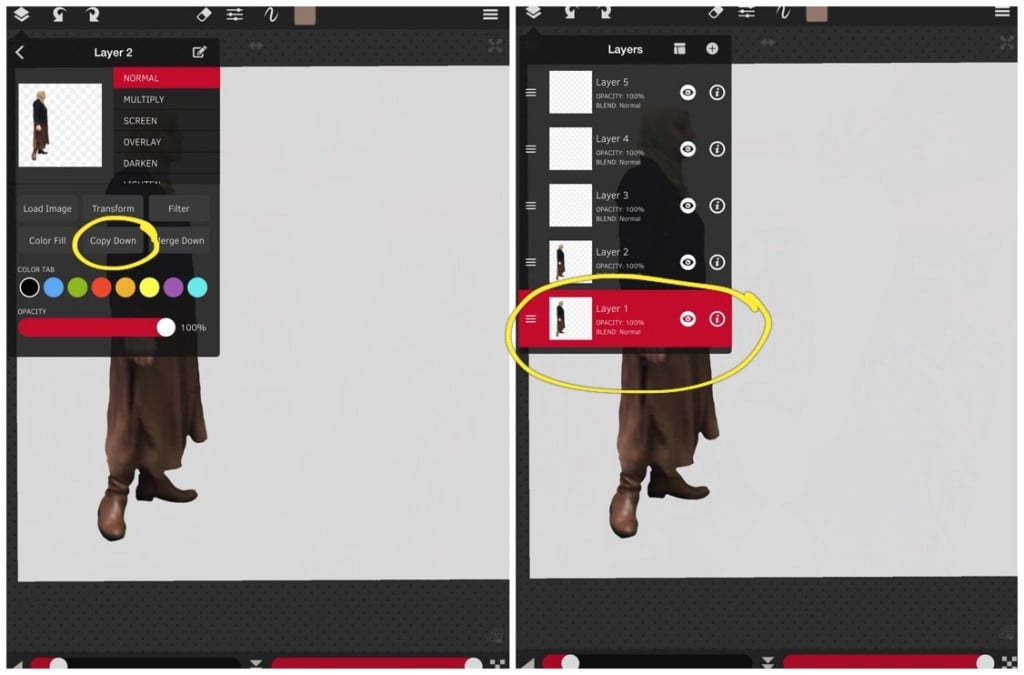
I wanted to create a shadow of the woman. To do this I moved the active layer up one row and then selected “Copy Down” to duplicate it to the layer below. On the bottom layer, click on the “i” which will take you to the layer tools. Click on “Filter” and make the adjustments as shown to turn the figure completely black.
Step 7
I want to position the shadow where it belongs, so again using the Transform tool on the shadow layer, I rotate it, resize it and distort until it looks right. I am imagining the light source coming from the upper left hand corner, so the shadow will appear shorter than the woman and it will fall to the right of her. I erased bits of the shadow near her feet that I didn’t want.
Step 8
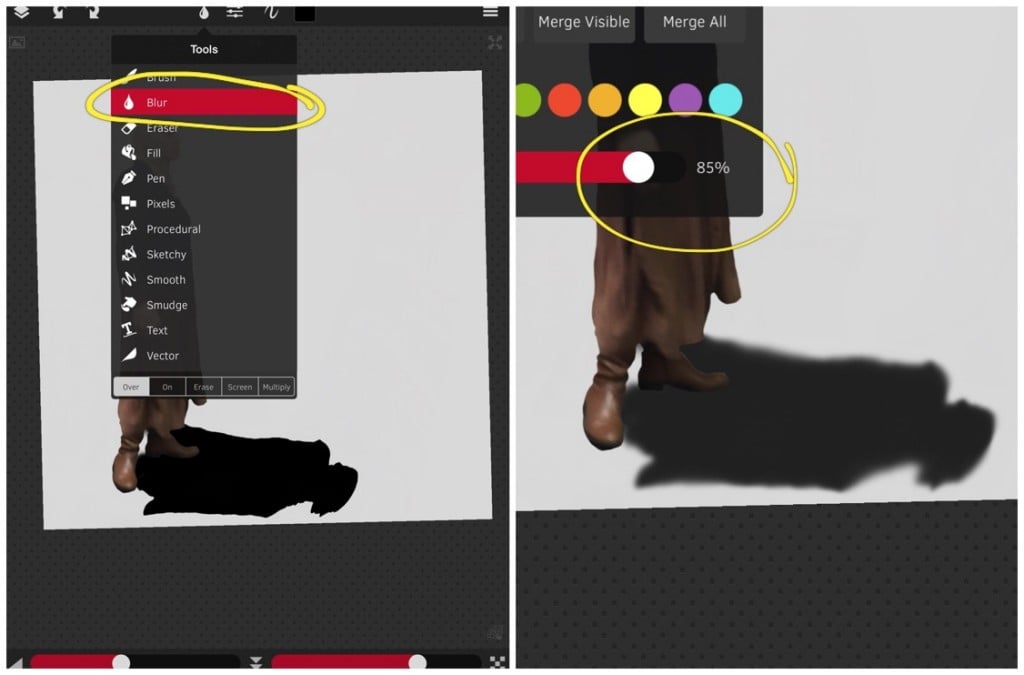
Normally shadows don’t have very sharp edges, so using the Tools menu at the top of the screen I selected a Blur brush and painted over the edges of the shadow to blur it. It’s a subtle difference, but makes it look more realistic. I also lowered the opacity on the shadow layer to 85% just to lighten it a bit. In reality the shadow would gradually get lighter from her feet to her head because of the distance her head is from the ground in comparison to her feet, but this is a fantasy edit, so I’m not trying to be exact. If you wanted to lighten it you could use a soft eraser brush with low opacity to do so.
Step 9
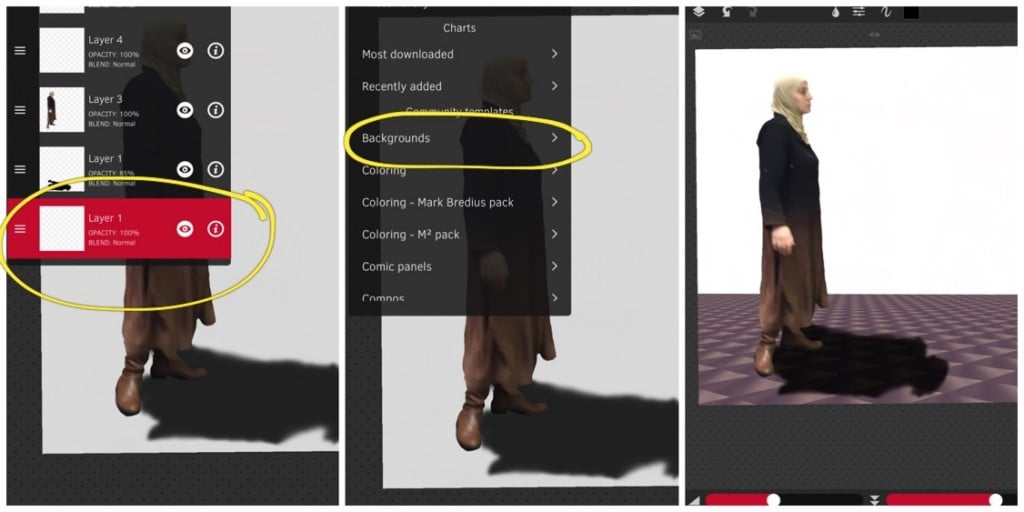
Now I want to create a floor so she isn’t floating in mid-air. I needed an empty layer below the shadow, so to do that, I simply used my finger to drag an empty layer and move it under the shadow layer.
Sketch Club has an image library containing background, textures, etc. To locate them, Select “i” on a layer, then select “Load Image” and choose the image you want. From the “Background”s library I chose one called “Abstract Mauve” which was contributed by Sketch Club user LuckyLisa. I positioned it using the “Transform” tool.
Step 10
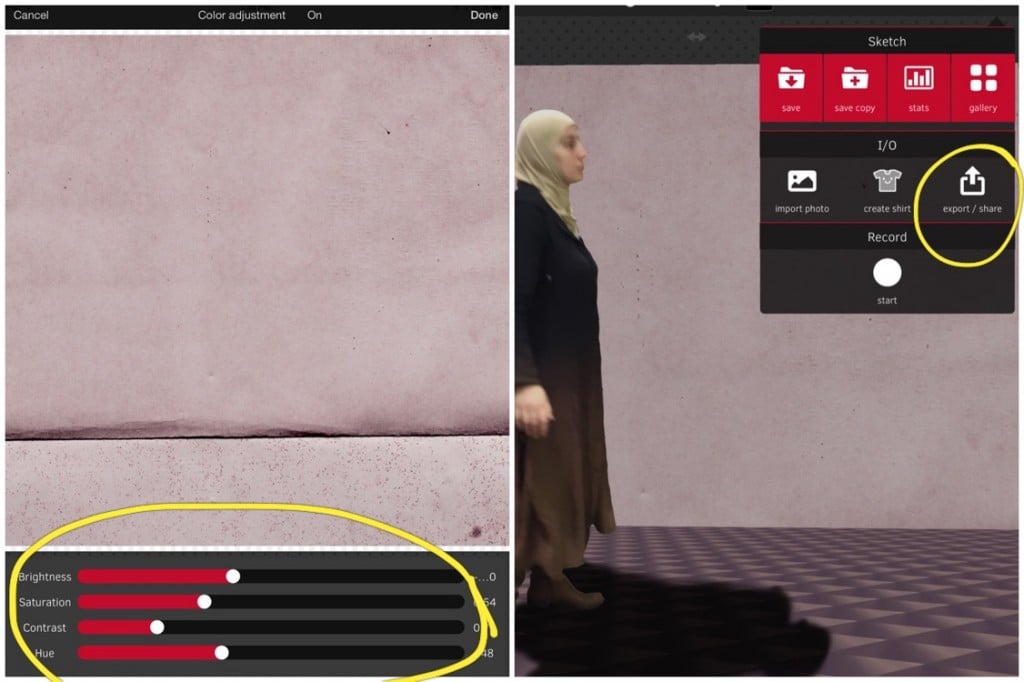
For the background wall, I needed to drag another empty layer below the floor. This time, I selected “Old Grunge Paper” by Sketch Club user Smokey from the “Paper” image library of Sketch Club. I made some adjustments to the color using the Filter Menu so that the color would be similar in tone to the floor. I’m finished in Sketch Club for now, so I saved the image to my Camera Roll.
Step 11: Brushstroke app
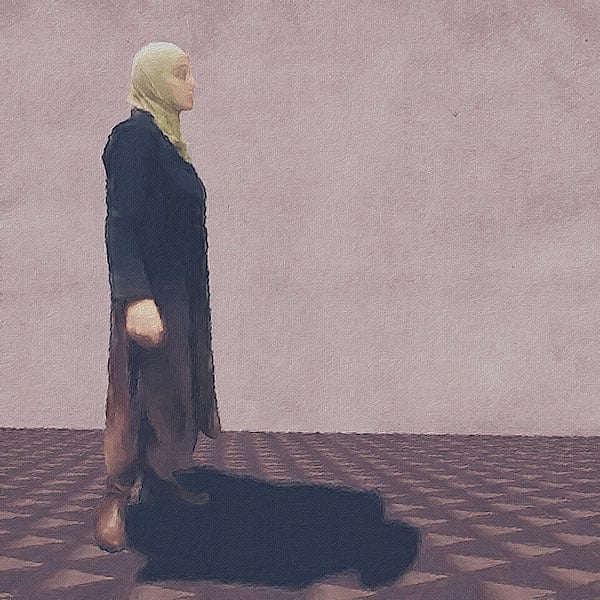
I was happy with the progress so far, but I wanted it to have more of a painterly quality, so I used Brushstroke to accomplish that.
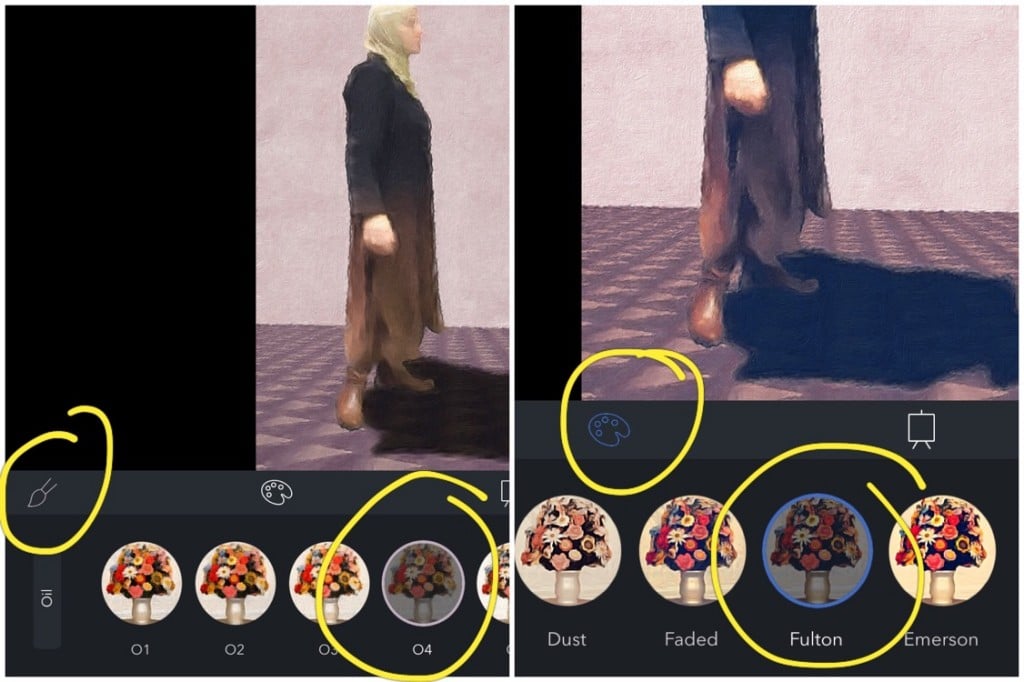
First I used O4 (Oil 4) as the preset which can be found under the brush icon. Then under the palette icon, I selected Fulton under Tones.
Using the Adjustments menu which can be found by tapping on the “Slider” icon I used the following settings:
- Contrast +29
- Saturation +56
- Density +54
- Vibrance +19
- Exposure +45
- Shadows 0
- Highlights +100
- Temperature +50
- Thickness +35
- Sharpness 0
Save this version to Camera Roll.
There is no set formula for this step, just adjust until you get the look you are going for.
Step 12: Back to Sketch Club
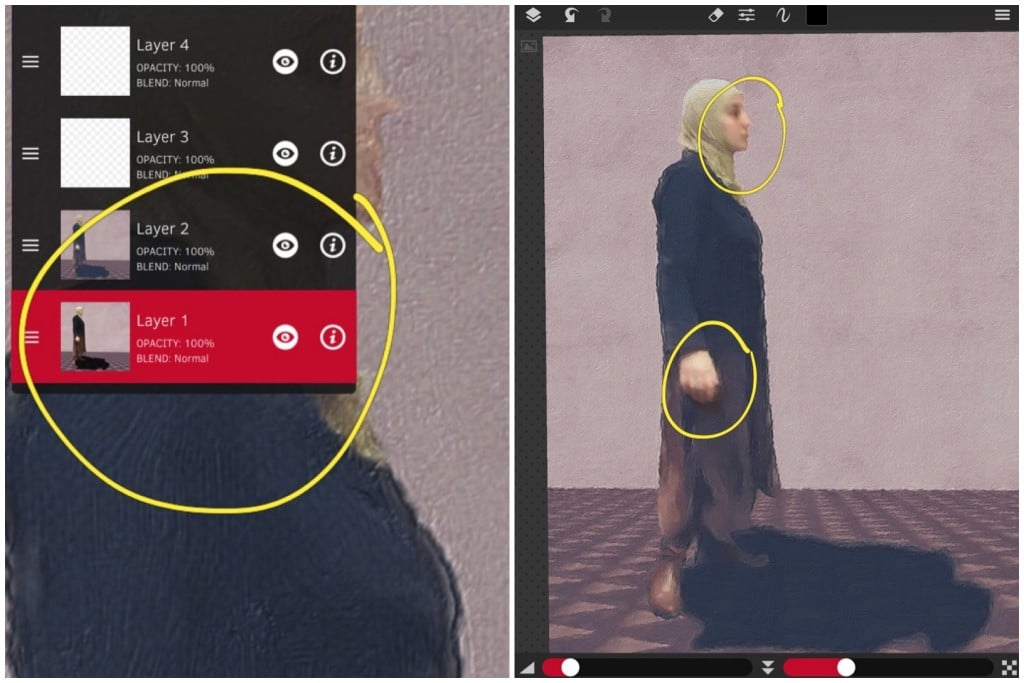
Brushstroke took away some of the detail in her face, so to bring it back, I went back to Sketch Club and layered the image from Step 10 under the image from Step 11. Using a soft eraser brush set at low opacity, I gently revealed some of the features of both her face and hands. Save this new image to Camera Roll.
Step 13: Using Mextures
Now I needed to add some light. Since I created a pronounced shadow I need to have a light source that is visible. Using the image saved in Step 12, I applied my Mextures custom formula HFGSMEI to add light from the upper left corner. (Note: Mextures formulas are shareable – from the opening menu select the Formula Flask, click the red + button and type in the 7 letter formula code). Save to Camera Roll.
Step 14: Using Brushstroke and Snapseed to finish
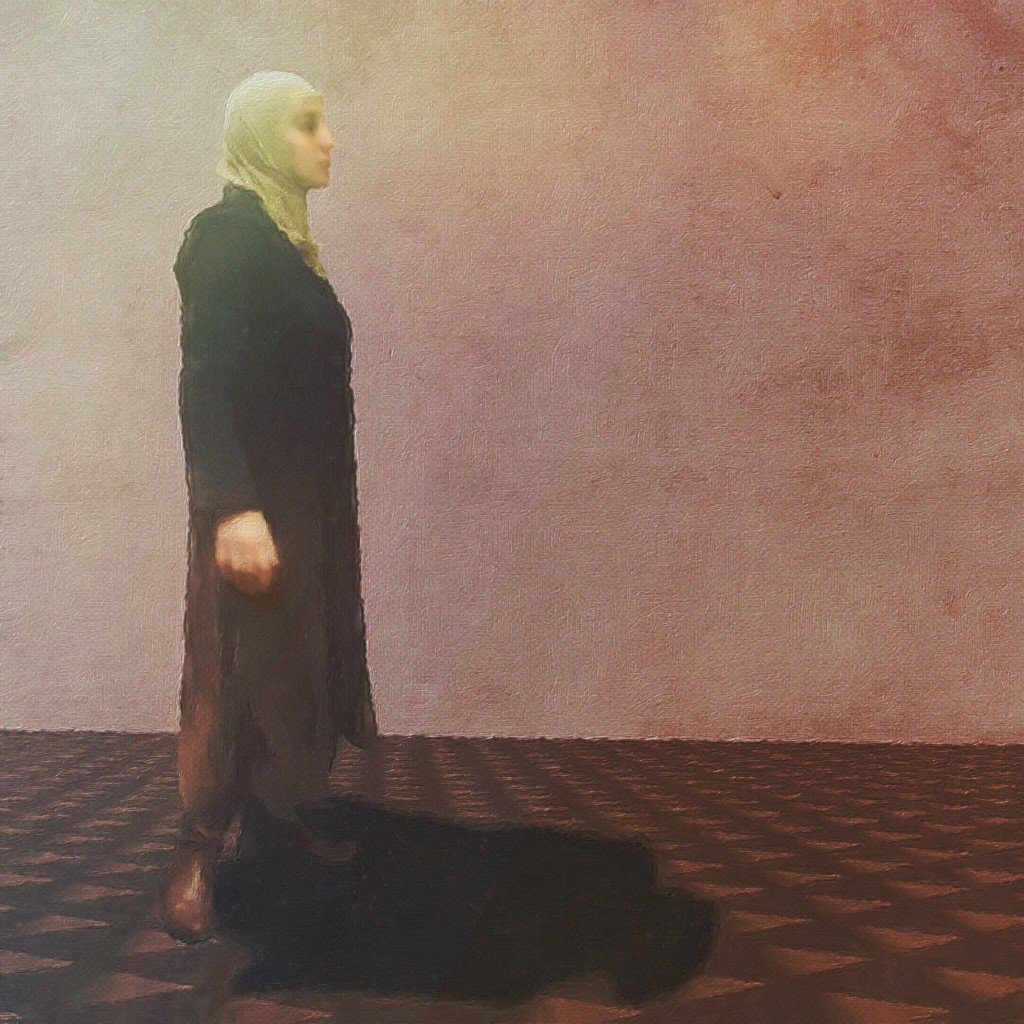
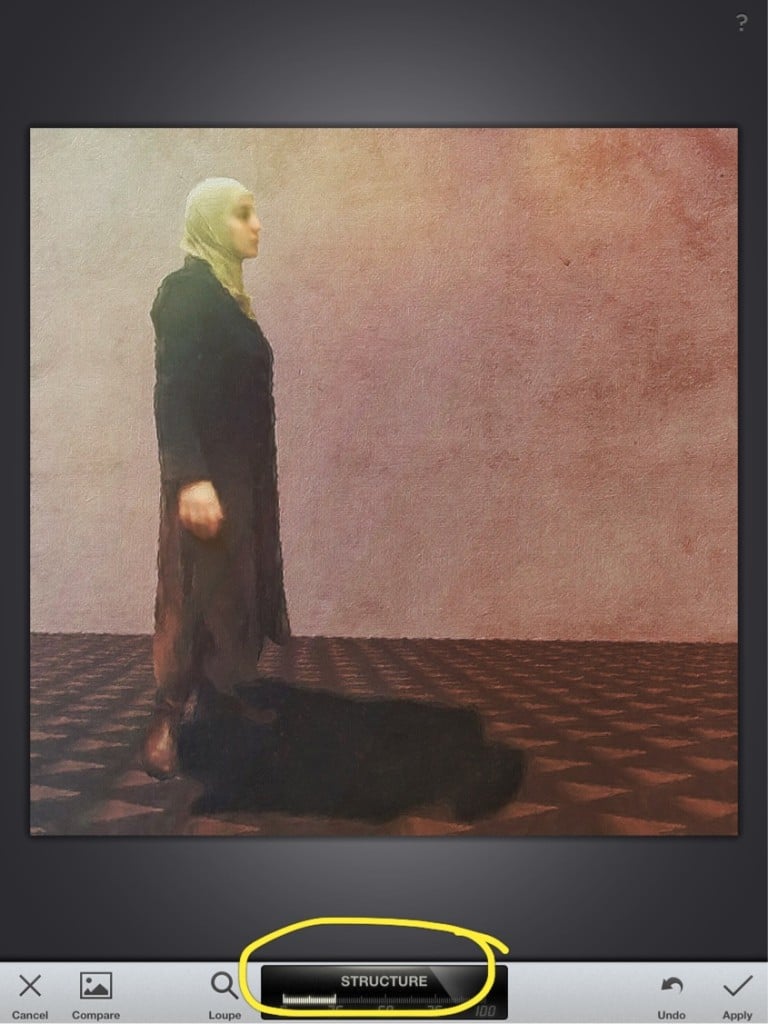
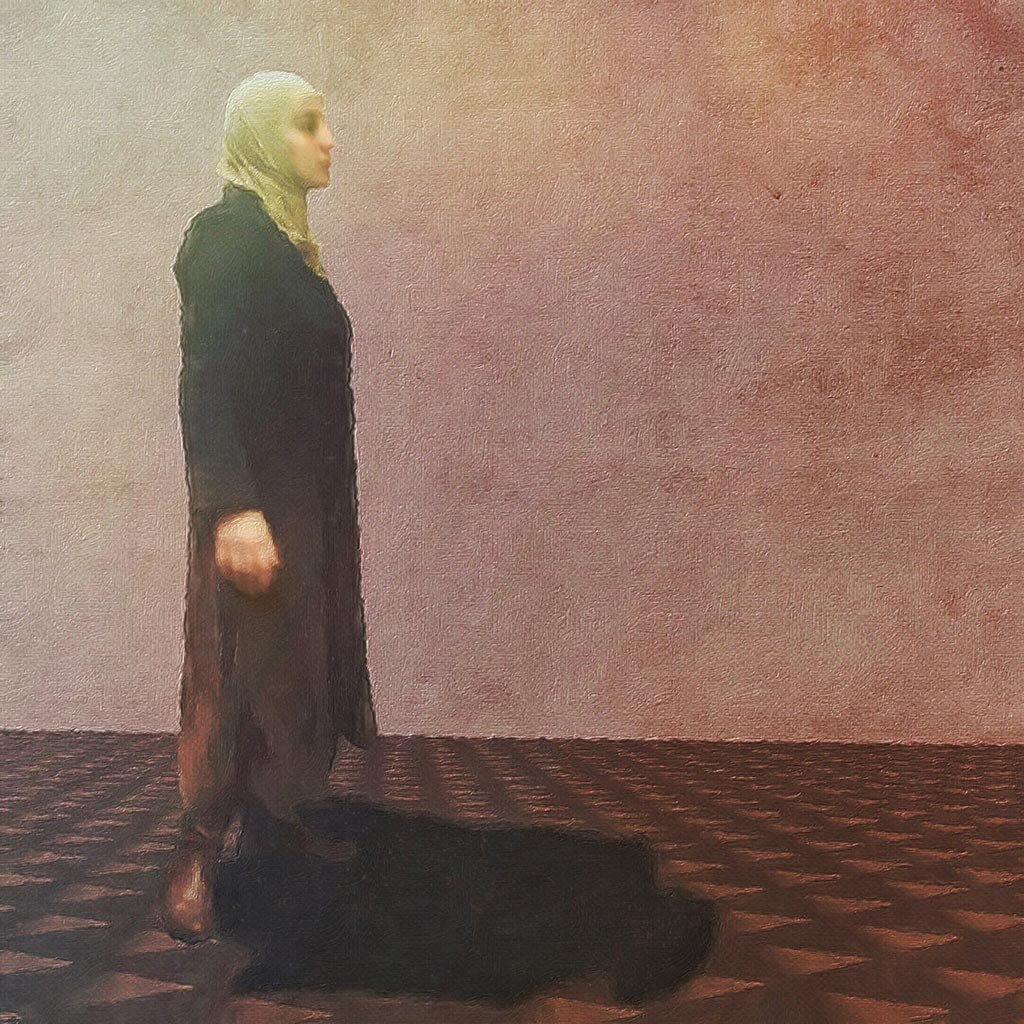
The final step was to bring out the texture created in the Brushstroke app to enhance the painterly quality. Using the image created in Step 13, I opened it in Snapseed and increased the Structure which can be found under “Details” to +25. Save to Camera Roll as the final image.





Andy, thanks for allowing me to kick off this series. I hope to see many more artists participate to learn from them!
Always appreciate ur tutorials @geri
Just wanted to say thanks to Stef! I appreciate it!
Thanks again Geri. Whenever I find my motivation or creative inspiration is a bit lacking, all it takes is to read one of your tutorials and I am raring to go once more. I really must try to shoot some strangers in the aisles after seeing this!!
It is always interesting to see your process, Geri! Thank you for your generousity in doing this.