Many photographers will tell you that the iPhone, as a camera, has some annoying limitations which make is tricky to take the perfect photo. I don’t entirely agree with this philosophy, as I believe that most common “fails” are usually down to user error and others are becoming easier to fix thanks to advanced camera technology and smart photography tricks. Sometimes simply cleaning the lens or letting auto-focus take over is all it takes; other times, you’ll need to spend extra time composing or working with manual settings.
No matter what your problem during composition, shooting or editing, though, there’s a hack out there to fix it.
1. You don’t have a well-defined subject.
Without a focal point, there’s nothing to draw the viewer’s eye into the image. While there can be a few points of interest in one shot, it’s best to pick just one main subject.
In the example photo below I was trying to capture the leading lines created by the perspective in this French street scene. However, because of the clutter created by the people in the street the eye doesn’t know where to look and the feeling I wanted to capture at the time was lost.
In contrast, in the photo below I chose a neighbouring street that was empty. Due to the reduced clutter, the photo is more defined and the feeling I was trying to achieve in the first image is so much stronger. The leading lines are more obvious and therefore the eye is drawn into the photo.
Other ways to clearly define the subject of your photo include filling a large portion of the frame with it or positioning it against a dark background to make its colors pop.
2. You can’t seem to take a flattering portrait.
If you’ve ever opened the front-facing camera by accident, you’ve probably caught yourself from a low angle, which can be pretty unflattering. The same rule applies when you’re taking a portrait of someone else. If you can’t seem to capture your subject favorably, position the lens higher, above the subject’s face, and angle the camera down slightly.
3. There’s too much background clutter.
Check the frame for unsightly or unimportant objects. Unless that random person in the background or wooden bench adds character to your image, move it or reposition yourself to get it out of the frame.
Also, look for any areas within the frame where the highlights are too-bright and bleached out or any bold colors that draw the eye away from the subject. To correct these, adjust the exposure so that you can retain the detail in the highlight areas or reposition your camera to avoid the reflections.
4. The background is in focus, but the subject isn’t.
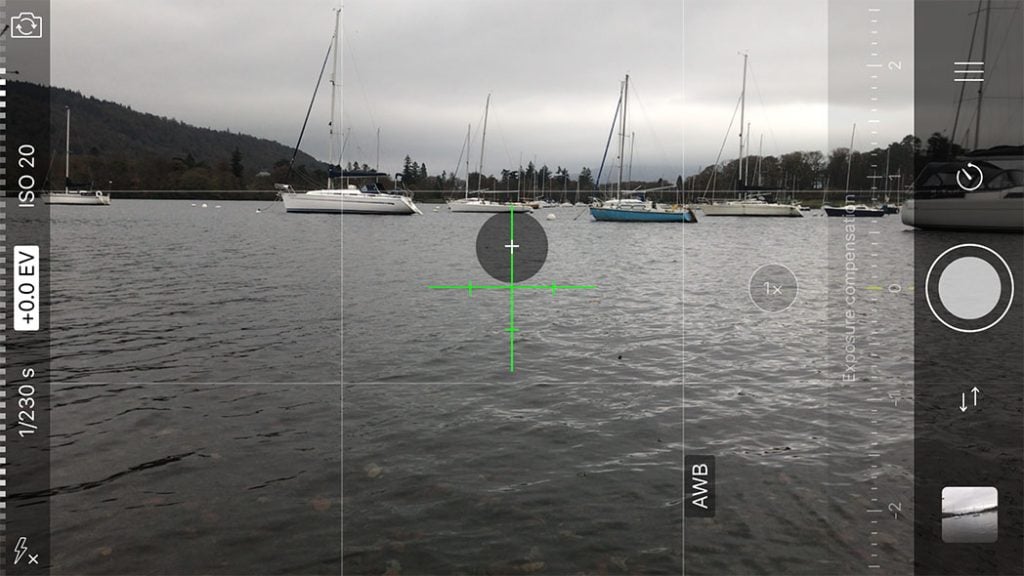
Smartphones have a fixed aperture, which doesn’t allow for much control over depth of field. The wide focal area of the smartphone causes it to auto-focus on the most prominent part of the scene, which may sometimes be the background instead of the subject. To fix this, lock the focus on your subject. There are slight variations between mobile phones and third party apps, but most of them will let you lock the focus by tapping and holding the screen on your subject. Once you lock the focus, it won’t change even if you move the camera.
5. You’re having a hard time capturing motion.
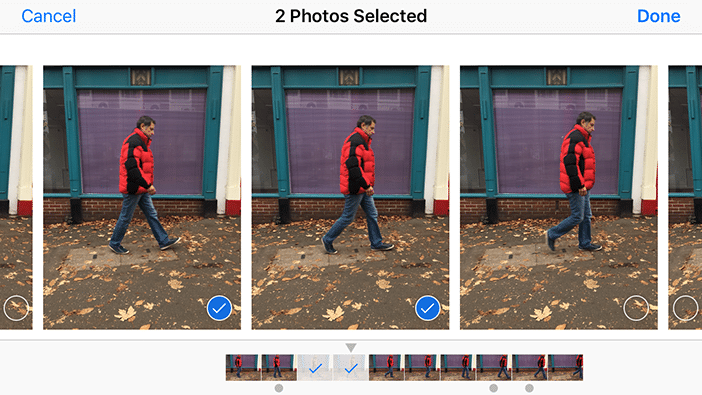
If you’re photographing something that’s moving, a slow shutter speed can result in a blurry photo. Since certain smartphones will auto-adjust shutter speed based on light conditions, and not whether or not you’re shooting motion, you can use a third party app like ProCamera and Camera+ for manual control over the shutter speed.
You can also use Burst Mode to capture motion – your camera will take a series of photos and you can choose the one with your subject in the best possible moment.
6. The horizon is crooked.
No matter how much you try to keep your camera straight, it’s so easy to take a photo with a crooked horizon.
This can cause a problem during shooting, or you may not notice that it’s off-kilter until you start editing. Use the grid to straighten out the horizon, either when you’re composing your shot or when you’re editing the image. Alternatively, some apps such as ProCamera and Camera+ have an horizon level feature that will tell you when your framing is level.
Note that if you have to straighten the image to much during editing, you will have to crop out a portion of the image so it may change the dynamics of the composition.
7. The photo is too light or dark.
Often a photo will turn out to be too light or dark. This is often caused by the camera analysing the scene and setting an automatic exposure level that captures a mixture of dark and light areas. Unfortunately, this can often result in the detail in the dark or light areas of a photo being lost.
This means a photo can either be too dark or underexposed in which case the results are flat and lifeless.

Example of an underexposed Photo
Or to light (over-exposed) in which case all detail in the light areas have been lost.

Example of an over exposed Photo – See how the detail in the sky is lost
To correct this we need to manually adjust the exposure levels of the photo. Using the native iPhone camera app this can easily be done by tapping and holding the screen where the subject is located until the focus/expose is locked. Then, swiping your finger up or down on the screen will adjust the exposure levels to either brighten or darken the image.

Example of an evenly exposed photo
8. The image is blurry.
There are two main reasons why your image may be blurry: camera shake or low lighting. To avoid camera shake while shooting, place your elbows on a hard surface; pull your arms close to your body; use a mount or tripod; or use an external shutter release. In low light, the camera’s shutter will stay open for longer to get as much light as possible, which presents more opportunities for blur and noise. Shoot in a well-lit location with natural light, or try the Cortex Camera app, which takes a recording of the scene and then creates one well-exposed image.

Handheld nightime photo using Cortex Cam
9. You’ve over-edited a photo.
Over-editing can make your image look unnatural. I always say, ‘Edit to enhance a photo, not mask the flaws in a badly taken photo’.
So, when it comes to taking the photo in the first place, take time to compose your shot, limiting the changes you’ll need to make afterwards. Then, think about what you want to change before you start tweaking the photo. If you’re working on a portrait, you can smooth the skin or blur the background. If you took the image on-the-fly, it may need to be cropped to put more emphasis on the subject. If the color looks dull, adjusting the clarity, contrast or temperature could help. Save both the original and the edited versions, then come back to them after a little while to see how the edits look.
10. The quality looks poor when you print.
Even though modern smartphones have high resolution cameras, your image can still look pixelated when you print it. This can happen if you used the digital zoom when shooting or if you cropped the image.
The best defense against this is to pay close attention when composing. Frame the image the way you want it to avoid cropping, and if you have to zoom, move closer to the subject with your feet not the digital zoom. You may also want to invest in a good quality iPhone photo printer which could help to improve the quality of the final printed image.
As with anything one of the best ways to correct any mistakes you make is to practice, practice, practice. Making mistakes is sometimes a good thing as it allows you to identify them and ensure that you don’t make them again in the future.
Have you found ways to fix all-too-common mobile photography mishaps? We’d love to hear them in the comments below!


1. When I take close-up portrait photos, I place the camera lens at eye level. The person in the final image looks more engaging.
2. If the subject is moving, I usually lock the focus and take multiple shots to prevent blurry photos.