We’ve all taken photos with great potential, only to get home and realize there was a bit of trash on the ground near the subject or an annoying telegraph wire or signpost. Or, you’ve taken the perfect portrait but your eye is drawn to the large spot on the subject’s chin!
With the right app, fixing these kinds of problems is simple. While there are many such apps, we’ve chosen the TouchRetouch app and in this tutorial you’ll learn how to solve common retouching issues, so let’s get started.
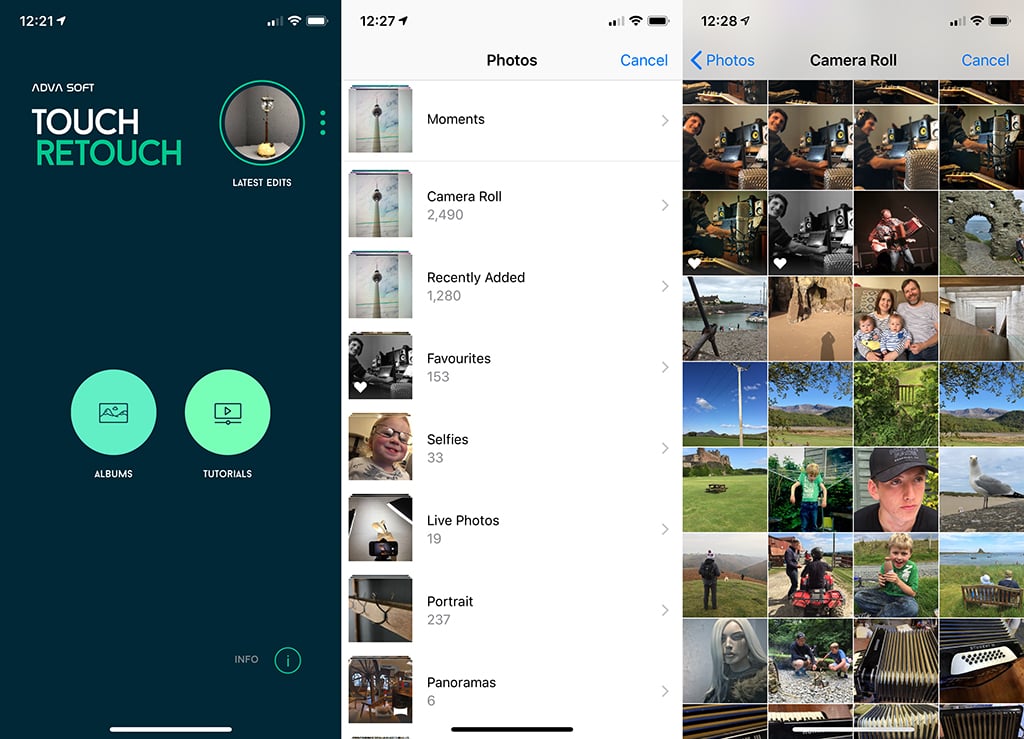
Find the Image You Want to Work On
The first step is to load the image you want to fix into the app.
- Open the Touch Retouch app
- Tap the “Albums” icon/button
- Navigate to the album where your image is
- Tap the photo
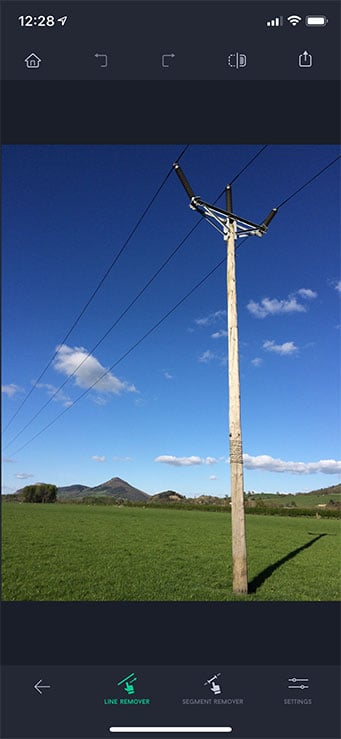
You’ll see the selected image displayed in the app. The top and bottom navigation buttons are explained below.
Top navigation bar:
Bottom navigation bar:
- Object Removal – Easily remove unwanted objects from photos
- Quick Repair – One-touch removal of small objects and blemishes
- Line Removal – Get rid of unwanted linear objects from images
- Clone Stamp – Remove unwanted items by covering with a copy of another part of the image
Removing Lines
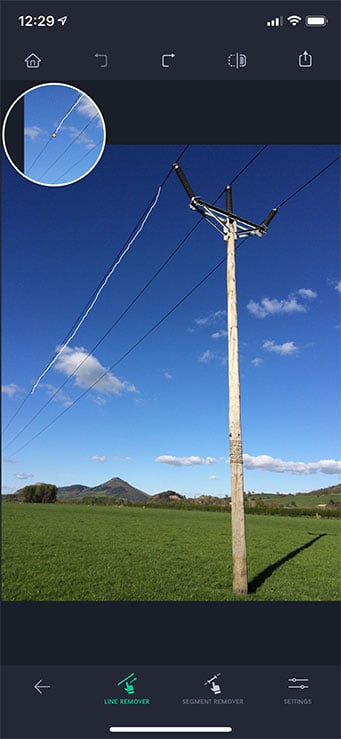
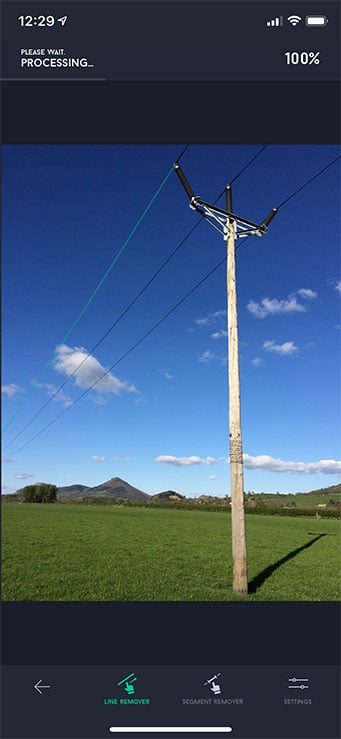
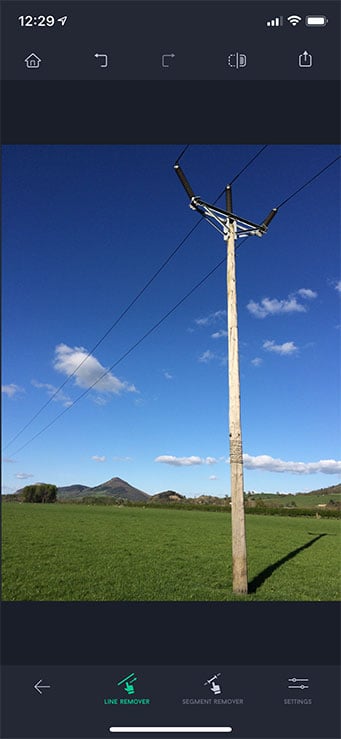
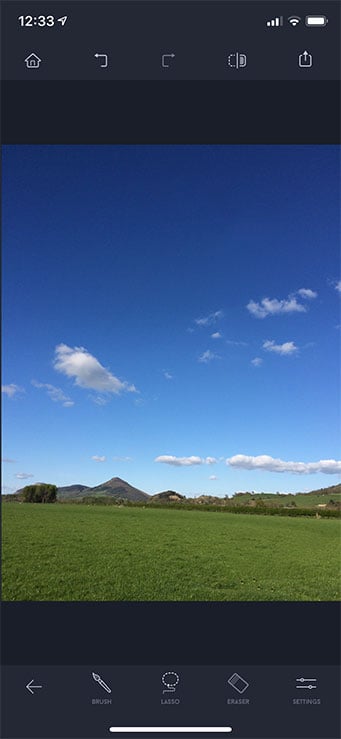
In this example, I wanted to remove the power cables and the pole. Firstly, I removed the power cables using the Line Removal tool. It’s not necessary to be too precise or even to mark the whole length of the line you want removed – the tool is clever enough to find the actual line, including its whole length.
Line Removal is a magical tool for removing power lines, telephone wires, utility poles, antennas, etc. from otherwise perfect nature, urban, architecture or street photos. This innovative tool can even remove wrinkles, scars or surface breaks – straight or curved.
Select Line Removal > Line Remover (and then Segment Remover, if you are trying to remove a line segment).
Use the Settings menu to set the Line Thickness to Thin, Medium or Thick.
Mark the line (the segment) to be erased. If you need to remove it whole, only a part of the line should be highlighted. You do not have to be precise – the app will find the line.
However, if you are trying to remove the line segment, the whole segment should be highlighted.
When you are done, the line (the segment) simply vanishes from your photo.
Removing Unwanted Objects
Use the Object Removal tool to get rid of any undesirable objects in your photos. It doesn’t matter what these are – furniture items, trash cans, street signs, trees or even whole buildings. They can all be easily erased from your images in just a few simple steps.
- After opening an image, select the Object Removal tool from the main menu.
- Mark the content to be removed with the Brush or Lasso.
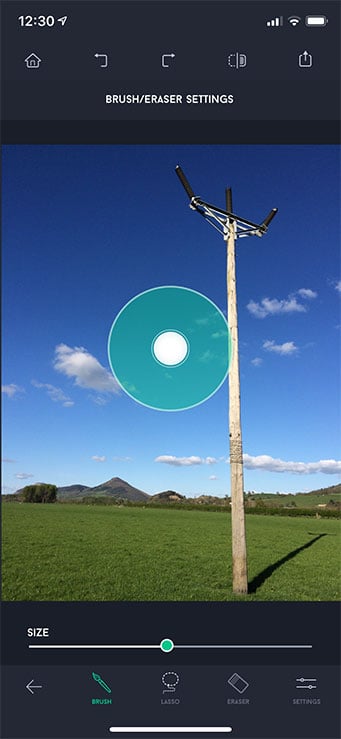
To use the Brush, click the Brush icon, then paint over the unwanted content to highlight it green. To adjust the size of the brush, tap Settings in the lower-right corner of the screen.
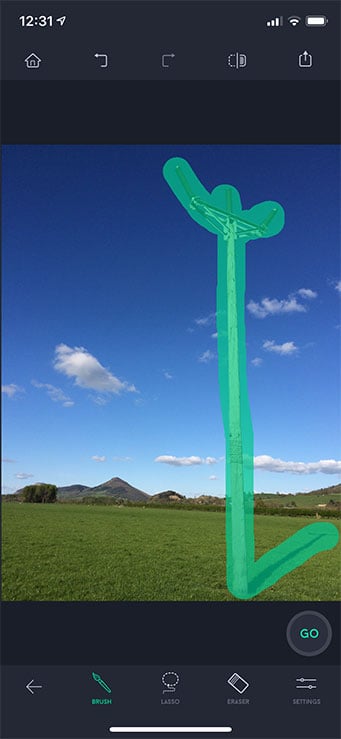
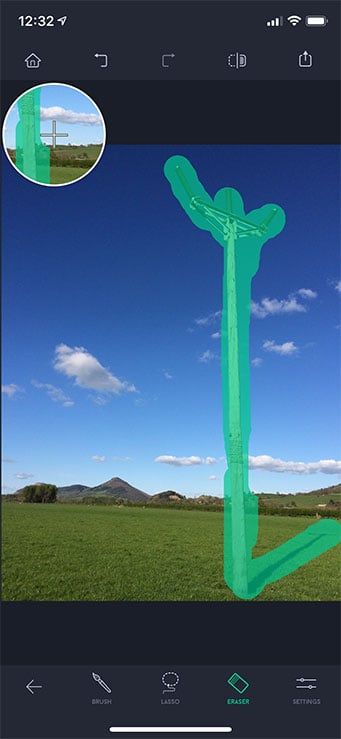
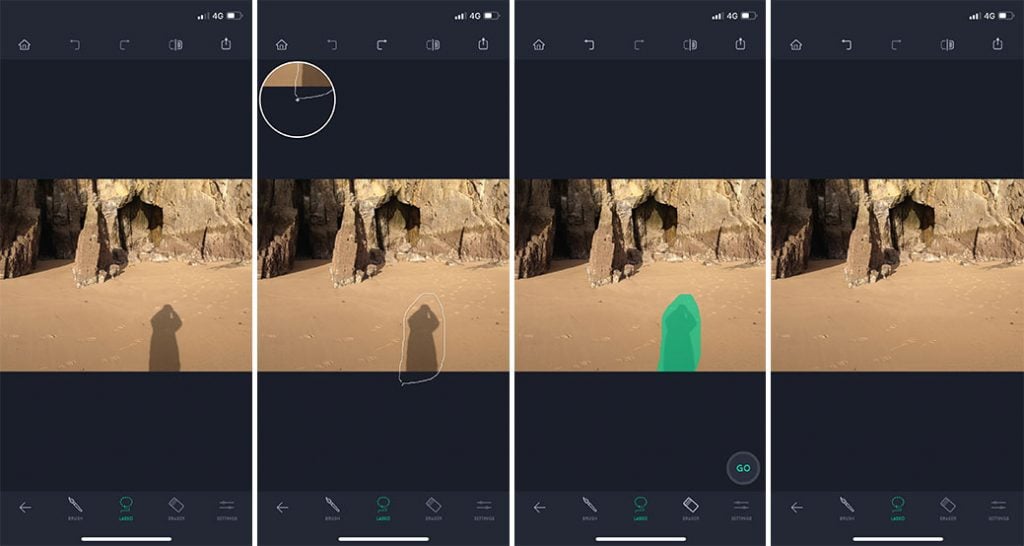
Continuing from where we left off with the previous example, here’s how I removed the wooden post and even its shadow. I selected a suitable brush size (neither too big or too small), marked the area to be removed, then used the Eraser tool to refine the selection area.
To use the Lasso tool, click the Lasso icon, then use your finger to draw a continuous line around the object that you want to be removed from the image. A green mask will appear over it. Simply click the “Go” button and the offending object is removed.
You can mark multiple items and then TouchRetouch will remove them all in one operation.
The app comes with a handy loupe to help you be accurate when marking content. It shows you exactly what’s under your finger. By holding your finger on the object you are marking, you can drag the loupe to any location you want with any of your other fingers.
Use the Eraser to unselect those parts of the marked area or areas you don’t really want retouched. In the Settings section set the size of the Eraser.
Remove the unwanted content by tapping the “Go” button in the lower-right corner of the screen.
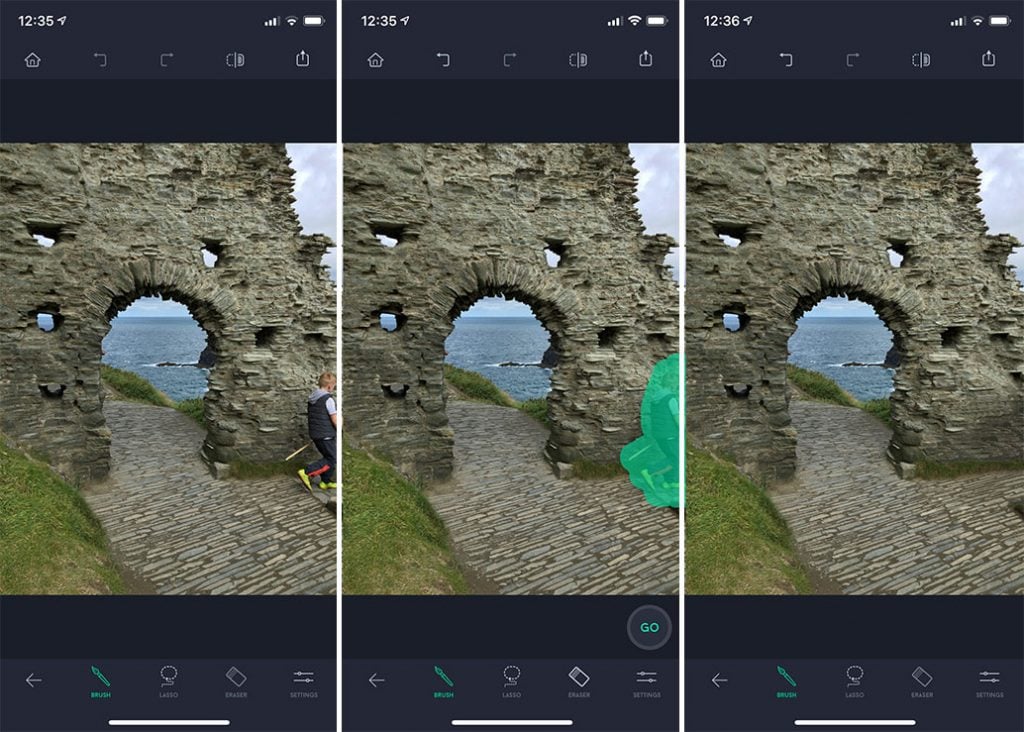
In the next example, I was able to easily remove the boy exiting the frame using the Object Removal -> Brush tool.
TOP TIP: If you can’t remove an object by one-step retouching, try to remove it in sections or by retouching the same place in your image several times. If automatic retouching doesn’t help, try to use Clone Stamp to remove an object manually.
Removing Small Objects Quickly
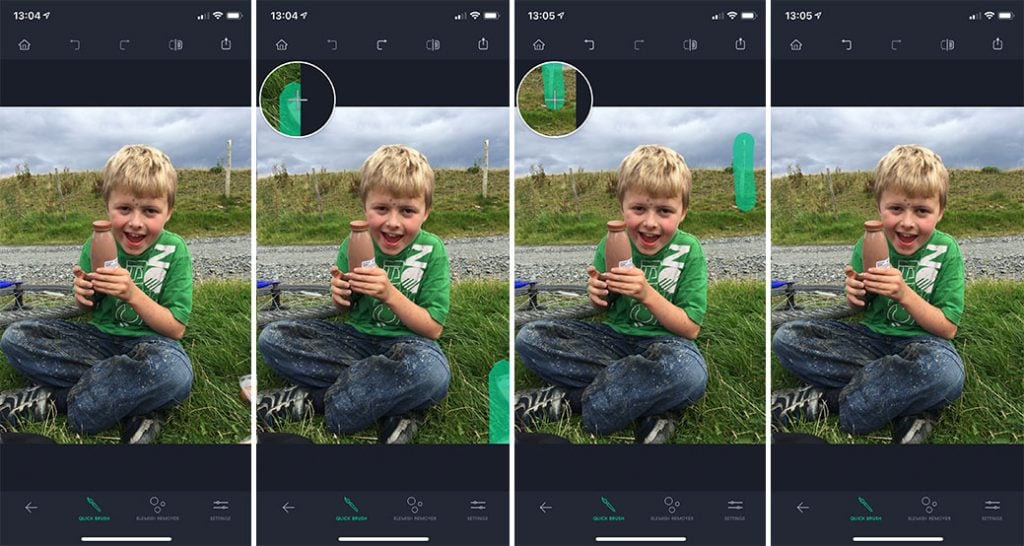
In this example, I wanted to remove the packaging at the bottom right and the wooden post at the top right. As both objects were small and fairly simple in shape, the Quick Repair brush was the perfect tool.
With the Quick Brush tool, you can remove small items from your photos more quickly and without having to confirm the removal. If you want to erase large objects or objects with awkward shapes, it’s best to use the Object Removal tool instead.
Tap Quick Repair > Quick Brush.
Start marking the object you want taken away from your photo by drawing over it with your finger. The moment you release your finger, the object will disappear. There’s no need to tap any extra buttons!
Removing Blemishes
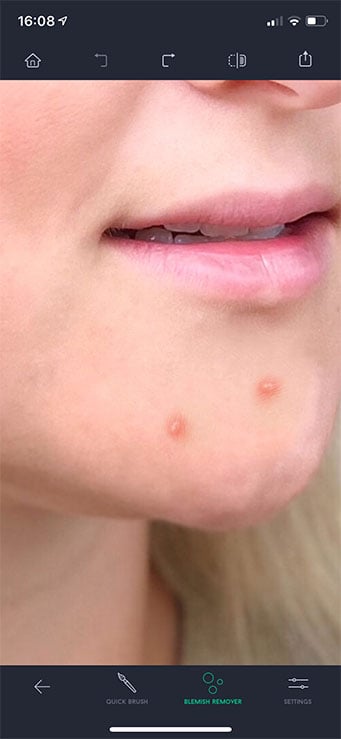
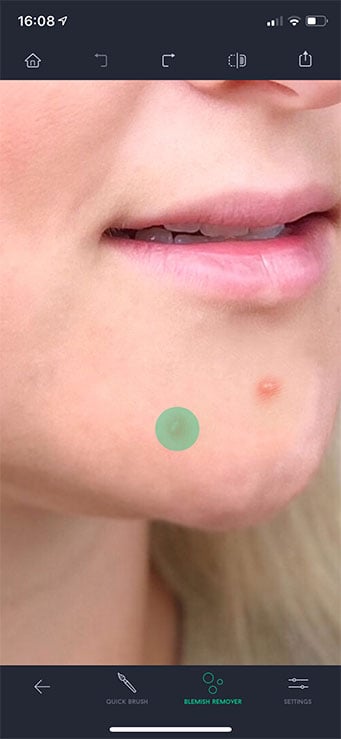
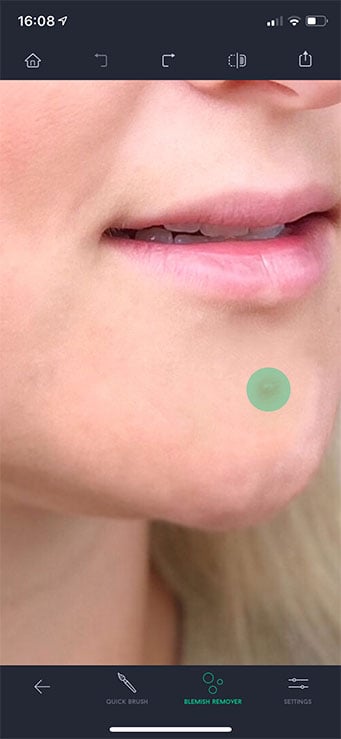
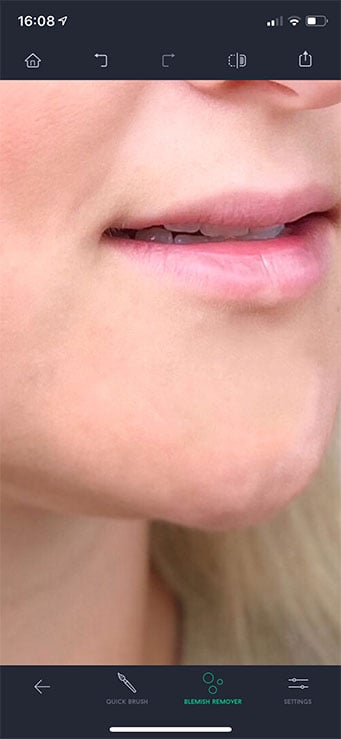
In case you need to fix minor imperfections on your face (like pimples or freckles), some small spots of dust on your camera lens, or other point-like spots with just a few taps, use the Blemish Remover.
Tap Quick Repair > Blemish Remover.
If needed, adjust the size of the Blemish Remover in the Settings menu in the lower-right corner of the screen.
Tap an object to have it removed. The object will vanish the moment you take your finger off the screen. The tool looks for any blemishes in the selected area and removes them all without blurring the background.
Using Clone Stamp
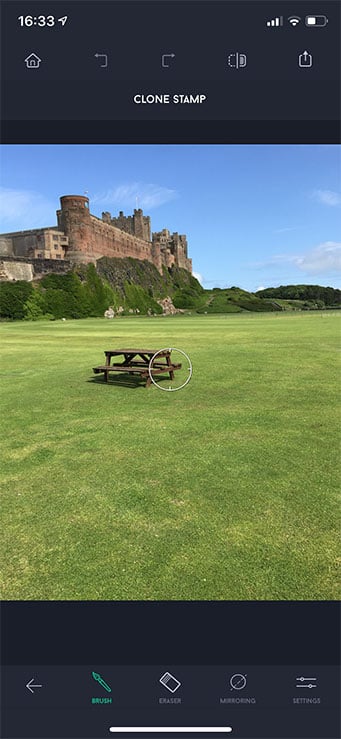
With the Clone Stamp tool, you can manually retouch photos. It doesn’t matter whether you want to remove a defect from your image or repair a background damaged after removing an unwanted item from it, the Clone Stamp is a really useful tool. It can also be used to duplicate objects in a photo. The tool works by allowing the painting of one part of an image over another part of the same image.
Select Clone Stamp from the main menu.
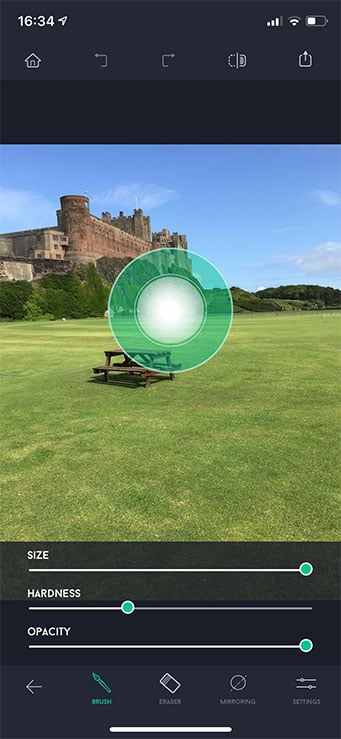
Adjust its size, hardness and opacity as desired.
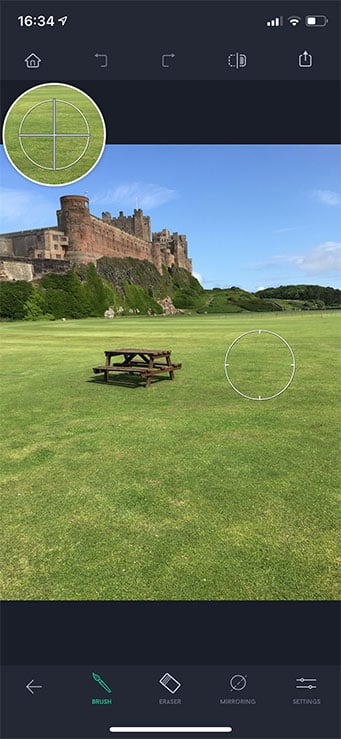
Drag the source pointer to the location you want to clone from, or just tap once where you want to clone from.
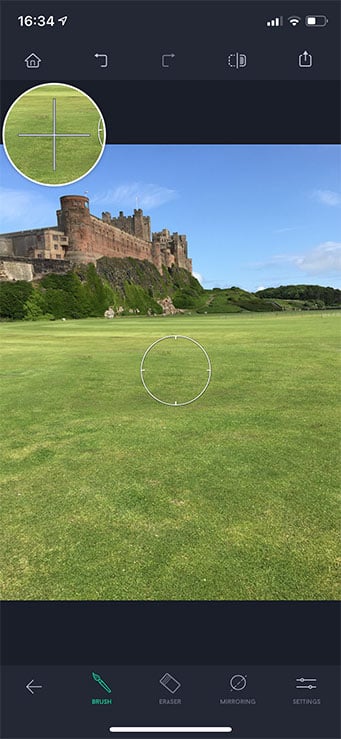
Start brushing with your finger where you want the cloned content to appear. As you brush, you are drawing with the copied pixels.
If needed, use the Eraser to remove the object or area that has just been cloned.
In this example, I wanted to remove the wooden picnic table. While I could have used the Object Removal tools, I chose instead to use the Clone Stamp tool to copy the pixels from a neighboring area over the table. This was particularly appropriate because the surrounding area is fairly similar.
Summary of using the TouchRetouch App to remove objects from your photos
In this tutorial, you’ve learned how to fix several common image faults using the TouchRetouch. You can now remove unwanted lines, small and large objects, and blemishes, and even copy regions of an image over unwanted objects.





After removing the object in question, how do I return the photo to my photo album?
Hi, If you tap the little arrow in the top right corner you can then select to either save as a copy or modify the original. These options will save the file to your camera roll.