VSCO, short for Visual Supply Company, but pronounced “VisCo”, is a popular camera replacement and photo editing app. The app is available on both iOS and Android platforms and comes with a suite of photo filters. The filters do an excellent job of emulating the colour saturation and feel of old-school film cameras. This is where VSCO has excelled and it’s one of the reasons why many photographers opt to use the app as part of their post-production workflow.
In the summer of 2016, VSCO pushed out a major update to the app which presented users with a completely new design change. This had mixed reviews and as a result a lot of people didn’t really take to the new look VSCO very well, with many complaining that the navigation was extremely confusing and hard work. This was one of the reasons why I gravitated more towards apps like Snapseed.
Recently, I noticed there was a new update to the app which highlighted a new navigation structure as one of the reported changes. I decided to pay VSCO a visit and check it out to see how the app has changed.
In this VSCO tutorial guide, I’ll show you how to use the VSCO app by walking you through the layout, the basic features and settings as well as illustrating how to edit your photos using VSCO.
VSCO Tutorial Table of Contents
Chapter 1 – VSCO App Interface and Layout Chapter 2 – How to take photos using VSCO Chapter 3 – How to edit photos using VSCO Chapter 4 – Making Custom Adjustments To Your Photo Chapter 5 – How to share photos using VSCO Chapter 6 – Final thoughts…VSCO App Interface and Layout
One of the first things you will notice about VSCO is the beautifully designed interface and contemporary look that the app has.
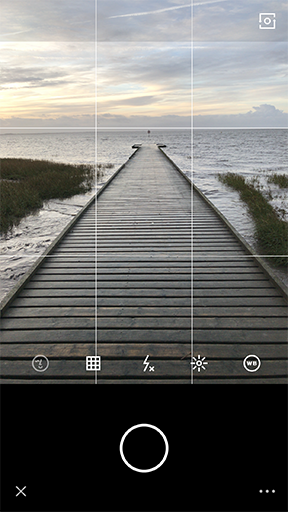
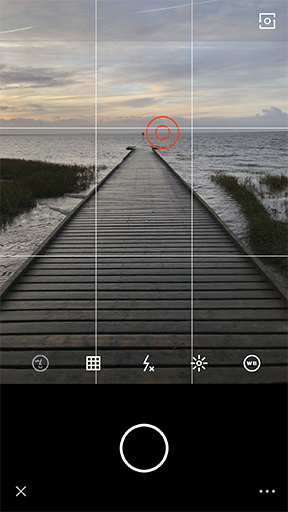
On opening the app, you are presented with the cameras viewfinder which has a very simple and minimal interface. The main screen area is devoted to the viewfinder itself. In the top right of the viewfinder is the front/back facing camera selection button. Along the bottom edge of the viewfinder, a section of camera setting options are displayed. These include:
- The face recognition tool
- Grid overlay options
- Flash settings,
- Exposure compensation
- White balance
- Manual focus
- ISO settings
- Manual shutter speed control
- Tap screen shutter release control
We’ll explore this section a bit more closely very shortly.
Below the viewfinder is a large circular shutter release button and below this, two buttons; a small cross which gives access to VSCO’s photo gallery or library as VSCO calls it, and three horizontal dots which hides/shows the camera setting options.
So, that is the camera layout explained. Now let’s take a look at the options hidden within the library section.
If you tap the cross in the bottom left corner a pop up window slides up. This can also be accessed by swiping upwards with your finger on the screen. While this second method is convenient I did find it very annoying when I was trying to move the focus/exposure points when taking a photo.
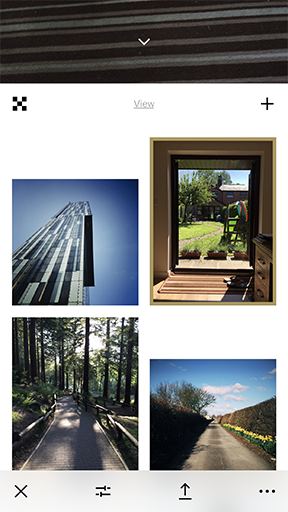
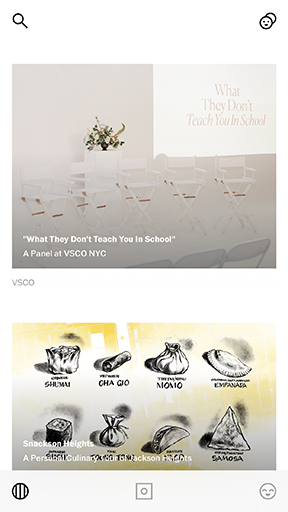
With the library displayed on screen you will now see a grid of photos taken using VSCO. Surrounding these are several other icons. Let’s go through these.
VSCO Shop – The VSCO shop can be accessed by tapping the envelope icon in the top left corner. This will open a pop up where you can screen through and buy additional filter packs. Tap the cross in the top left to return to the library.
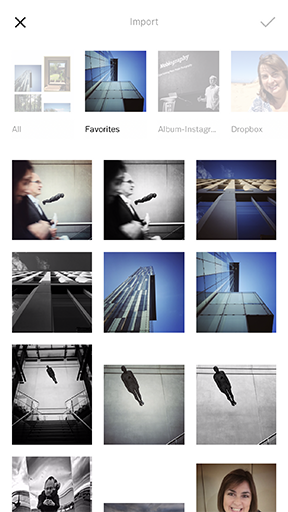
Camera Roll Import – If you tap the plus symbol in the top right of the library the devices camera roll/gallery is displayed. From here you can select photos to import into VSCO. Tap a photo to select it, then tap the tick to import. Alternatively tap the cross (top left) to return to the library.
On the bottom edge of the library are three icons.
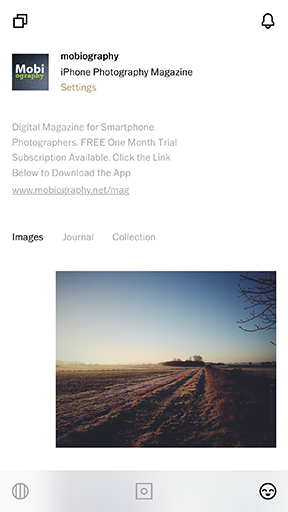
VSCO Grid – The bottom left icon shows a circle with three vertical lines through it. This will take you to the VSCO Grid, which is VSCO’s own social network. Here you can post and journal the photos that you take and browse the work of others if you need some inspiration.
Your Profile – The face icon to the right will display your VSCO Profile settings. To access these, you need to first sign up. From this screen you can also set custom preferences, social settings and access support information.
To return back to the library, tap the middle icon, a square with a circle in it.
Like I say, the navigation has a very contemporary and modern look and feel. Many of the options are hidden behind cryptic icons so it can take a while to become familiar with the settings and layout.
How to take photos using VSCO
Now let’s return to the camera’s viewfinder and start to look at the various camera settings that are available.
How to set focus and exposure in VSCO
Setting the focus and exposure points within your photo is simple and very similar to the way other camera apps work.
To set your focus and exposure, simply tap the screen in the required location. A red circular icon will appear on the screen. You can tap and drag this icon around to adjust where the camera will set the focus and expose for. Be careful if you are moving the marker upwards, this motion tends to pull up the library window up from the bottom of the screen which can get very annoying.
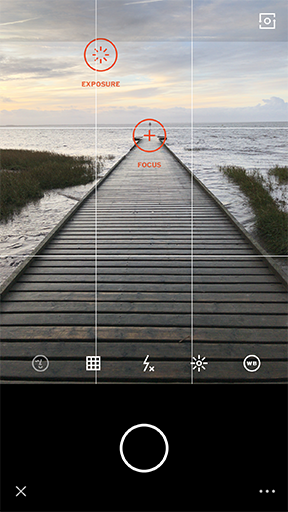
If you want to have more control over the focus and exposure points you can split them away from each other in a similar manner to apps like ProCamera and Camera+. To do this, tap the screen with two fingers. The circle icon containing a plus sign is now your focus marker, and the circle icon containing a circle of lines is your exposure marker.
Again, you can move these markers around to adjust where they take their readings from. To lock these settings simply double tap the markers. To unlock the marker all you have to do is move it.
Now let’s take a bit more of an in-depth look at the various settings on offer with the VSCO camera. To access these options, make sure they are displayed on the bottom of the viewfinder. If they aren’t, tap the three dotted icon in the lower right of the screen.
Face Recognition
The first option in the settings toolbar is the face recognition tool. To be honest, I haven’t the foggiest idea what this option is for. As far as I can see it’s totally useless.
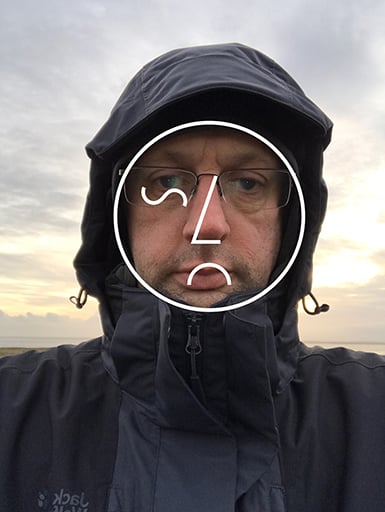
As far as I can tell, once enabled the camera searches for a face. When it has detected one, a face icon is overlaid on the person’s face. The tool is quite clever as it can detect whether the person is smiling or not. However, once you take a photo with the face tool enabled, the end result displays the face icon over the face of your subject. This renders your photo useless.
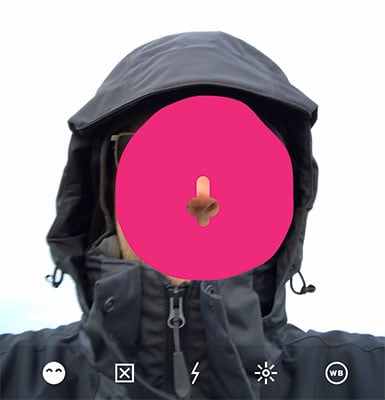
Tapping the face tool again changes the overlay to a solid circular block of colour which covers the face except for either two eye-holes or a hole for the mouth or nose. Again, when you take a photo it overlays the coloured circle.
It’s a bizarre and useless tool and for some reason the first one in the options list.
Gridlines/Square Ratio/Tiltometer
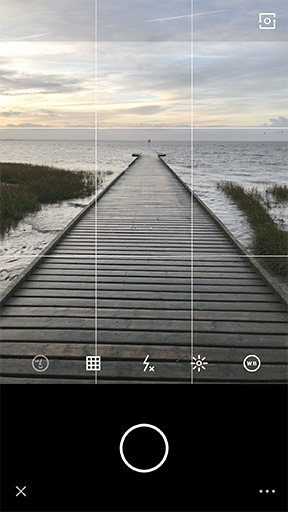
The second icon along displays a rule of thirds grid on the screen. This is a very useful tool when composing your photo.
If you tap the grid icon a second time the screen changes to display the viewfinder in a square 1:1 format. This is perfect for situations when you want to capture square compositions straight out of the camera.
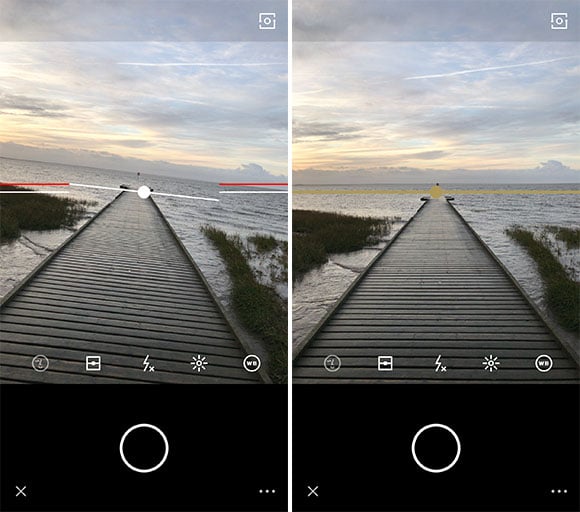
Tap the grid icon a third time and the horizon level tiltometer is displayed. This indicates whether your camera is perfectly level. Tilt your phone left or right to line up the three lines. There is also a red line which moves up and down the screen depending on whether you are tilting your camera too far forward or back. Get all these lines on top of each other and the line turns a gold colour. You can now be sure you have the phone perfectly level both vertically and horizontally.
Flash
The next icon across is the flash setting indicated by the lightning bolt. The setting offers several options which can be accessed by keep tapping the icon to toggle through them.
When the flash icon has a cross next to it then the flash is turned off.
When the flash icon has a letter ‘A’ next to it then it is in automatic mode and will fire the flash when it is required.
Tap the icon again to display the flash with no letters next to it. This means the flash is always turned on and will fire overtime you take a photo.
Finally, when there is a ’T’ next to the flash icon the flash is in torch mode which means you now have a continuous beam of light
Exposure Compensation
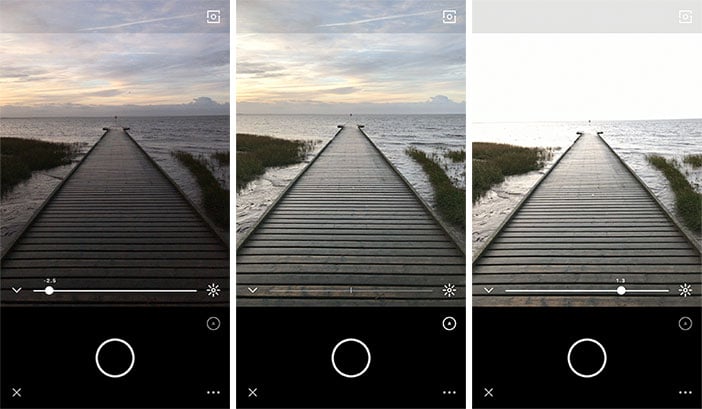
The next tool in the settings list is the exposure compensation tool. This is displayed as a small sun icon. Tapping it will display a slider at the bottom of the screen.
By sliding the slide marker to the right, you will increase the exposure of the photo making it brighter. Sliding the marker to the left will make the photo darker and consequently bring out more detail in the lighter areas of the photo.
To return the settings back to the automatic default, simply tap the small ‘A’ icon under the slider.
To return back to the main settings option menu tap the small arrow to the left of the slider or double tap the three dots in the lower right of the screen.
White balance
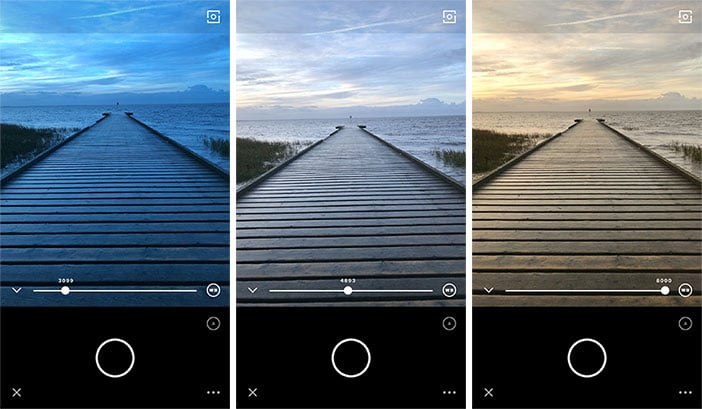
White balance allows you to control the colour temperature of a photo which applies warmer or cooler tones to the image which help to compensate for different lighting conditions.
To use the white balance setting in VSCO, tap the ‘WB’ option to display. Slide the white balance marker to the right to increase the warmth of the photo and slide it to the left to apply cooler blue tones to the photo.
To return the settings to normal, tap the ‘A’ icon below the slider.
Again, to return back to the main settings option menu tap the small arrow to the left of the slider.
Manual Focus
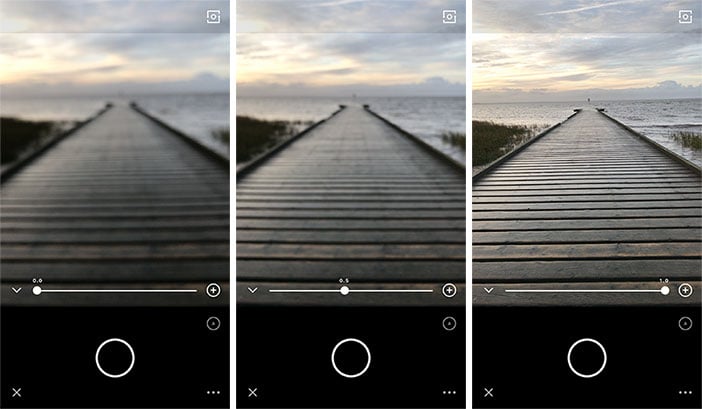
Manual focus lets you take control over the focus point by using a slider rather than tapping the screen. It is perfect for situations when you need more control over the focus such as when shooting close up or macro photography.
To access the manual focus, tap the circle icon that contains a + symbol. You may need to slide the options setting list to the left access it. To use the tool, simply slide the focus marker left or right to adjust the focus. Tap ‘A’ to return to the default focus settings.
ISO
The next setting is the ISO control option. ISO is the setting that makes the camera more or less sensitive to light. Increasing the ISO will mean the camera will be more sensitive in lower lighting conditions and will therefore use a faster shutter speed. Unfortunately, the trade-off here is that in low light conditions the photo will contain a lot more noise or grain in your photo.
To use the ISO tool, tap the ISO icon and then slide the ISO marker to the right to increase the ISO setting or to the left to reduce it. To return the settings back to automatic, tap the ‘A’ icon under the slider.
Shutter speed
Next, we have the manual control for shutter speed. The shutter speed controls how much light is let into the camera. Using a faster shutter speed will let less light into the camera, ideal in bright lighting conditions or if you want to avoid camera shake or capture fast moving action shots. Using a slower shutter speed let more light into the camera which is perfect in low light conditions or if you want to capture some creative blur. If you’re using a slow shutter speed it is advisable that you use a tripod to avoid any camera movement during image capture.
To use the shutter speed control, tap the circle of diagonally sloping lines icon and then slide the marker to the left for a faster shutter speed or to the right for a slower shutter speed. The shutter speed setting will be displayed above the marker so you can see how fast or slow it is.
Screen activated shutter release button
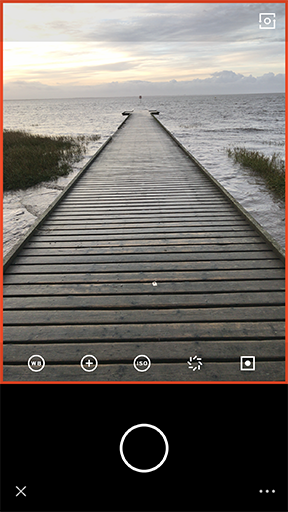
The final option in the camera settings list is the screen activated shutter release button. By default, this will be greyed out. Tapping it will enable the tool which will display a red border around the viewfinder. Now if you tap the screen it will trigger the shutter and take a photo. This is one of my preferred methods of releasing the shutter.
With or without this option enabled you can always trigger the shutter by tapping the circular shutter release button in the lower section of the screen.
How to edit photos using VSCO
By now you have a basic overview of the various camera settings that are available to you, so now let’s look at the photo editing capabilities of VSCO.
The photos you take using VSCO will be saved to your VSCO library (accessible by tapping the cross in the lower left of the screen or by swiping upwards on the screen).
You can also import photos taken using other apps by tapping the + symbol in the top right of the library window. This will open your camera roll or photo gallery. Next tap an image to select it, then tap the tick icon to import it into your VSCO library.
To select an image to edit, simple tap it in the VSCO library. You will now notice that the icons at the bottom of the screen have changed. These are your photo editing options. Let’s take a look at them.
Choosing and Editing Pre-Set Filter
The first step in your photo editing process will be to apply a pre-set filter to your photo. To do this tap the second icon in from the left (the two horizontal lined slider icon). This will open the editing suite. At the bottom of the screen you will see a horizontal scrolling list of filter thumbnails. This are grouped into categories based on the look and feel that they give.
Spend some time scrolling through the available options until you find one that closely matches the look and feel you are after. There are also plenty more that you can buy in the VSCO shop.
Once you have selected a filter to use, you can make further adjustments to it in order to customise it to your own personal taste. To do this tap the filter again to display the filter adjustment settings. Select the required setting to adjust then adjust the slider to reduce the intensity of the filter.
To apply the change, tap the small circle to the right. To cancel the changes, tap the small cross to the left of the screen.
Making Custom Adjustments To Your Photo
In addition to making adjustments to the filter pre-set you can also adjust various other aspects of your photos make up. To access these additional editing options, from the filter selection screen, tap the thin white bar at the bottom.
This will reveal some additional options. From this menu tap the second icon in from the left.
You now have access to a list of 19 options which include:
- Exposure
- Contrast
- Straighten/Rotate
- Horizontal perspective
- Vertical perspective
- Crop
- Clarity
- Sharpen
- Saturation
- Highlight Save
- Shadow save
- Temperature
- Tint
- Skin tone
- Vignette
- Grain
- Fade
- Shadow tint
- Highlight tint
For each of these tools you can control their settings by way of a slider. To confirm edits, tap the small circle to the right and to cancel edits tap the cross to the left. Let’s take a look at a few of them as I apply them to my photo.
Let’s take a quick look at a few of these and see how the changes can affect an example photo.
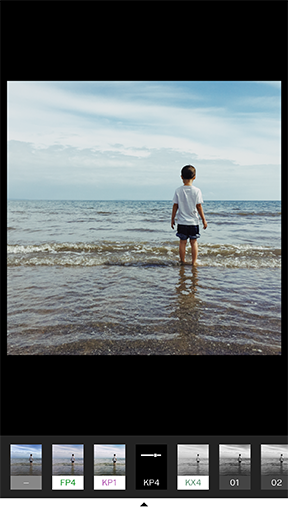
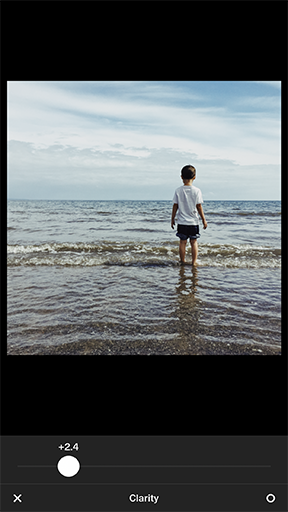
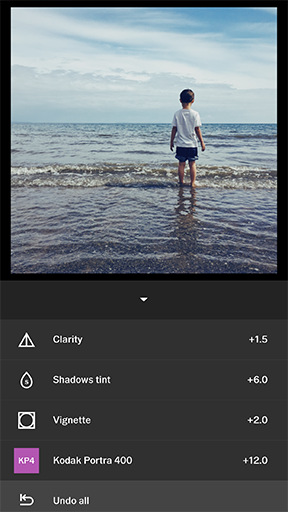
After selecting the preset filter KP4 (see above), I next open the clarity tool and increase the setting to 2.4.
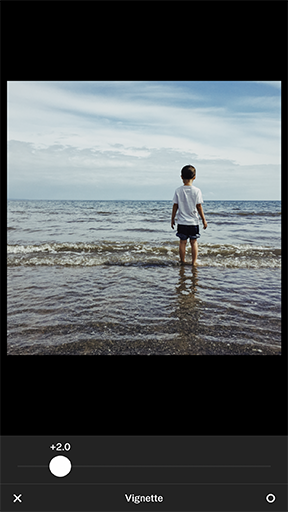
Next, I add a small amount of vignette to the outer edges. I do this by moving the vignette slider to +2.0.
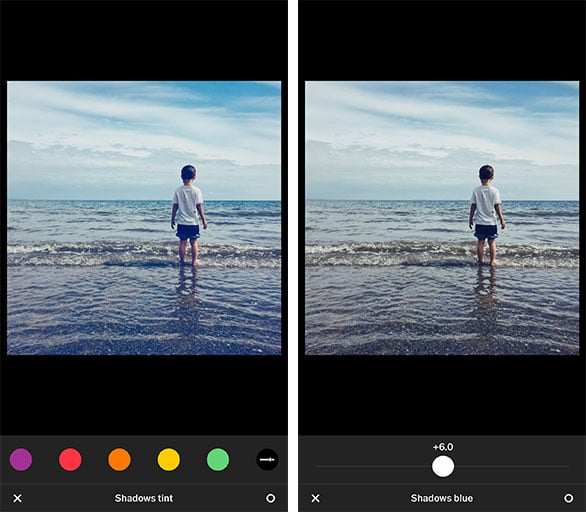
For this photo, I’m looking for an old film look and want to tone down the contrast and saturation a bit. To achieve this I decide to open the Shadows Tint tool. This allows me to add a colour cast to the shadow areas. For my photo I select Blue. Tapping the Blue swatch a second time opened the intensity slider. Here I dial the intensity down to +6.0. This softens the blue cast effect a little.
Happy with the edit, I tap the small circle icon in the lower right corner to apply the changes.
If you make a mistake at any point, you can remove an edit by tapping the third icon in on the editing suite menu, the reversed arrow.
This will remove the last step in the editing sequence. Alternatively, if you tap the last icon in the editing suite menu (the 2 sets of 3 horizontal lines) this will display a list of the edits you have made. By tapping on you can either remove it or edit the settings further.
Once you are happy with your edits to the overall photo, tap the small circle in the black bar at the bottom of the screen. This will apply the changes to the photo. The cross will cancel the edits.
I have found that you only need to make small changes to the settings, as collectively you will find they add up to make big changes to the overall look of your photo. So here is a comparison of my edits albeit minor adjustments.

Before VSCO

After processing with VSCO with the KP4 preset and custom adjustments
How to share photos using VSCO
With your photo now edited the chances are you’ll want to share it. For this you have a few options.
VSCO has its own in-app social network which it calls the Grid. To share your photos with the Grid, from the library tap the third icon along (the up arrow with a line underneath it).
This will open a window where you can add a caption to your photo and also select to share on Twitter or Facebook. Happy? Then tap the tick in the top right.
Another way to share your photos is to tap the three dots in the bottom right of the library screen. Next, tap share and select the social networks and then complete the required details for your chosen social network.
From here you can also save the photo to your camera roll/photo gallery, print it out or delete the image.
Final thoughts…
VSCO has certainly been one of the leading photo editing apps on the market for a long time now. It offers a fine select of filters which give some cool analogue film effects. It is a look that is very popular at the moment.
However, in my view the app has sacrificed a lot of usability for visual design. Like many people, I now find VSCO awkward to use. This has meant that I’ve tended to gravitate away from it and towards apps like Snapseed for general photo editing or Filmborn and RNI Films if I’m looking for a VSCO style old film effect.
That said, VSCO has a lot of fans and once you persevere and can familiarise yourself with VSCO, it can be an amazing tool. You can use it to both capture photos as well as edit them before sharing out on the in-app VSCO Grid or on other networks.
If you haven’t already done so download the app here, check it out and if you share the result on Instagram make sure to tag the photos with #mobiography.






Thanks for the updated VSCO tutorial guide, Andy! Great read and reference.